Tuesday, March 31, 2020

Weekend Progress

Yes, I am still open for Business
 WE have been on a stay at home order here in Colorado for some time now, but I am still allowed out to the grocery, and post, bank, ect, so yes, I am still working, and yes, I am still open for business & shipping orders!  I have limited myself to only one trip to the post per week tho, so please do have patience if you do not see a tracking number right away for your order.  We are all well here, I have been 'self isolating' I guess I can say, since I got back from Williamsburg the last of Feb. I usually only venture into town to go to the post or the grocery(once every 2 weeks only!) anyway, so nothing new here for me.  I am still making dolls, taking custom orders, making figures and supplying threads/linen~ if Access Commodities has it in stock, I can get it for you if you are in a thread emergency~

  I had a large order of figures that I got finished up on Saturday morning (the last that went out in the post yesterday, so if you are expecting one, check your email for tracking info!) and so decided to spend the remaining Saturday and all day Sunday painting another side on the travel case. Was really excited to get the lion side finished, so that I could finally mount the carrying handles, a wonderful set of 17th c reproductions I had made in England.

 
  I trimmed the bolts down on the inside so they don't interfere with the casket.  Before I get nasty grams about the mask hanging there....I've had it for years and reuse it over and over~ no medical person would want it!

Super pleased, just the back and top now to paint, but those will wait until the next batch of boxes I have to make are finished.  
Patience. Respect. Compassion. Gratitude. Love. 
XOXOX

Friday, March 27, 2020

Hollie Point Lace

18th c Baby Bonnet 1134.2020.26

    Next out of the basket was this cunning little baby cap or bonnet~ hand stitched from a super fine lawn, with insertions of Hollie Point lace. 

  Here it is how it looked next out of the basket~ my hand was drawn to it immediately when I spied the Hollie Point.  After so many years of looking thru attics and old dusty boxes of crumpled up textiles, one gets an eye for spotting things for what they are, not so much how they look at that particular time.  If you see Hollie Point lace on an item of clothing, it's usually going to be a baby item, and it's usually going to be 18th c.

 So just what is Hollie Point lace?   It is an early 18th c origination of  needle made lace. The stitch is somewhat similar to the button hole stitch seen in later needle lace, but this lace's design comes from the holes left between stitches, rather from the stitches themselves.  In this picture above, you can see my thumb there for reference~ always so very fine, just miniscule little stitches. This type of lace was very labor intensive, took many hours to execute a small amount, which is why it is usually reserved for smaller items. Having a blue glove on helps to see the pattern of the lace more clearly. Aside the insertion of lace, there is tiny lines of drawn thread work, and then two rows of scalloped buttonholed loops that stand erect from the surface.
All of the Hollie Point lace on the various items in the basket share this same flower basket pattern.
  The cap back repeats the large flower, with an addition of  a crown flanked by sets of diamonds.  An interesting note on dating baby caps with Hollie Point lace~ if there is a strip up from the nape of the neck, and then this round at the crown, that would be called a 'keyhole' opening, and those usually date to first half 18thc.  The second half 18th c saw the addition of Hollie Point insertion from the crown to the front, which this one does have, dating it to the second half 18th c.
 
I want to show the superior and super fine stitching on this bonnet~ even with my finger here for comparison, it is hard to realize the actual scale of the stitching. Counting in several different areas on the bonnet, with my loupe for magnification, there is at minimum , 39 stitches per inch. 
Please do enlarge the photos to appreciate the details!

Monday, March 23, 2020

Happy Monday Ya'll

  Christening Pin Cushion 1137.2020.29
  Many of us today, take for granted the humble straight pin, and have no concept of what an important, indispensable tool this was in the 18th c and before. Before there were zippers and velcro...buttons and hook/eye closures....there were pins. Simple, straight pins made from wire, that were used to hold ones clothing together. 
Not just outerwear, or the elaborate ruffs worn by Queen Elizabeth that come to mind when most folks think of early usage of straight pins (each one of those glorious pleats was held to its neighbor with a pin)...but pins held everything together, on adults, all the way down to babies. Just wrap your head around a newborn having its pilch,(diaper), pind closed....along with the shirt, the gown, the bonnets..the forehead cloths...if swaddled all the wrappings and aprons...all held tightly together with pins. One would need a sea of pins to be dressed properly~ so not only were pins vital to dressing, they were quite valuable. Pins were often listed alongside jewelry in estate inventories and wills.

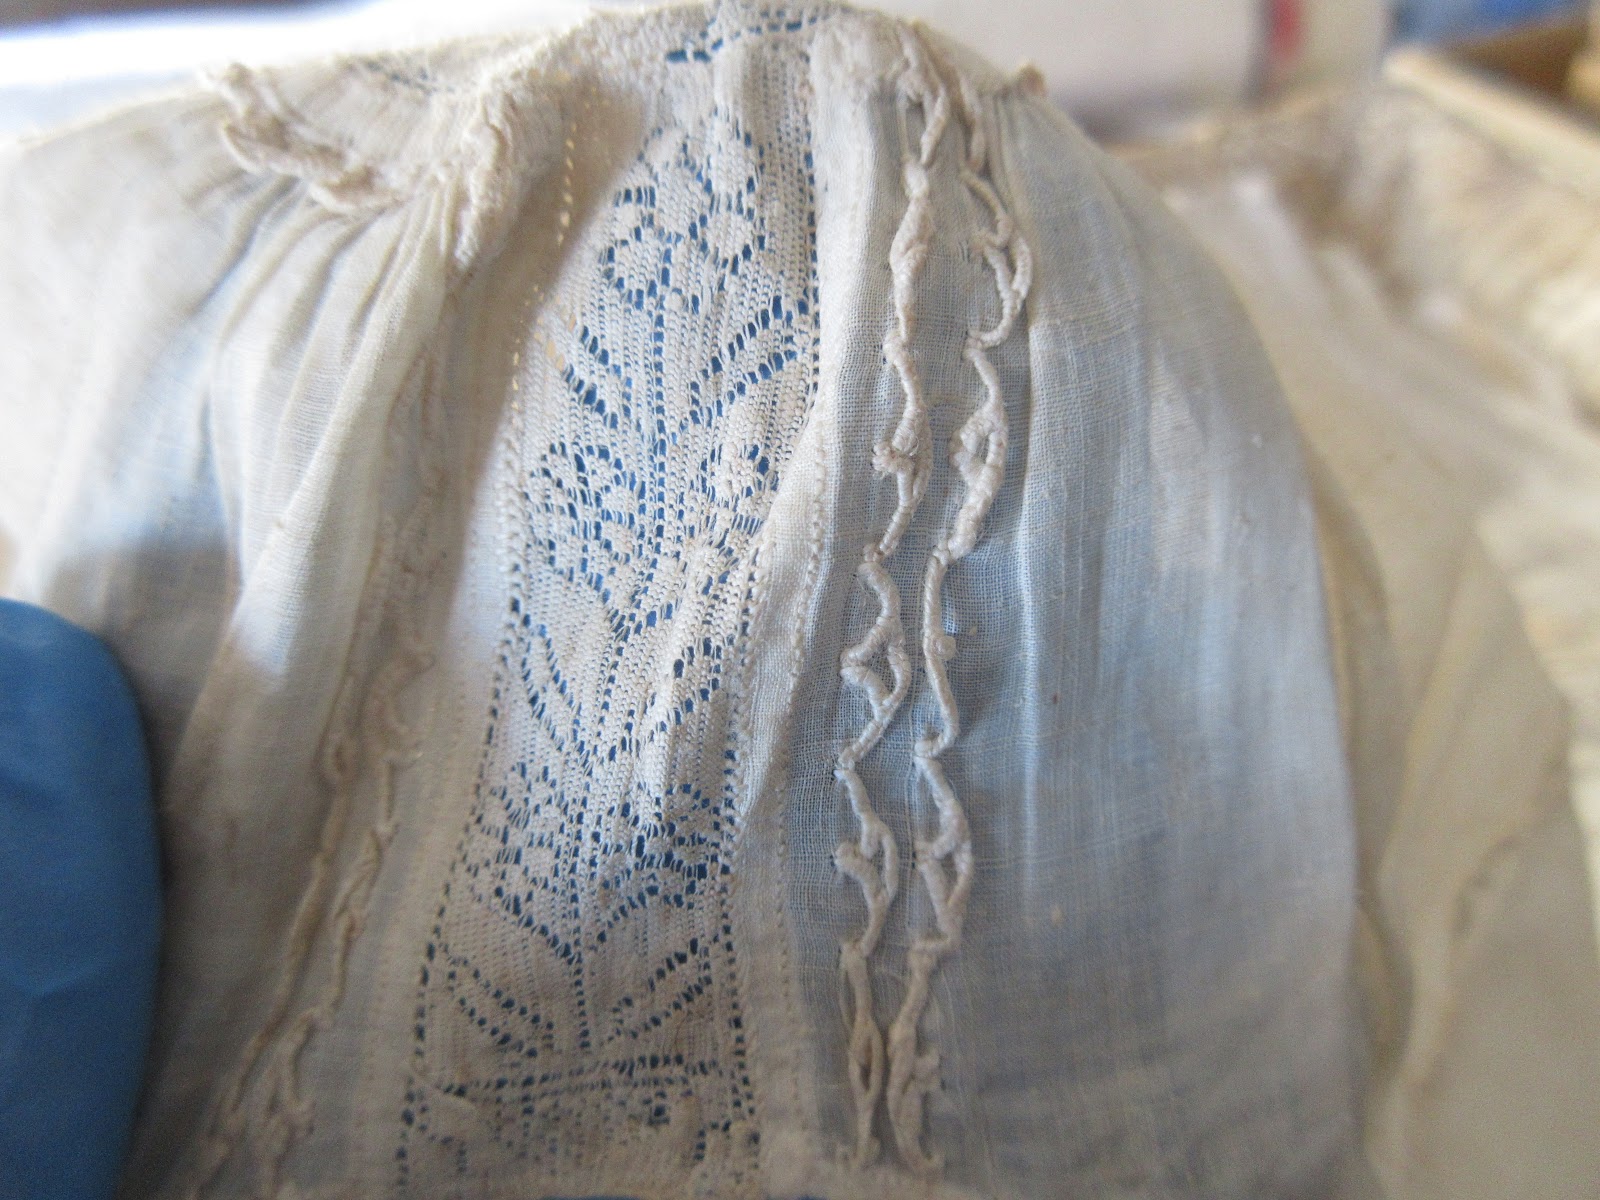
  This cushion is exciting because it remains with its original set~ it is made from the same cream silk satin as the gown, bearing cloth and basket, and is trimmed with the same silk fringed fly trim. From feel, I cant say exactly what this cushion is stuffed with. It feels and sounds like a mixture of maybe straw and hair...possibly wool, which would make sense as the lanolin in the wool helps to lubricate the pins and keep them from rusting.

 It was common to make a pretty design with the pins on the cushion~ many toward the later 18th c and early 19th c had sayings worked with the pins~ I'm sure most everyone has heard the saying 'Welcome Little Stranger'.  Some had initials, and even dates on the cushions.  This cushion's design is a bouquet of flowers with a zig zag vine border round the outside edge. Not too many of the pins have been removed and placed back hap hazard, so the design still remains true to its original placement. If  enlarged, three different sizes of pins can be observed.  Tiny fine pins make up the bulk of the flower stems, a medium size pin the bow and flowers, and absolutely huge pins, more akin to nails in my opinion...the center of the flowers. 

   Before mechanization during the Industrial Revolution, pins, including these shown, were all made by hand. The process of hand making pins was very labour intensive, and involved several different folks, each doing their own specialized jobs, with up to 18 separate steps being needed to make a single pin.
The pin itself was made from a length of wire, with the head made from another piece of wire of similar diameter to the rest of the pin. It was coiled around the body of the pin and moved up in to place at the top of the pin, and referred to as a 'wound head pin'.  It was hard to produce pins this way with all the heads being the same size, and as well, the bit of wire at the top could snag on the clothing. This led to advances where the head of the pin was stamped into a flat or ball shape from the same piece of wire from the body of the pin(early 19thc). During the 18th c, large pin manufacturer's laborers could produce about 5,000 pins per day. 
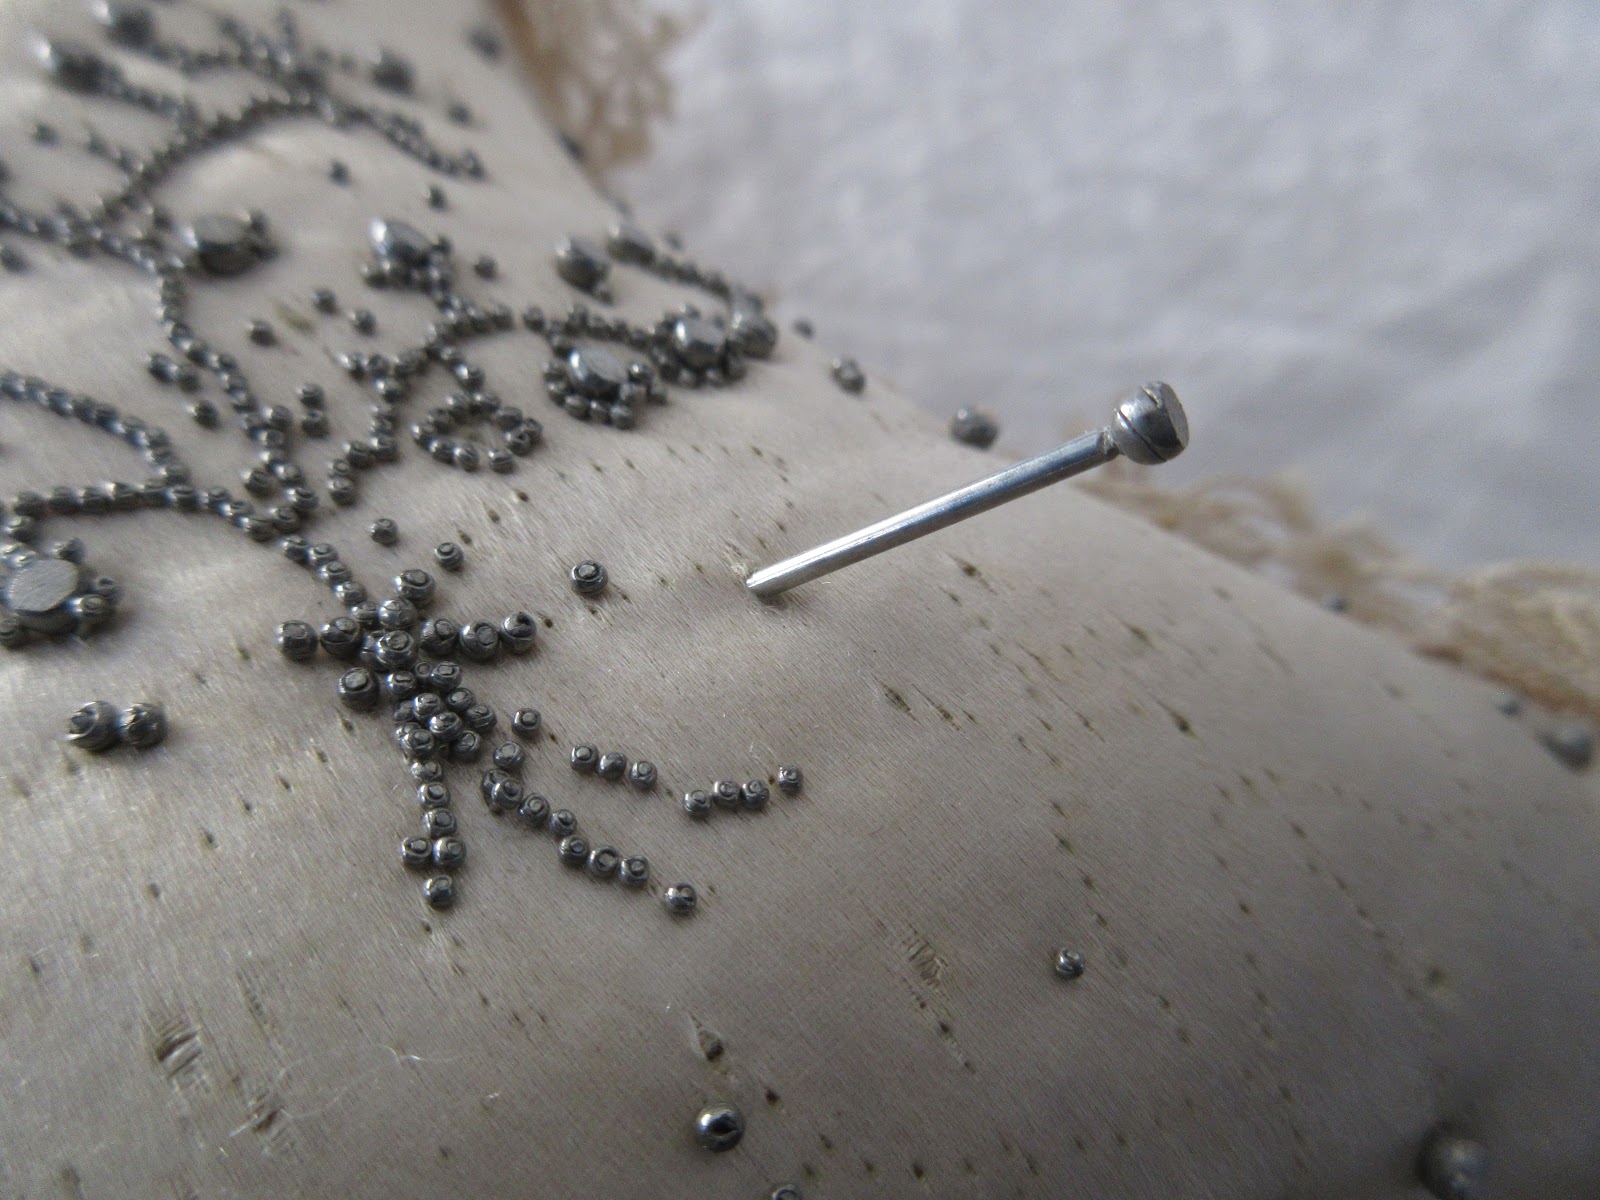
Do enlarge the photo above and study the heads of the pins~ the amount of slight variation on the heads is beautiful.  Little wire tips can be seen sticking up on the smaller pins. There is no denying the look of a wound head pin~ the wire can easily be seen wrapping around to make the head. The larger pins are interesting. Looking from the side, seams in the head can be seen, and looking close at the tops, they have been ground down flat and the center of the pins can be seen. 

  The large pins are more of what I would expect to find in adult clothing use, but many are missing from the cushion so were used just as much as the smaller pins. These things are the most robust straight pins I have ever seen....I don't even think one could get a modern straight pin in this heavy a size today.

The largest size pin, alongside the finest pin in the cushion. Glory be to the early pin makers is all I can say! Even these little bits....are each such works of art.

Friday, March 20, 2020

Next out of the Basket~

mid 18th c Baby Bodice, 1128.2020.20
   What a cunning little piece this one is!  This bodice, as it is now, is typical of the period for a small child~ the cut being the same for a poor class or an elite class baby, with the only difference being the outer fabric. The further down the class scale one went, perhaps a little plainer fabric, less decorative details, that sort of thing....but not always, as clothing was always being sold at Vendu sales(18th c equivalent of our yard/garage sales), given to the poor ect. As evidence shows from thread remains at the waistline, this bodice has been unpicked from the skirting it once had. I have examined the area closely, and it looks to have been made up as a lined bodice first, then whipped to the skirting, as the lining is intact and not cut away, only the threads used to whip it to the skirts were cut. 

  I am leaving these big, as reducing them one cannot see the wonderful details of the vertical pleating on the front and back of the bodice. Dorset button back closure, with sleeves that would have reached down to the elbow of the wearer. I use a minimalist approach when it comes to storage. I do not wash unless the piece's structural integrity would be compromised otherwise....I do not steam or iron out wrinkles unless something is going on exhibit. I store all my items flat to reduce the most stress on the fibers.  So here, to help ease out the bad creasing of years of being crumpled in the sleeve area,  rolls of acid free towling have been inserted from neck to cuff. This helps to prevent flat crease folds at the shoulders, and support the sleeve at the same time.  If you enlarge the picture, look closely at the over shoulder neck edge area.  The band of fabric that goes up over the shoulder here, along the neck edge, is twice as wide as shown. I had unfolded the fabric with my fingers before inserting the towling, and upon inserting it, they folded right back in on themselves. The fold is greatly worn as well, which tells me, this happened when precious one was wearing it as well, so that is how they will remain in storage.
One thing I love about early clothing, is that, much like a fingerprint on paper...clothing forms to its wearer...like a body print, if you will.....providing details of how the piece was worn, how the wearer was able to move and function with the garment on. 

  I love the details in this piece~ tambour embroidery up center front, with wonderful drawn threadwork bands running aside it.

 And then those broad bands of minute pleating, really amazing.

   Here is a great close view of the Dorset buttons on the back closure

 The construction is very simple~ just a band of cloth peaked up a little at the armscyes, with a strip running from back to front over the shoulder, that the sleeve is set in to. There are tiny, tiny eyelet holes at the very top of the lining, at each side of  each armscye, for a drawstring adjustment along the neckline. 

  A gathering of pin holes can be easily seen center front of the lining, where other pieces of clothing were pin'd to this bodice, or the bodice pin'd to something underneath.

It's no wonder the skirting has been removed and reused at some point, the fabric is a gorgeous sheer hard cord muslin popular for caps and things at the time.  Cord muslin came in three kinds~ hard(stiffened or dressed), soft and lawn. 


Wednesday, March 18, 2020

Basket of Surprises

A Precious Time Capsule...
  If you guessed an 18th c Christening set, or basket....you would be correct. What sets this grouping apart from others I have, is not that it has so many pieces that match. That is awesome, yes, but what really made my heart skip several beats, was that the Christening items were still in their original matching basket. I have seen other quilted basket covers identified as cushions over the years, but never, ever a cover still stitched onto the original reed basket underneath. I could hardly contain my excitement when I obtained this precious 18th c time capsule... so I thought it would be fun to dig back in the pictures, and share the basket with you all, as I picked out each item....one by one.  I think at a post every other day, this should  be a nice respite for some while~
 So lets see what came out first!

 I did sneak under the top two items to retrieve this shirt (1125.2020.17) first..., it is the most fragile of everything in the basket, .even more than the basket itself.  Why so fragile you ask? well...I will explain in a moment.

  A shirt like this would have been worn under the Christening gown. The long pleated sleeves end with silk tape ties.  Lace trims the cuff, neck and front opening edges. 

  The shoulders both have insertions of  delicate Hollie Point lace. The above is a single repeat~ Flowers in a vase. Sadly, there are no initials or dates worked into the lace, but hey, I'm not complaining.  Do you notice anything 'interesting' about the ground fabric yet?

  What makes this shirt so fragile, and such a rare survivor, is that the pattern of the ground material, has a pattern that was literally pressed into it. Along with the pleats of the sleeves, if this shirt would have ever been laundered,  the impression and pleats would have washed out. 
The V&A has a wonderful example of  a shift  with this type of gathered and pleated sleeve....when a description reads as 'in the pressing', this means they are done just that way~ not stitched in. 

The design of the pressing on this shirt is wonderful, and also a singular design, meaning no repeats. I don't know if you will be able to see it if you enlarge the very first photo...but the front is composed of an undulating vine in a U shape, of what look like wheat, over a pointy sprig'd ground. 

 Looking behind, there is a lattice filler down the center back.

  So....one of my current challenges with this piece in particular, is how to remove this vertical crease on the front...doesnt look like its been there too long, but all the usual ways of removing a crease such as this, would ruin the design of the fabric...so for the moment, I have it in storage with the weight of a buffered acid free tissue holding the flap open.

  As one can see, the underarm gusset is pressed, and on the sleeves, only the outermost third of the fabric has the pressed design.  

A beautiful, and very expensive little shirt for an undoubtedly elite class little baby!

Tuesday, March 17, 2020

Anyone???

Have a Guess???
As to what this may be???   Leave me a comment or email what you think it is~ dont worry if your comment doesnt show up right away~ I have them on moderation to keep out the pesky spammers.
Since everyone always emails me for 'hints'....the hint for this is....its a someTHING....that is made of of many someTHINGS.

Monday, March 16, 2020

Bergere Hat 1099.2019.20

Did you have a guess?
  A couple of days ago I posted a larger view of this close up, asking if anyone knew what it was. I had  a few guesses in the email and more on facebook. If you guessed 'knotwork', you were correct!   This is an example of knotwork done in straw, and was used to trim a bergere, or flat hat. 
Knotting was a favorite pastime in the 17th c & 18th c...all a Ladye need was a length of fiber, and her knotting shuttle. The knotting shuttle looks very much like a tatting shuttle, just with open ends.

 The fiber was wound round the shuttle, as shown in the 18th c painting above, and then a series of knots were tied in the material....so in the end, one had lengths of knotted silk, linen, straw....that could be used in trims and fringes, and also couched onto items for decorations.

   This is a wonderfully quaint flat hat, it is unique in the fact that it is stitched leghorn straw, with a thick layer of gesso painted/pressed over the entire outer surface~ I have never seen this treatment before in this type of hat. In addition to the knotted straw fringes, there is a band of stitched straw rosettes and flowers, pressed paper leaves, and beautiful feather flowers, shown above.  Red and green feathers have been tied round fluffy wool centers with silk. 

 Here one can appreciate how thick the gesso layer is, as it has cracked in several areas

Hope you enjoyed a peek at this wonderful hat~ I'll be back maybe tomorrow with another fun something....Happy Monday!

Sunday, March 15, 2020

Peaceful Sunday

My Me Day....

Happy Sunday!  I should be working on my model for my Dallas class...but decided to take a me day. I turned on the Spa channel on my Sirius XM radio, and spent better part of the day today painting the swan side of Precious's travel case.  I love to paint, its not 'work'...even tho I paint for a living. When I paint, I can just get in the 'zone' and enjoy each and every stroke my brush makes...and before I know it, its 6 o'clock and I realize I never put anything out for supper.
I hope YOU had a wonderful day today!

Friday, March 13, 2020

Anxiety....

  Is this what they call March Madness???

I  wouldn't call myself a worrying kind of person, but as the days go on, I find my level of anxiety getting larger and larger...heavier and heavier.  Everyone is just fine here, I am working working working...one really great thing about working for oneself...by oneself~ I'm hardly ever around people...so not difficult to do the social distancing now recommended!  I am keeping my news watching to a minimum, just once a day in the am, and then not very long...because the Corona is all anyone is talking about...and like I said before...I have just reached my saturation level. 
So in an attempt to keep my mind busy thinking about more light hearted pursuits~ I thought I would pull some things from stores and share with you all. 
Anyone have a guess as to what this is???? I left it big, so do click on and enlarge!

Thursday, March 05, 2020

Back home

with...Treasures!
  I apologize for letting the blog slide this past month, was super busy with my order for a private needlework seminar and show at Colonial Williamsburg. As you can see, we were graced with beautiful weather~ 

  This year I designed and made special thread palette sets with one of the Williamsburg coaches on the fronts.  I took several things to sell as well, some of which the remains are in the ETSY shop, which I should also say, is back open now.
I love to design for special events~ something special no one else will have!

  I had alot of fun in Williamsburg this year, love love love the trades~ folks are always so passionate & eager to share their knowledge...I had a riveting conversation with the gals in the Weaver's Shop. If you recall I have a pair of rug mittens in the collection that are similar to the rose design of a piece hanging in the shop~ it is a knotted rug, whereas my mittens are knit, with the same effect of that thick full pile. 

Aren't they great? We were talking about how usually in clothing the pile is to the inside of the garment, not the outside. 

I did not come home empty handed of coarse... for those of you who have never been to Colonial Williamsburg, the Prentis Store in the historic area sells only items made by the craftsmen/women at the trades shops....so if you want something special, go there! Last year I bought several skeins of wool made and dyed at the Weaver's Shop...I was lacking greens tho. ( I have planned a pair of pockets for Wood) So this year, I was elated to find a nice selection of colours...and concentrated mainly on the 'uglies'.  Same as in quilting & beadwork...embroidery is no different~ its the 'ugly' colours that will make your work stand out and bring harmony to a design. An extra special treat, was that they had linen yardage....which they have not had the past two years I have gone. (If the weaver's have left overs from historic projects, they will sell the overage in the Prentis Store) This is 20" wide, Irish Fancy linen woven in a twill pattern~ so I just may make Wood's pockets from this instead of another linen I had set aside!