Saturday, April 27, 2019

Coming Soon!

It's Not Just All About Beads Here.....
I am super excited about this year's 2019 annual limited edition Christmas Ornament kit! I think ya'll are going to love love love love him.  Knock on wood it is coming along smoothly, just one redesign because of discontinued thread colors/types....it is super fun to work....works up quickly...and lets you try several different types of silk and metal threads all in one cute cute cute lil project. Those of you who have my previous designs, this year's ornament is worked on a linen  ground for a nice change of pace.

Thursday, April 18, 2019

on eBay this week!

Honesty, a One of a Kind Queen Anne Dollye

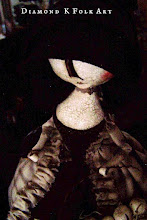
  I am so honored to have been chose again this year for Early American Life's Directory of Top Traditional American Craftsmen. I don't have as much time as I used to to make dollys, but we do have a good time in the studio when we are playing.  Each one is such a little character~ Honesty is the sweetest girl, quite timid, but she loves story time and thinks the idea that worms eat dirt is absolutely fascinating. We have some very interesting discussion over tea, her and I. She needed help to put on her shoes for her eBay pictures. All hand stitched from a precious scrap of 18th c quilted block printed cotton, with antique glass eyes and gorgeous real human hair. If you would like to get to know her better, you can see her here, or just click the link on the right to my eBay specials.

Monday, April 15, 2019

My Flat Top Casket Progress

When Things Go Good......
Keep Going

  Been a few weekends since I shared progress on my casket....the pillars went slow and were super boring....but one has to keep plugging away at the boring parts...to get to the fun stuff. The peacocks.....ugggggg...the peacocks, that's a different story

  Did anything go right with these little devils? I suppose so, because they turned out fairly well....I'm not super excited about them, well...hang on, I AM.....super excited they are DONE. Both panels worth...which brings me to a 'tip' for ya'll.  Really think about multiples of anything in your design. Will you have enough thread or beads of the right colors....not just for one...but (in my case) four? Will you want do work multiples of the same thing...over and over and over????   I have my answer. No. These beasties were horrible....horrible to work  And when I finished one.....there were three more to work. I had a real problem picking bead colours, because I am using all antique beads, I just cant run to the store to buy another colour....I have to work with the colours I have, in the amounts I have...and I ran in to a real problem with the "amount" factor.  I spent hours trying colour combinations that didn't work, ripping things out ect ect...  I thought about making two differently coloured pairs....but in the end decided I wanted them all the same, because the entire casket as a whole is elements of the same scene/area.  I ended up working the four bodies first, as some of the body colour was going to be in the tails, but I could change that if I ran out in the bodies....then four wings came next, then the wicked tails...stitched over kid leather. Murder on my fingers. Murder on my precious size 16 bead needles. But. They. Are. Done.

 Stumpwork, of any sort, is like working a huge puzzle~ you may want to go right to the fun stuff...but things have an order of working. For example, the pond wall. I chose my colours....was in the mood to work something quick and easy....had my string padding in place.....but nope..  Couldn't work the wall until I worked the snail that was sitting on top of it.  Doesn't she look like an eye???  She's my little secret spy snail.

 And then, I still couldn't work the wall because the swan's heads were over some of it....so this weekend, was swan time~ WOO HOO!  I had been wanting and dreaming about working these swans for ...forever. The start was not grand. No. Not even 'good'. Didn't like the colours of white I had chosen...so those got unpicked. Then I worked the padding in grey, and when I went to put the first whites over it, didn't like that, so switched to white padding...which meant all the grey padding had to be unpicked....but no biggie...I had a plan, and the energy around these swans was good. So good, that they literally flew forth from my fingertips...as in, less than a day ya'll!!!

 What was one, became two... and though I was now technically 'free' to work the blasted wall I had been aiming at, I just couldn't let them live on my casket with no beaks!!!!

  Perhaps it was lil mudhead's fault everything went so well this weekend~ he is always good luck for my stitching. This is the palette of colours just for the beaks...and yes, all of these colours are in them!

 Beaks...and wall, finito!

Still have much more to go on this panel, but it's getting there....I have to work the water next, before I can finish the swans and give them their wings...then this side will be down to just flowers. Just flowers, I say....there are a zillion petals and leaves I'm not really looking forward to doing...but hey, one gets energetic when the light starts to squeak out the end of the tunnel!  Normally I would be excited for next weekend, 'water' time...but I will probably end up skipping my stitching time for track meets and Easter. 
Happy Stitching!

Monday, April 08, 2019

From my Brush.....

Some Past Painted Pretties~
   I have painted so many wonderful things for folks on their slate frames...but this last one,  was so much fun! A customer had purchased one of my mini slate frames, ( I have two currently available in the ETSY shop) at Williamsburg last year, and this year she brought it back and asked me to paint it with 'creepy crawlies'. 

 Oh. My. Golly.  It came out so cute I can't even stand it! I am going to have to paint something on mine now! This frame is tiny~ not even 12" long slats

  There are microscopic little ants traveling in and out of the peg holes....butterflies, may flies, caterpillars...a snail, various little bugs, all inspired by 17th c embroideries. The yellow bug above is my favorite of them all, inspired by a bug on the bottom of a mirror in the Burrell collection.

  In addition to slate frames and various spool/thread palettes and winders, I also paint 'other' things...like this antique Singer sewing machine puzzle box....they originally had the sewing machine implements in them. The owner of this box wanted me to paint it in blackwork, what ever I wanted to paint on it...but she liked a certain 16th c painting of a young man leaning against a tree...so I redrew him lounging instead, so he would fit on the box. She is going to finish the inside and keep her needlework tools in it~

  I love monochromatic painting~ blackwork is my favorite, but was thinking of maybe painting something up in indigo....it is a true challenge to see how much depth and detail I can achieve just using one color of paint. I thought it would be fun to share with ya'll how the top of this box progressed, from being quite flat and lifeless, to looking pretty awesome. The design is first drawn on with India ink and a quill pen. Some parts I dont ink in first, like the building above, because I wanted it to be further off in the background, and not such a focal point. So it got painted first...just a hint of a building, not too many details.

  The difficulty in painting this way with watercolours, is the nature of the paint itself....water colour.  Each consecutive coat of paint, if not mixed right with the correct water to paint ratio....can remove the layer of paint underneath of it, instead of adding to it. It is a very light touch I must have, so these pieces are the most challenging for me. This panel, by the time I got finished, probably had close to 20 coats of black on it, or more.  So the next picture, above, the building and garden is now finished, and gentleman has hit first coat of shading

  I left the pictures large so you can really see the details~ he is coming along. I love how the woodgrain shows thru the watercolours on these pieces. 

  After gentleman was mostly finished, I start on the border.  Watercolours are so fragile before they are varnished, they cannot be touched, or the paint will literally just wipe off. When painting a large piece such as this one, I must start in the center, and work my way out, so that I don't accidentally place the heel of my hand or my pinky finger on the surface, and take the paint off. 

    Once finished with one side, I left it to dry a few days before lacquering that side, so I could move on to the next side.....so it is a slow process

I love how he came out, and can't wait to see it after Sharon finishes the inside.

  This is how it looks unfolded

The ends, when closed, make a complete design. 
I do love to paint.

Tuesday, April 02, 2019

Warning: Proud Parent Moment!

He Makes Hand~Mades
   I am super proud of my son Josh~ he has always loved to 'make' things. When he and the girls were super little, I can remember one year they stitched little pins from felt for their teachers for Hallowe'en. The girls whipped thru theirs, but not Josh~ he sat there for probably an hour, making sure his was perfect~ each and every little stitch. His favorite series on the TV was 'How its Made', until a new favorite started a couple of years ago, which is 'Forged in Fire'.  He decided after seeing that show, he wanted to make knives....but he didnt have a forge....so our 17yr old made his own out of some kind of metal wheel thing....dont ask me, I have no idea what it came off of~ but it works!  We have a coal seam that runs thru our property, so naturally, its a coal forge.
He graduated high school last year, and has paid his own way thru the welding program at college~ who can ask for more from a teenager, right???? Oh my golly.....  He made all his Christmas gifts last year, and is just getting better and better. He goes to school in the day, works after school as a math tutor at the college, and in his free time, makes glorious things he sells to pay for his tuition.

  These are some of my precious bits! The knife at the top is not a knife, but a box opener~ this was my Christmas present last year. 

 I love the shape, and its perfect for opening boxes with

 He made this mini cleaver and left it 'primitive' because I fell in love with it this way. He drifted the hole, and I love the hammer marks. This one is definately, me

  He finishes his knives by hand as well~ he hasn't got a belt sander/grinder yet....so literally, he spent DAYS sanding and sanding this knife down to its mirror finish. Its got an exotic katalox wood handle and is soooooo smooth and comfy to hold onto

  This was his first go at decorative file work on the back . I can't imagine what he will be making in a years time from now~ but it's exciting! We may have to come together and collaborate on a special something in the future.....my gears are turning

 This last one is my letter opener...it's a little large I suppose, but he was practicing new techniques, and I fell in love with the mosaic pin in the handle......and anyways, some of my letters can be quite robust....and I wouldn't want to break a nail....ok, my nails break just looking at them, so yes, I needed this!

  Josh has been making lots of hooks for folks, its fun to watch him make these and put the twists in. One can never have too many hooks.....and I am going to copy my friend Stacey and use two of them to mount my huge early rolling pin up on the wall
I have been trying to convince him to start an ETSY store, maybe he says. If you have a special bespoke knife you have always wanted made, but didn't have anyone to go to for such, or maybe need some hand forged hooks or some really awesome tent stakes....drop him a line at jkinn51@yahoo.com , I'm sure he would love to hear from you!