Showing posts with label Silke Gum Worke. Show all posts

Sunday, March 10, 2024

A Road Trip to Wa D.C

 To Study A Truly Magnificent Gummed Silk Casket

at The Cotsen Textile Traces Study Center


I was thrilled earlier this year when a post popped up on my Facebook page about a micro exhibit at the George Washington University Museum in Washington D.C. that included this casket. The last location I had known of it was when it was sold at a Christie's auction in 2001. 
I have been looking for it to pop up ever since, and finally, I know where it went! It was purchased at Christie's by Lloyd Cotsen(president of Neutrogena Corporation), who traveled the world collecting textiles and embroideries with the goal of making them available for public study & education. When he passed away in 2017, he bequeathed his collection to the George Washington University Textile Museum. They in turn created the Cotsen Textile Traces Study Center within the museum, to house only the pieces of his collection. 

I had a long history with this casket before I ever met it in person. I have a few pics from the 2001 auction along with a 1929 image of it with the garden displayed at the top of the pillars that I studied heavily when I was researching & testing my gummed silk techniques. There is only so much one can glean from a photo though, and honestly, I was not confident I would ever see it publicly again. 

I made an appointment to study it in person and it was not disappointing in the slightest. We made some new discoveries, like finding writing on the bottom of it....and I could finally see all of its elements up close. It was a super fantabulous study session and I am happy to say that it will not be the last time we are together~ Watch for some fun things happening with this casket & the Cotsen Textile Traces Study Center in the future!

This casket is unique because the interior is one large mirrored cavity whose sole purpose is to house a wonderous, over-the-top, three-dimensional flower garden made of gummed silk. 


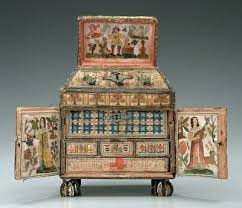
I have studied the Victoria & Albert Museum's casket T.23-1928 in person(above), which is another garden casket, but as you will note, it is more formal~refined and dainty...what I think of when someone says an 'English Garden'. This garden includes pressed paper, wax & gummed silk among other things.


 The Queen's Casket at Windsor with the shepherdess on top is three-dimensional, but all of its elements are needlelace and not gummed silk, so I do not place it in the same category as the garden caskets.


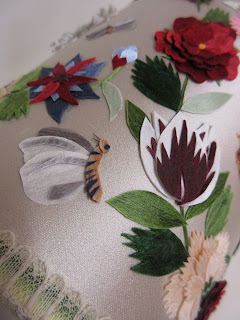
The Cotsen garden casket, as I refer to it, (T-1084a-b) is a wild naturalistic garden situated on a removable ground pad of thick green plush velvet stitch. Each and every flower or fruit the eye can see has been made of gummed silk. Forms of wood and wooden beads have been used as the bases for the fruits, there are some silk-wrapped purls used for foliage, and the center stamens of the honeysuckle are exquisitely fashioned from real feathers.


Though now (hopefully temporarily) stuck in place, the bottommost wooden tray slides out from its fitted slot and can sit atop the pillars. The garden can then be placed on top of the tray and be displayed with the lid open and front fully shut, as seen in the 1929 photo.
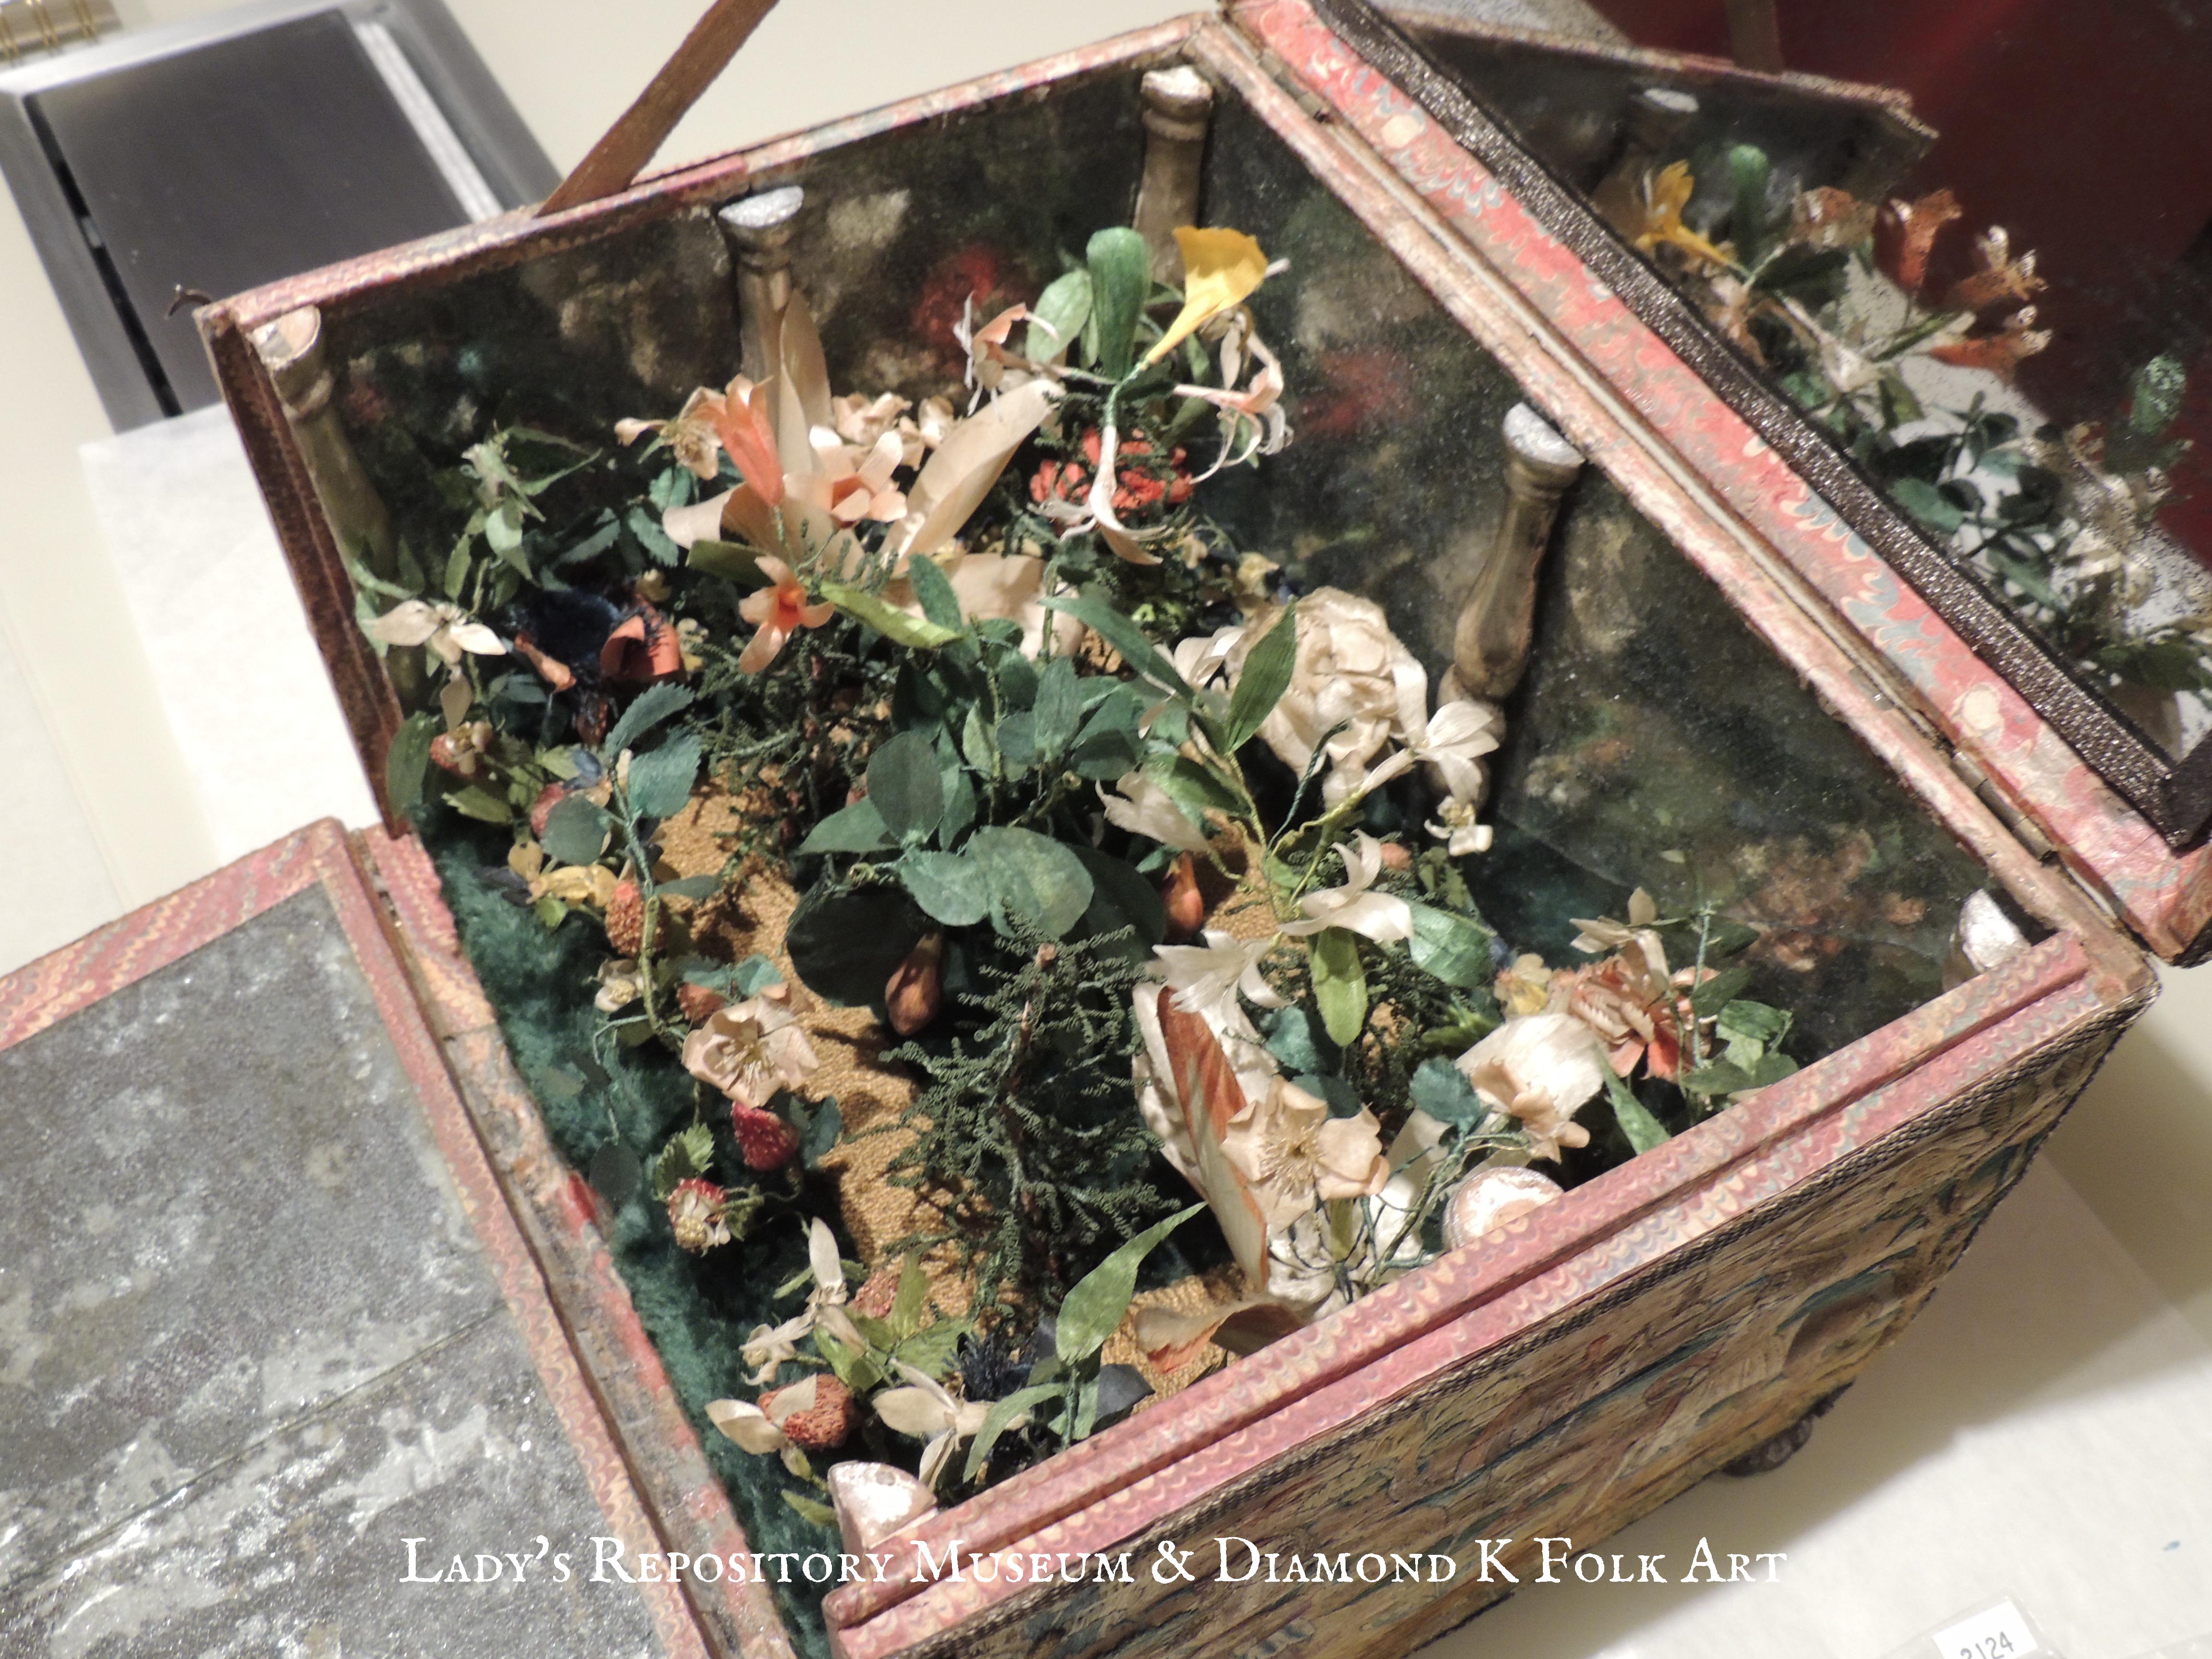

There are so many different flowers, I took a zillion photos and after two hours was still seeing new things I had missed seeing before. One can easily just get happily lost in this piece. When the mirrors were new, the garden would be reflected back from every angle and it would have looked like it could go on and on forever!


There is a pear tree in the center, and strawberries along this edge of the garden. The seeds are a bullion stitch over the gummed silk covered form. 


Each flower has been carefully recreated from gummed silk~ with the thickness of the sheets varied for the size of the flower. My favorite though is by far the honeysuckle shown above. The centers are the most tiny, delicate little feathers.  I think it's time to take my gummed silk skills a step further into the third dimension....keep a watch on this space!

.


Monday, August 29, 2022

Another Wedding &...

Another Finish!

Three weddings in less than thirty days.....I certainly hope my youngest isn't planning to get married anytime soon. My son Josh got married this weekend~ such a beautiful wedding! They say a family tree grows over time...I feel like ours has exploded all at once, but in a good way. 


I also wanted to share this beautiful finish from one of my students! Frances is in my Gum Work, The Art of 17th c Gummed Silk class that is currently running. It's not even over yet and she has made this stunning dome top casket of her own.


I am just so proud of her! I love her colours and design~ and that the three flowers stand up along the top like pretty little jewels on a crown.


Making and working with gummed silk is so much fun, once you start you can't stop! If you are interested in making your own, you can click the link above to find out more about the class.

I hope you have a great week ~Happy Stitching!!

Tuesday, May 31, 2022

Gum Work~ The Art of 17th Century Gummed Silk

 Now Open for Registration!!

Registration is now open again for my gummed silk class! You can read all about the class by clicking the tab above for my Diamond K Folk Art Online Academy. Its right under the Blog header here on this page. The photo to the right is a link to the Academy for those in class to sign in. To learn about what classes are running, click on the page tab at the top of the page, under the Lady's Repository Museum title banner. 

Have you always wanted to make a 17th c inspired something....but for whatever reason don't stitch? Do you love to cut and paste? Make collages??? This class could be just what you're looking for! 

You will learn gummed silk history, and how to make it so you can make gummed silk compositions of your own~ on a box, or just as a flat panel to frame on your wall. This technique is perfect for tight spaces and interiors of caskets & boxes.  

If you click on the Silke Gum Worke tab to the right to sort the blog posts, you can see some historical pieces that have sleeven or gummed silk on them.


You will also learn some wet techniques, including how to make gummed silk curls like these shown here on the lion. 

THIS IS NOT A CASKET CLASS, it is a class to teach you how to make Gummed Silk. 

I will have an interior finishing class coming up later this fall.

Saturday, May 21, 2022

 17th Century Silk Wrapped Cards


The wrapped cards on the back of my little casket have piqued a lot of interest from folks. That's GREAT! I have received quite a few questions so I thought I would just share a bit more about them here on my blog for everyone to enjoy. 

These cards are indeed a 17th Century technique.  They are most often found on caskets, but I have seen ones made up into little purses as well. I know I have seen more than one.  The following example is shown in Domestic Needlework~


It is described as a "Perfume case in latticed silks; English 1650-1670"

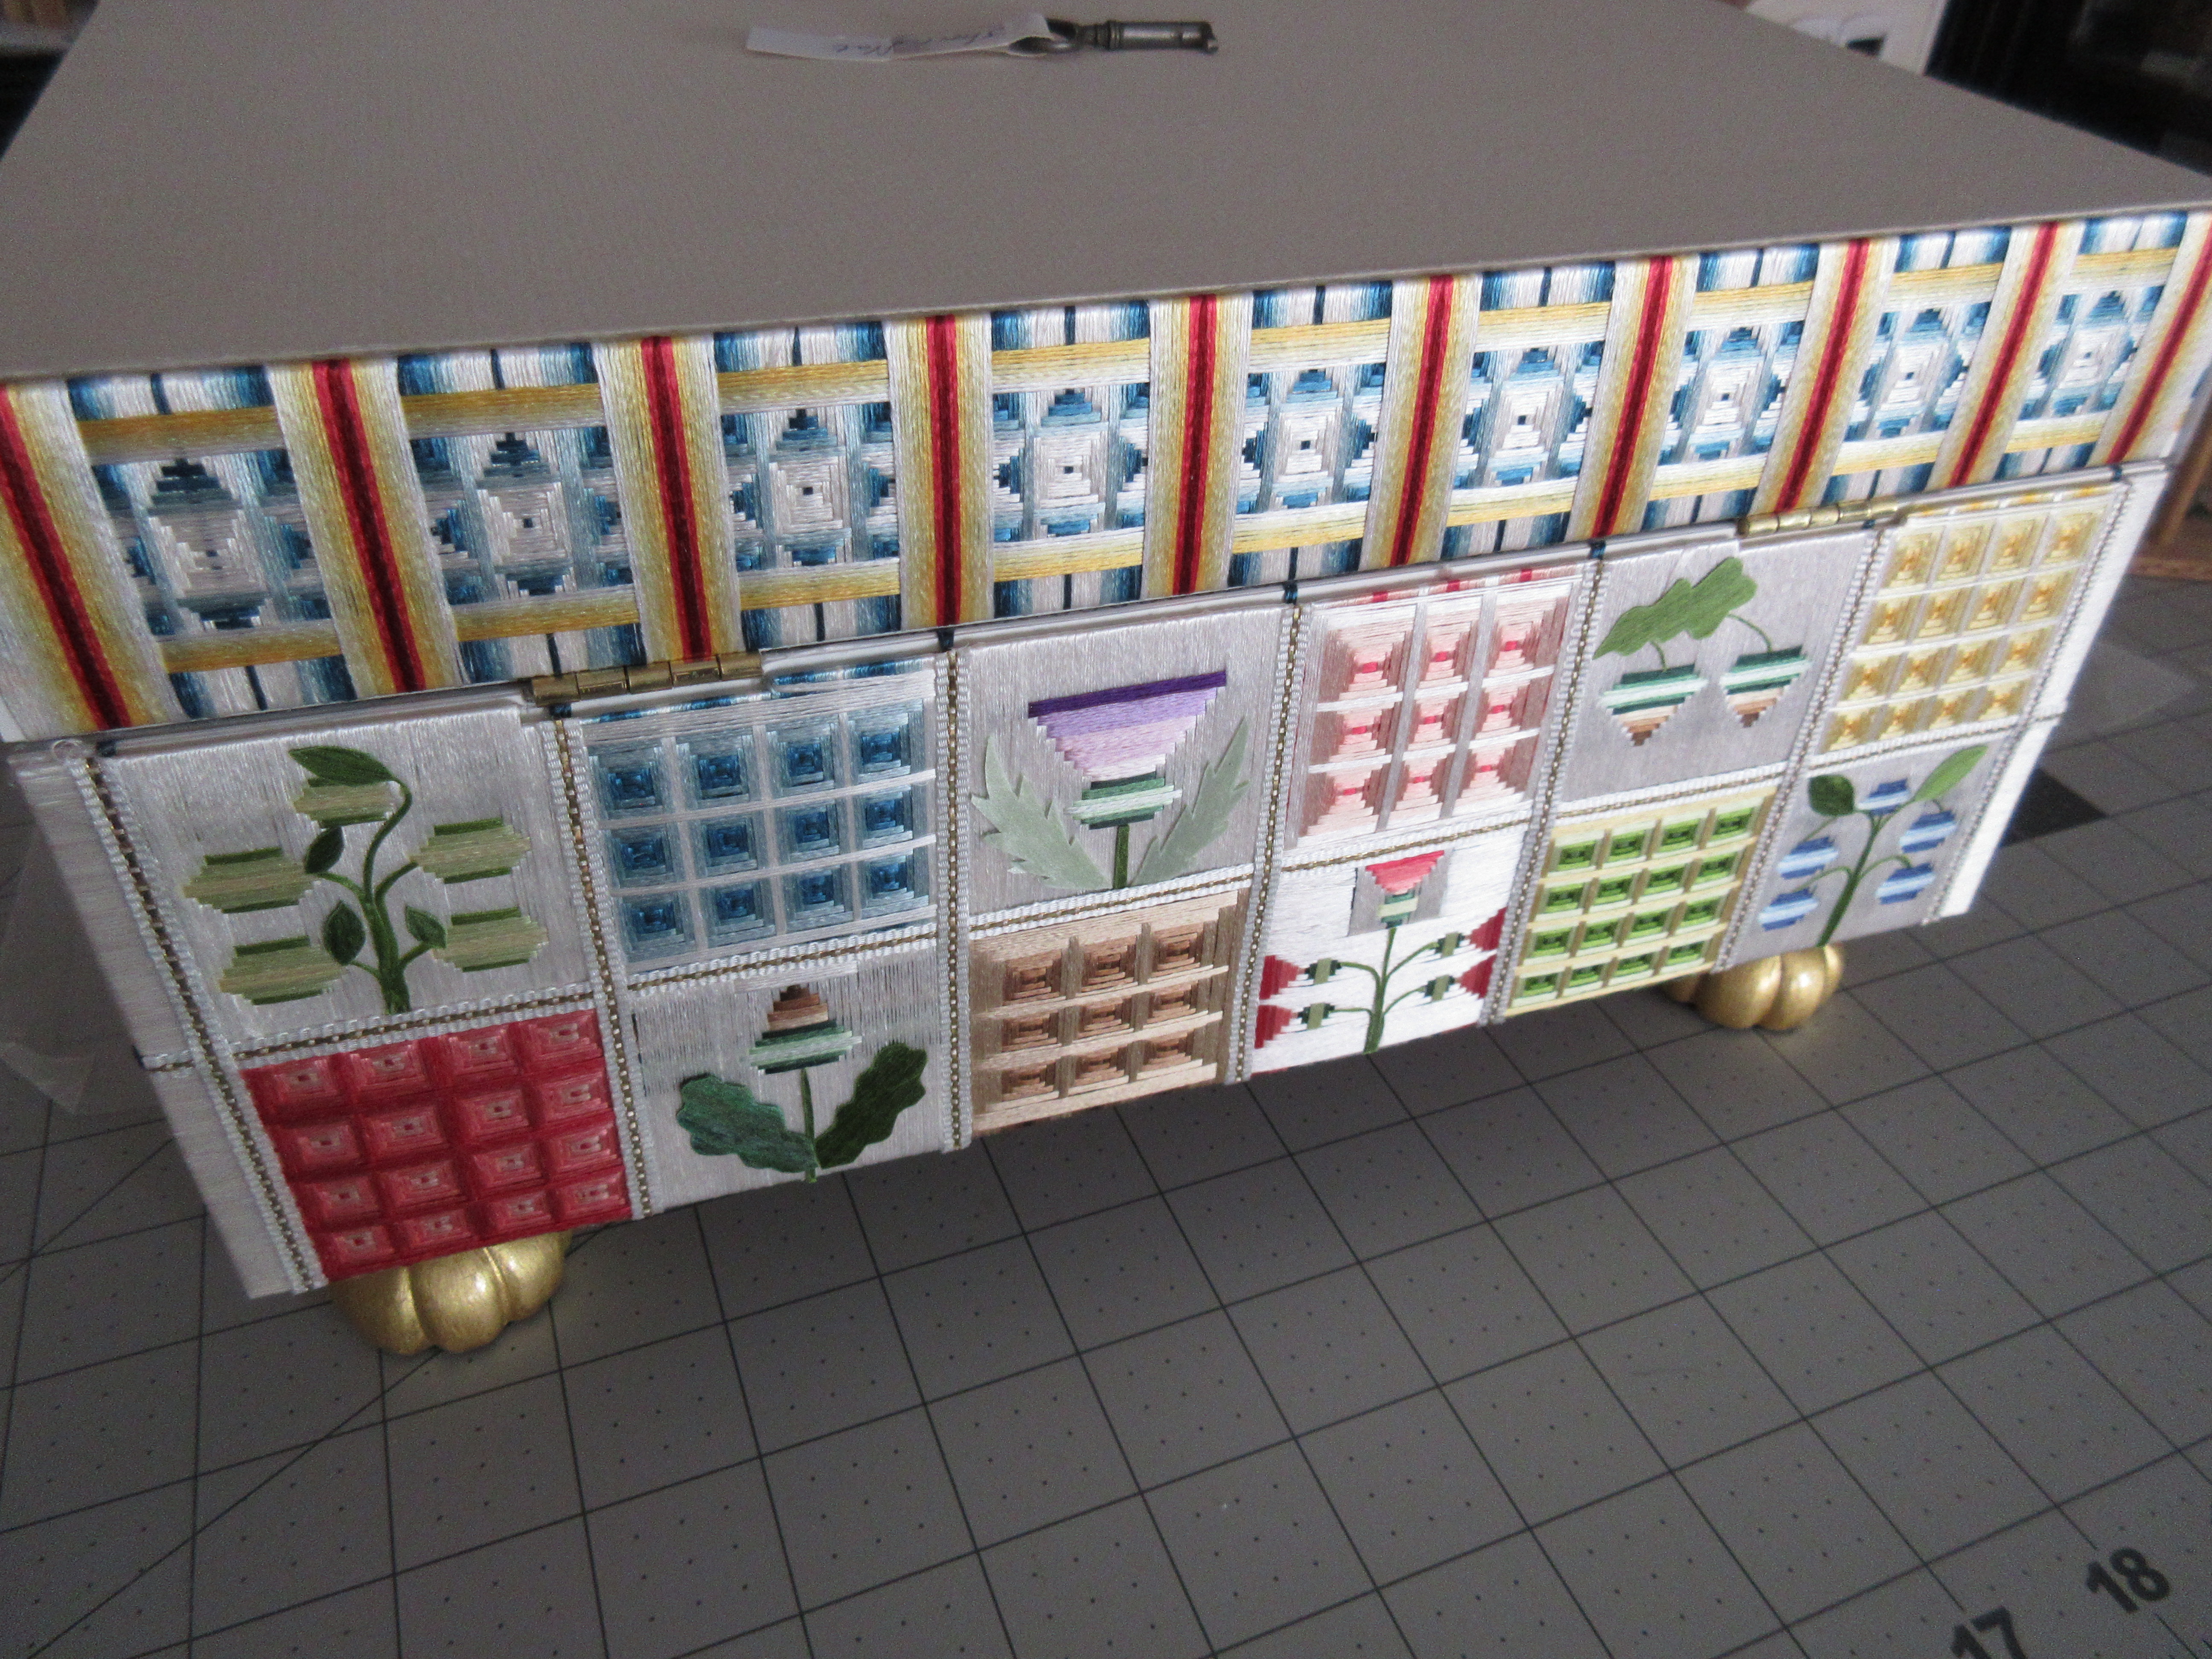
 Many early caskets were not worked in a single technique. Usually, the elaborate raised work was done on the top or front, with flatter techniques like satin stitch used for the sides. Wrapped cards were common for the backs of caskets, especially if they were planned to sit against a wall where the back was rarely seen. A person could spend months and months working on a single elaborate raised stumpwork panel, whereas I worked all of the wrapped cards for the back and frieze of my little casket in only a day and a half. 

The above photo is of Winterthur casket 1970.0507 A, and can be found here. If you click the link to the object page, you will see that only the top and door fronts are embroidered in satin stitch. The back, sides, friezes, slopes, and interior are all done in wrapped cards.

 
These two cuties above, in a private collection, are made up only of wrapped cards.
        

Wrapped cards are pretty self-explanatory. They are made up of silk thread that has been wrapped around a thick card. I am lucky to own some period ones, three of which are shown above. They may look tatty to the untrained eye. Tatty ones like these reveal the secrets of how they were made ;)


The 'card' is rather quite thick, and made up of several layers of pressed paper, as seen above.

Every one of these cards is fascinating to me. They are like intricate little puzzles, each with its own secrets. These three were made and never used, as there is no glue residue on the backs. It is when comparing the back(shown below), to the front (shown above), that one can appreciate the damage light can do to the dyes over time.

 The bright colours of silk are gasp-inducing when you turn a card over for the first time. It is by studying the backs one can decipher in what order the silks were wrapped to obtain a certain design on the front. Some cards, such as the one shown above, also reveal little surprises contained within the wrappings...

 Period straight pins at the corners were used to anchor the silk threads when starting and stopping, and changing directions of the wrappings.
 
 Not all cards used pins. Sometimes a knot was made at the end of a thread, and the needle passed through the layers of the card to secure it, as seen above. There is a little knot at the top edge of the card, all the way to the left~ if you cannot see it, click on the photo and enlarge it. You can also see other stray needle holes within the card below the knot. It is little details like this one looks for in trying to figure out how to reproduce one of these little cards. 

 I lump wrapped cards into two categories: geometrics and figural. The first card I showed was obviously a geometric design. The card above is what I would call a figural card. These are cards that have been wrapped in a way to represent flowers or buildings. They will have added features such as stitched on or gum work stems and leaves, and in the case of buildings, inked on architectural elements like windows and doors. 
The card above has three stitches of much heavier silk forming the stems.

On the back, one can see the obvious light green silk used for the stems, but an additional dark green heavy silk can also be seen. What was that for? Perhaps they first used the dark silk and didn't like how it looked and then switched to a lighter silk? As long as the threads were unpicked from the front, there was no need to unpick the ones to the back. Like I said, these are all very fascinating!

The above photo is one I took of casket T.23-1928 at the Victoria and Albert Museum in London~ you can find it here.  If you click on and enlarge the photo, look at the top section of the middle drawer, right in the center of the picture. This is my favorite geometric design and the one I reproduced for the frieze on my casket.

I studied the photo and sketched out the design on graph paper, as seen above. This is where your brain can really start to melt, but in a good way if you like challenges or puzzles. One must think backward when deciphering these cards. The wraps or silk allll the way to the bottom were wrapped first. You look at intersections to help you see the order of wrapping. As a rule, I assign 1mm for each colour. On my graph paper, each square is 1mm. (This has nothing to do with how many wraps around the card) Depending on the silk you choose to use, it may take two wraps of thread to equal 1mm, or 4 wraps of thread to equal 1mm. That you have to actually do it and measure for your thread type. 
Once I plotted out a single motif, I measured the size and divided my frieze length by that, to give me the number of whole repeats so I could center them on my frieze. 

The card is then marked, as seen above. Each mark here represents the darkest blue in my design.

I used the pin method to anchor my threads, as seen above. I find that brass sequin pins are the perfect size. They are pushed into the card, leaving enough of the head and shank exposed to hold the silk in place. 

The first wrapping sequence on my frieze is shown above. The wraps are flat, and silk within a 1mm wrap section NEVER overlaps its neighbor. 

Things can get pretty hairy as you wrap, as the design you see on the card really looks nothing like the finished design until the last wraps go on. 

The above is a picture of the finished focals, with no border banding on yet.

And here is the frieze with all border bands finished.  The top and bottom of the frieze will be covered by trim so no need to waste precious silk wrapping to the very outside edges. The difference between the previous picture and this one really shows how much colour choices play in the overall look of your design.

To panel the back, individual tiles are glued on and then I used tape to cover the seams. Original panels are usually wrapped in silk again over the seams. I couldn't decide on a colour, so I used tape! Here you can also appreciate the addition of gummed silk stems and leaves to complete the figurals, as was done on the original ones. 
You can learn how to make your own gummed silk sheets in my Diamond K Folk Art Online Academy class 'Gum Work, The Art of 17th Century Gummed Silk' starting again on 1 July. I will be opening enrollment for class again soon, if you are interested just shoot me an email to rlkinnison@yahoo.com.

Happy Stitching!


Sunday, May 15, 2022

Thankyou

 Life is nothing without Family and Friends

I don't know where to start, so I guess I'll just jump right in. First I want to apologize to all my faithful readers that I have not posted in so long. This year has been a challenge. On my last blog post, I was excited and getting ready to go to Williamsburg Va for an embroidery seminar. I was excited on the outside, but I had been struggling for some while, just not feeling well. I can remember joking to Lamora that I was so sick, but needed to get my order done for the seminar so was painting all hunched over on my stool because I couldn't sit up straight, the pain and cramps were too bad. Did I listen to my body???  noooooo I did not. I got my order done and strangely enough, instead of taking it with me on the plane like I usually do, I mailed it in. Even my angels were talking to me secretly and I wasn't listening. 

Three days before my flight in Feb I spent the day in the ER, never got to Williamsburg, and the rest is a blur. Long story short, I had a coconut size tumor removed and am now sitting here in MAY, looking down at a scar that runs from my sternum to my nethers, trying to realize where the time has gone. It actually seems like YEARS have gone by in these months.  I am still having panic attacks, but I feel one coming on and can push it out of my mind. I know what one is now, I wish I didn't. 

Each night I pray for strength, and understanding, sometimes for more patience, and more compassion. The Creator does not have a magic wand and just swoosh, here your prayer is answered. It doesn't work like that. He throws situations and tests at you...things that will teach you more compassion, or more patience, or more love, more kindness.  Kinds of things that show you how much others love you, and how much you really love those others. 

I hope I passed my test. I hope I learned what I was supposed to, because I really dont think I have it in me to go again. I love my family & friends more than words can express. There are no words of thanks that even come close to how I feel on the inside. I have always thought in my mind that I would live to be 100. I never even thought twice about it....until these last couple months when I was honestly hoping I would just get to 51. Ya, 51 in Sept would be great. One more trip home to see my parents, one more summer, two daughters getting married. My surgery went great, I got the best surgical oncologist and he ripped that coconut right out of there and now news is great and I am back to shooting for 100 again. I got a lot planned, so I need to get busy. I have slept more in these past few months than I have in years..but I'm not dwelling. I am feeling better each day and am starting to feel like my old self again. 

The ETSY store will be closed a little while longer as I am still not driving and not lifting. I will be opening enrollment soon for another running of the Gummed Silk and Poft Oak classes, and long awaited padded interiors class. Soon, I promise!

 I haven't done any stitching in so long, but in trying to keep my mind busy before surgery, I did work some wrapped cards for the back of my short flat top casket. If you ever need something to totally wipe your mind clean of any other thoughts, I have to recommend wrapped cards. At least for me, trying to figure out the order of wrapping to achieve a certain pattern, took every speck of brain power I had, and then some!
Happy Stitching  XOXOXOXOXO


Thursday, January 27, 2022

Last week to Enroll & A Finish!

 Do you want to Learn how to make THIS?

There is but a mere 4 days left to enroll in my Spring 2022 class Gum Work~ The Art of 17th Century Gummed Silk. You can learn more about it and enroll here. It is such a beautiful and fun technique, and class starts on Feb 1st!

I also am so proud to share with you one of my student's finishes~

Patti was in my 2020 class Beneath Thy Poft Oak. Over the span of a year, I teach both surface and detached beaded stumpwork techniques, all combined into this beautiful sampler. I am so proud of Patti~ this is her first beadwork! 


I knew she wanted to incorporate her class piece into a casket when she started but did not realize it would be the focal point, as in, the work on the outside.  I think her vision was inspired and the result is a stunning example of less is more


She has worked her initials and date alongside, and due to forethought in backing preparations, her final mounting of the silk satin onto the wooden casket is just beautiful.


Her casket has such an elegant and classic aura, the interior fittings just as splendidly finished as the outside. I really love her use of blank space to create a peaceful & serene feel to it overall. 

Do not think that every nook and cranny of your casket's stitchable areas need be filled to the max, and I hope that you will let yourself be inspired by Patti's example!

I will be running this class again later this year, if you would like to be put on the mailing list, just send me an email or comment. Comments are moderated, so if you send your email address, it will not be published. 

Happy Stitching!!


Wednesday, January 12, 2022

My New Teaching Website!

 Diamond K Folk Art Online Academy


It gives me much pleasure to announce the opening of my new teaching website,

 Diamond K Folk Art Online Academy

All of my online classes will be hosted here from now on, so save the link! Some classes will be digital-only, some will be more traditional with associated physical kits. I have new classes in the works, and will be adding some from previous years as well. Classes are fully paid up front, and content is released at the first of each month for however long the course runs. I will announce classes here on my blog, and link to pages where they may be purchased.

 If you are in Colorado, please email me to enroll and I will invoice you directly to include applicable taxes, if not, I will have to send an additional invoice with added tax.

I am planing the second running of my 2020 Beneath Thy Poft Oak class later this year. This is an in-depth 12 month long course covering 17th c surface beadwork embroidery techniques. A project kit is included with the class. If you missed the first running and would be interested in the waitlist for this class, just shoot me an email. 

Gum Work~ The Art of 17th c Gummed Silk

Class Starts Feb 1, 2022!

My new Gum Work class is now open for enrollment and will be starting on the first of February. This class is three months long, and is a digital only class, meaning there is no associated class kit. A full list of required materials with link to where they can be purchased online is included in the first lesson. You may already have much of what is needed, or be able to find them locally.
If you are unfamiliar with 17th c gummed silk, I will invite you to click on the tab on the right sidebar 'Silke Gum Work' to learn a little more about it....and if you want to learn how to make beautiful gummed silk carnations like the ones shown above, I hope you will sign up for the class!


Traditionally, items decorated with gum work only contained gummed silk, such as the top of my dome top casket shown above. But in class, I will show you how to elevate this dainty craft to a new level by adding goldwork stitches and some bling to it!


You will learn both flat and curled techniques. Even the lion's mane shown above is gummed silk

You can learn more about my Gum Work class & Enroll here


Saturday, December 25, 2021

Finished

 17th c Inspired Gum Work Casket


Here is a tour of my finished Gum Work casket. I hope you enjoyed following along on YouTube! If you haven't already got on the mailing list for my new 2022 classes, just drop me a line at rlkinnison@yahoo.com to be put on the list. 

Saturday, December 11, 2021

Floss Tube Finer Finishing Tips #14

 Gluing A Finished Panel Onto The Box

So.....you have laboured for perhaps years on your embroidery and it's finally finished. All that is left is to glue it onto your box or casket. Easy right? You may be surprised to learn that the majority of folks I know when they get to this point, they panic. Some don't even get as far as opening the glue pot, just the thought of glue on their embroidery is overwhelming enough for them to stop and make the thing live unappreciated in a drawer for the rest of its life. 

I am here as a calming voice to assure you, it's really NO. BIG. DEAL. 

Take a deep breath, gather your tools, and watch this week's YouTube video on how to do it below!


Each panel is glued on in the same way, one at a time, no matter what you have worked onto the panel itself. It could be cross-stitch, crewelwork, stumpwork, or beadwork...no matter, they all go on the same way. Come on back next week for a fun video on choosing trim!


Friday, December 03, 2021

My Kind of Lost & Found....

 17th Century Silke Gum Worke

 There were many techniques used in the 17th century to cover girls' cabinets, workboxes, and caskets. One of my favorites is Silk Gum Worke. I have talked about it before, and am very pleased with the results I have been able to obtain.  Gum work caskets and items are much rarer than their stumpwork or beaded counterparts, as they are somewhat fragile. Occasionally things pop out of worldwide obscurity. For a brief moment, like the lid opening on a box of treasures, we get to peek in, and then the lid is shut and we are left longing for more. Such was the case with the above silk and silk gum work casket from the Caldwell collection. It was sold by Brunk Auctions in 2006, you can see the auction page here.  One just cannot appreciate the beauty of silk gum work via a photograph...its impossible. 

I have studied pieces in person and they are so old and tattered now. Four hundred years of dust and sun and wear has left them tired. I wanted to know what they looked like when new.... and I want you to too! 

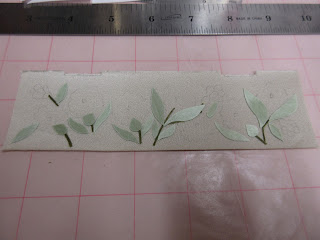
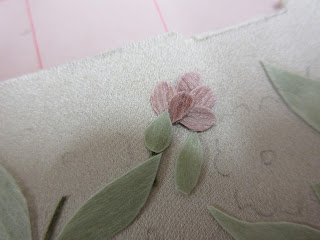
 This is the topic of my video for today...it's not so much a tip, as it is a treat. The gummed silk is extremely luminous. In the process of making the sheets, the silk fibers are aligned parallel to each other. I refer to this alignment as the grain. To make a panel, I first start with the stems and leaves, as shown above. Notice how some of the leaves are lighter, and some are darker...but they are all cut from the same silk. The light catches the grain at different angles and is reflected off in vibrant bursts of light.


Next petals are placed. 

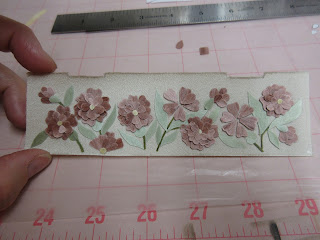
One by one, the flowers grow petal by petal

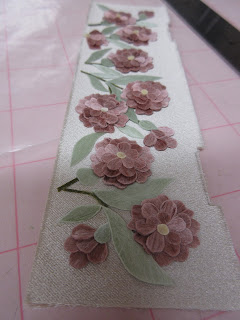
 Though the pieces are flat, the way they are built up gives the flowers added dimension. I used the same pink silk for all the flower petals. 

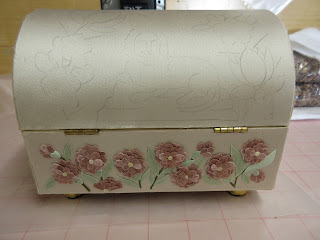
Here is the finished panel on the back of my little dome top casket. While it looks pretty here, one just cannot understand the movement you can get from this technique, so I offer you today a little video, below. It still does not do the real thing justice, but at least is a little better than a flat picture. 


If you are interested in learning more about this technique, drop me a line to rlkinnison@yahoo.com to be put on the mailing list for my upcoming Jan 2022 class, Gum Worke~ The Arte of 17th Century Gummed Silk.