17th Century Silk Wrapped Cards
The wrapped cards on the back of my little casket have piqued a lot of interest from folks. That's GREAT! I have received quite a few questions so I thought I would just share a bit more about them here on my blog for everyone to enjoy.
These cards are indeed a 17th Century technique. They are most often found on caskets, but I have seen ones made up into little purses as well. I know I have seen more than one. The following example is shown in Domestic Needlework~
It is described as a "Perfume case in latticed silks; English 1650-1670"
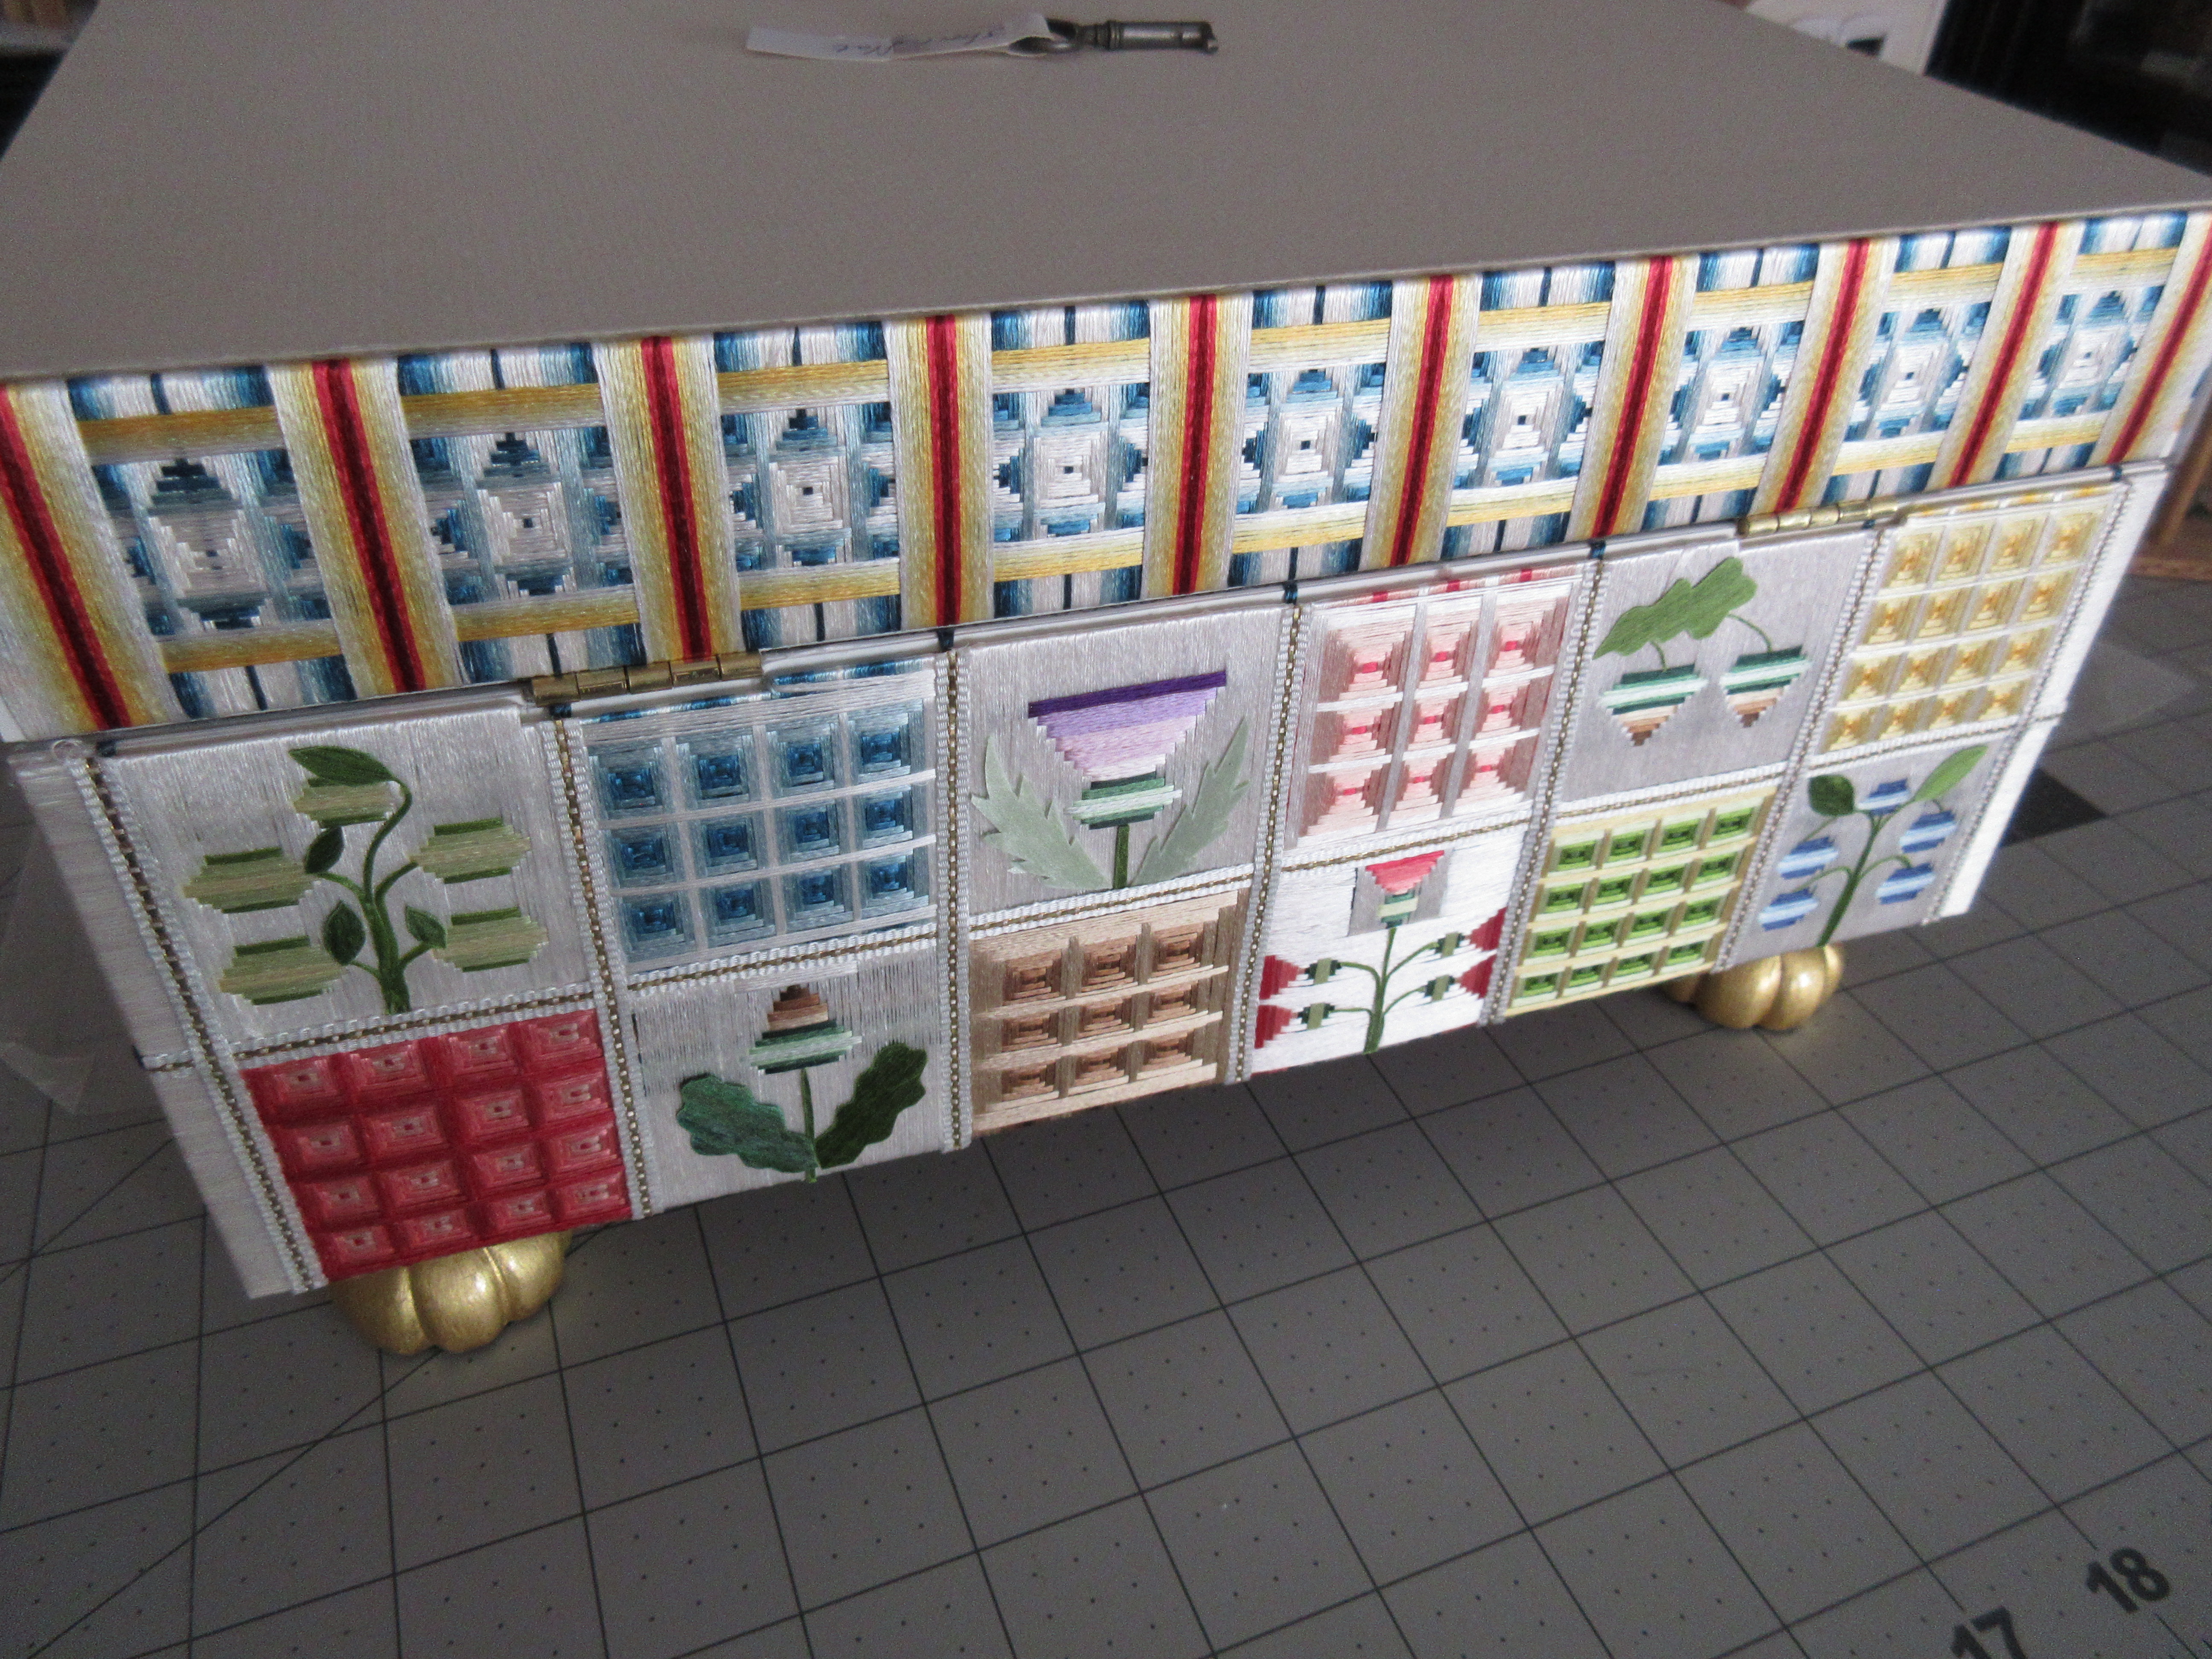
Many early caskets were not worked in a single technique. Usually, the elaborate raised work was done on the top or front, with flatter techniques like satin stitch used for the sides. Wrapped cards were common for the backs of caskets, especially if they were planned to sit against a wall where the back was rarely seen. A person could spend months and months working on a single elaborate raised stumpwork panel, whereas I worked all of the wrapped cards for the back and frieze of my little casket in only a day and a half.

The above photo is of Winterthur casket 1970.0507 A, and can be found
here. If you click the link to the object page, you will see that only the top and door fronts are embroidered in satin stitch. The back, sides, friezes, slopes, and interior are all done in wrapped cards.
These two cuties above, in a private collection, are made up only of wrapped cards. 
Wrapped cards are pretty self-explanatory. They are made up of silk thread that has been wrapped around a thick card. I am lucky to own some period ones, three of which are shown above. They may look tatty to the untrained eye. Tatty ones like these reveal the secrets of how they were made ;)
The 'card' is rather quite thick, and made up of several layers of pressed paper, as seen above.
Every one of these cards is fascinating to me. They are like intricate little puzzles, each with its own secrets. These three were made and never used, as there is no glue residue on the backs. It is when comparing the back(shown below), to the front (shown above), that one can appreciate the damage light can do to the dyes over time.
The bright colours of silk are gasp-inducing when you turn a card over for the first time. It is by studying the backs one can decipher in what order the silks were wrapped to obtain a certain design on the front. Some cards, such as the one shown above, also reveal little surprises contained within the wrappings...
Period straight pins at the corners were used to anchor the silk threads when starting and stopping, and changing directions of the wrappings.
Not all cards used pins. Sometimes a knot was made at the end of a thread, and the needle passed through the layers of the card to secure it, as seen above. There is a little knot at the top edge of the card, all the way to the left~ if you cannot see it, click on the photo and enlarge it. You can also see other stray needle holes within the card below the knot. It is little details like this one looks for in trying to figure out how to reproduce one of these little cards.
I lump wrapped cards into two categories: geometrics and figural. The first card I showed was obviously a geometric design. The card above is what I would call a figural card. These are cards that have been wrapped in a way to represent flowers or buildings. They will have added features such as stitched on or gum work stems and leaves, and in the case of buildings, inked on architectural elements like windows and doors.
The card above has three stitches of much heavier silk forming the stems.
On the back, one can see the obvious light green silk used for the stems, but an additional dark green heavy silk can also be seen. What was that for? Perhaps they first used the dark silk and didn't like how it looked and then switched to a lighter silk? As long as the threads were unpicked from the front, there was no need to unpick the ones to the back. Like I said, these are all very fascinating!
The above photo is one I took of casket T.23-1928 at the Victoria and Albert Museum in London~ you can find it
here. If you click on and enlarge the photo, look at the top section of the middle drawer, right in the center of the picture. This is my favorite geometric design and the one I reproduced for the frieze on my casket.

I studied the photo and sketched out the design on graph paper, as seen above. This is where your brain can really start to melt, but in a good way if you like challenges or puzzles. One must think backward when deciphering these cards. The wraps or silk allll the way to the bottom were wrapped first. You look at intersections to help you see the order of wrapping. As a rule, I assign 1mm for each colour. On my graph paper, each square is 1mm. (This has nothing to do with how many wraps around the card) Depending on the silk you choose to use, it may take two wraps of thread to equal 1mm, or 4 wraps of thread to equal 1mm. That you have to actually do it and measure for your thread type.
Once I plotted out a single motif, I measured the size and divided my frieze length by that, to give me the number of whole repeats so I could center them on my frieze.
The card is then marked, as seen above. Each mark here represents the darkest blue in my design.
I used the pin method to anchor my threads, as seen above. I find that brass sequin pins are the perfect size. They are pushed into the card, leaving enough of the head and shank exposed to hold the silk in place.
The first wrapping sequence on my frieze is shown above. The wraps are flat, and silk within a 1mm wrap section NEVER overlaps its neighbor.
Things can get pretty hairy as you wrap, as the design you see on the card really looks nothing like the finished design until the last wraps go on.
The above is a picture of the finished focals, with no border banding on yet.
And here is the frieze with all border bands finished. The top and bottom of the frieze will be covered by trim so no need to waste precious silk wrapping to the very outside edges. The difference between the previous picture and this one really shows how much colour choices play in the overall look of your design.
To panel the back, individual tiles are glued on and then I used tape to cover the seams. Original panels are usually wrapped in silk again over the seams. I couldn't decide on a colour, so I used tape! Here you can also appreciate the addition of gummed silk stems and leaves to complete the figurals, as was done on the original ones.
You can learn how to make your own gummed silk sheets in my Diamond K Folk Art Online Academy class 'Gum Work, The Art of 17th Century Gummed Silk' starting again on 1 July. I will be opening enrollment for class again soon, if you are interested just shoot me an email to rlkinnison@yahoo.com.
Happy Stitching!


2 comments:
Rachael, oh my goodness, Rachael--you are a genius, truly! Thank you for taking the time to educate us about these very beautiful AND intricately wrapped cards. Surely you have your PhD in some kind of engineering!! The subject is fascinating.
Molly
PS: I hope that you are gaining strength. Surely you were thrown for a loop in 2022!! Heartfelt wishes for continued recovery.
Those are so COOL!!! When I saw the back of the first one I immediately thought "Gee, that looks sort of like the back of my embroidery....only a little neater than mine." Ly, Mom
Post a Comment