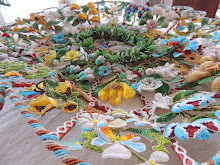
Say Hello To My Little Friend......
One of the great things I like to point out about my figures, is that the Ladyes have full sculpted bust..as in, body down to the waist. This makes getting a period correct body shape a cinch~ as all one need to do is cover the form with either needle lace or beads. I thought ya'll would enjoy to follow her making up~ so firstly, after her torso is covered, I made her first set of undersleeves and attached her far arm.
The sleeve came next. When working up a stumpwork figure of any sort, always work from back to front.
The two outside portions of her gown came next. I'm super happy with the peachy colors I choose.
The center of her gown was next, then it was time for her other sleeve/arm. Twilled undersleeves were made and attached~ the bottom to the panel, and the top portion directly to the sleeve before it was attached to the panel. Her collar and cuffs are right angle weave.
A twilled scarf in the traditional shaded blues was next....it seemed like I'd never get it long enough. I guess of all, this shawl gave me the most fits, trying to get it to drape right.
Ladye got a necklace of real seed pearls, and we spent some quality time picking out a hair color.
Before I could attach her hair tho, I had to make the flower coronet she wears. If I can give any advice here, it would be that if you think you need 20 leaves...make 30...but better yet, make 35. White flower turned out huge and clunky compared to the others, so it got scrapped for blue one. I like to lay all my pieces on my pattern roughly how they will fit. I thought I had plenty of leaves, and when I went to assemble the coronet, I was short....so I would make a few more~ plenty I thought....go to add them and they would just get sucked up into it...so I would have to go back and make more.
I would add a few, then hold it up and see how it looked. I refer back to my drawn pattern and my actual panel often when I am making a detached piece. Finally, here it is long enough to go on her head...but not quite yet~ I have to work the left side of her hair first
With left hair complete, coronet gets attached round her pretty face.
Laying the coronet up against the panel gave her waaaaay to much forehead, so after a placement that I liked, I went back and made a bead hair braid to cover the top of her head.
Right side hair was then added to finish her. A little primping and sculpting of the wired leaves and she is just what I had envisioned. I was going to work detached leaves on the left tree, but with her coronet, I think I will leave it as is, and just make a few simple leaves for tree on right.
As much as I am really wanting to work the cartouche...I think I will leave it for a bit... I have a rose garland planned for around the outside of it, so after I get that made, I will better be able to decide if I want a super busy cartouche border, or a plain flat worked one. There are no adequate words to express how much stitching makes my heart sing~


4 comments:
Watching you happily working makes me happy, too. Keep up the good work.
By the way, her blue and white corsage looks like an orchid to me. She's just lovely.
And watching her come together makes my heart sing! She is exquisite and lovely and makes me smile to see her!
What size beads do you use? They look so tiny. By the way, I know you teach this technique in person but have you ever made a kit of your designs? I'd love to learn but live in Canada.
Post a Comment