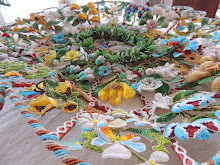
The Fun Part!
To make up the center panel, the first thing I did was turn the basket upside down and stitch the background net to it at each little wire ring.
I then flipped it back over, and sat it up on two hat boxes so that I could have both hands free for wiring the pieces onto the netting. For this I used super fine near invisible wire. I poked holes in the vellum of the motifs with a needle first to open a place where the wire would pass thru easily. I always had in mind the amount of space the wreath would overlap and spaced the pieces accordingly~ if I would have put the cloud and sun directly to the edge of the panel up against the lattice, aLOT of it would be totally hidden behind the wreath, so I moved it away from the edge
Wreath has been 'fouffed' to leaves standing straight up, so I could pass the wire around thru them without catching the leaves themselves...this seemed to take forever~ my arms go so tired! It took over an hour just to attach the wreath
Then I had fun primping and bending the leaves into shape. I was not pleased with how stark the wires looked tho, I did not want them to be so noticeable, so to blend them with the beadwork more,
each got lightly tinted with watercolor paints to match the bead colors. I enlarged my photo of the Corning baskets wires and they too blended with the bead colors. One can tell the wire is the same wire, but it takes on a different tint for each motif. It was impossible to tell from the photo those wires were painted or wrapped in silk. The only other basket I know of that uses this same technique of wire framed twill beadwork is held at the Maidstone Museum in Kent, and its wire frames I have examined up close and are wrapped in a very fine silk thread in color to match the beads.
In my next post I will share what wire I used for my pieces, and how I prepared it prior to use


No comments:
Post a Comment