No Glamorous Spaces Here
I often get asked what my stitching space looks like. I am usually a pretty organized person, I'm a Virgo so I do like everything to be in its place. When I am 'creating' though, things tend to get pretty hectic. We are always bombarded with pictures of Women's creative spaces looking so clean and glamorous...I personally don't know a single person whose space looks like those in the magazines. In case yours doesn't either and it bothers you, don't let it! This is a picture of my stitching counter, you can just see the corner of my slate frame in the bottom left there.
See, I usually set aside January for doing my business tax papers....but doing so takes up my entire counter. I used the excuse that I would work on my stitching in January, and start my tax papers on 1 Feb. Well.....I was so close to finishing this current slate frame worth of casket panels, that I convinced myself that it would be a total waste of time to clean off my counter for tax papers, and then have to set everything else back out again. I mean. LOOK at it. I got EVERYTHING I need, right where I need it. It looks like a huge mess to the untrained eye, but it's what I call my 'working mess'. I stand to stitch, and everything I need is right where I can grab it. You don't even want to see my doll room when I'm working on a doll. Just, no.
Anyways, I am also a numbers person and keep track of everything. I know how much time is WASTED getting stitching things out, and then packing them up again. Just think how much stitching you could get done in the time it takes you to set up and break down your stitching area every time. So this is my tip of the day for getting some serious gains on stitching progress~
Make yourself a dedicated stitching area. It doesn't have to be an entire room. Or an entire counter. A side table, the top of a dresser....just someplace you can have your stitching at the READY and not have to haul everything to and fro all the time. Portable rolling carts are great~ keep all your stuff for your current project in there, and then when you want to stitch all you have to do is roll it aside you. You may be surprised how much progress can be made with just 20 or so minutes of stitching a day!
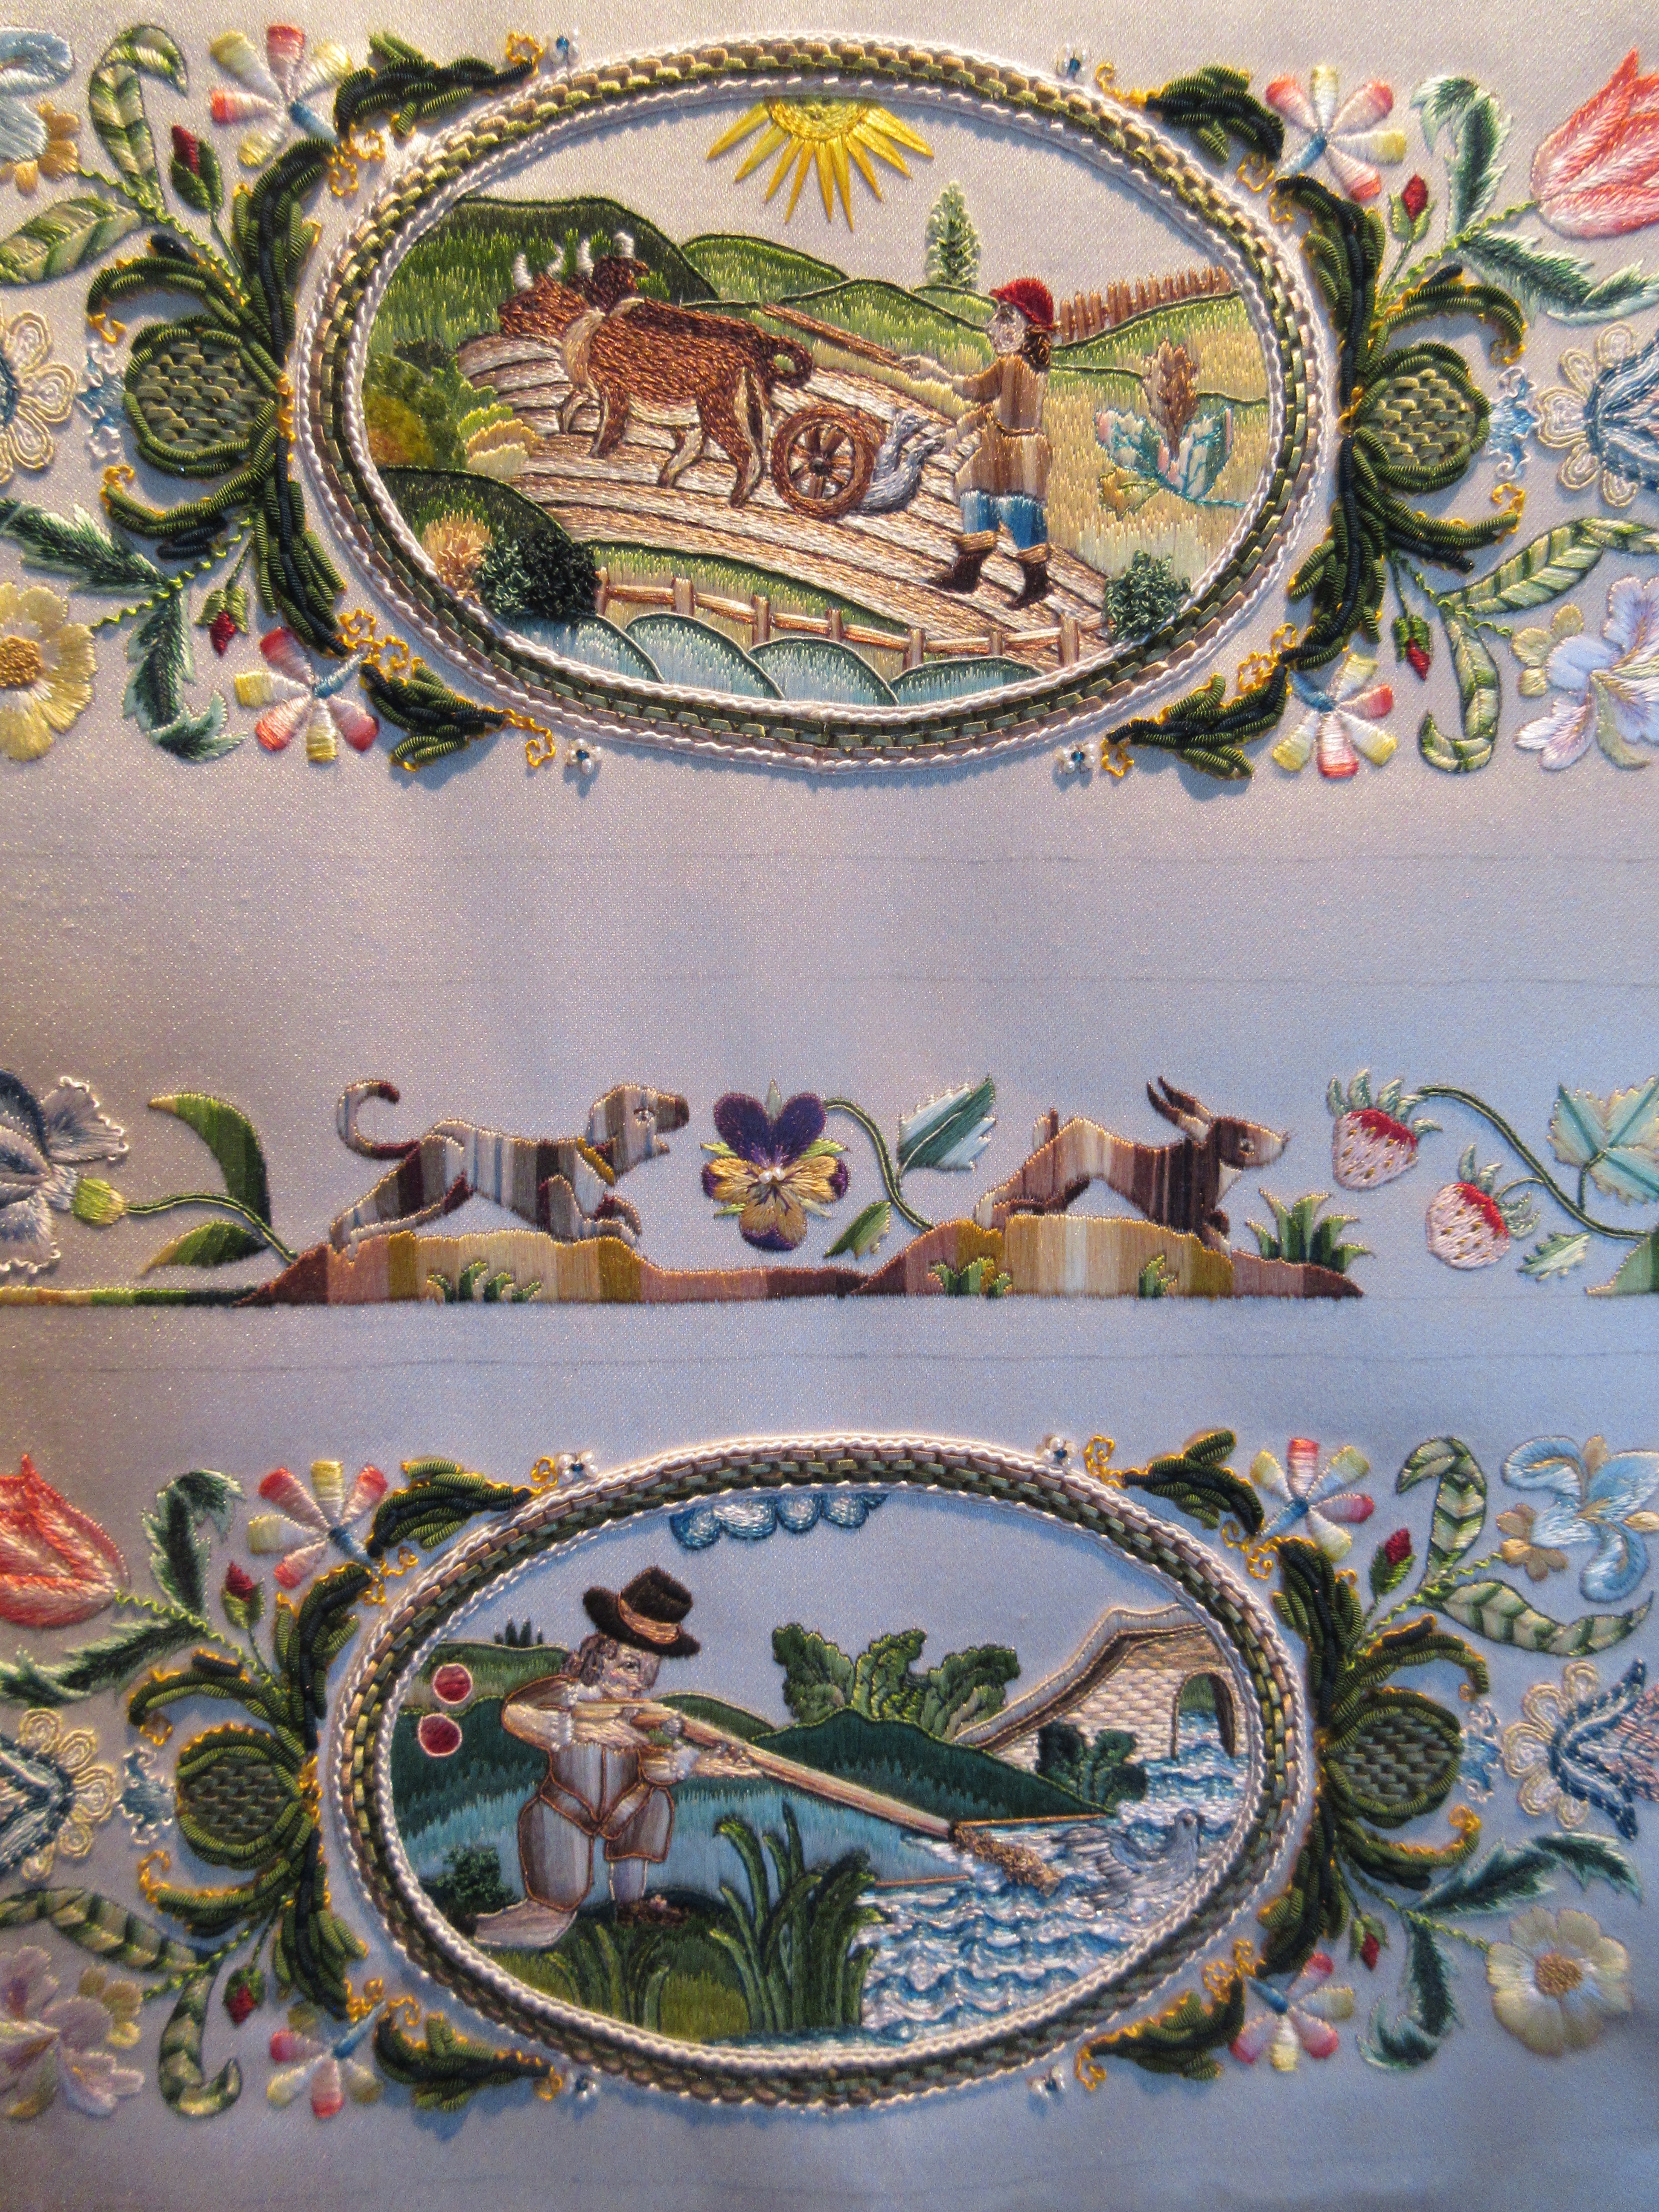
Speaking of progress, yes! I have progress to share on my Scenes of Country Life or Rural Pursuits casket~ WOO!

I actually 'finished' them twice LOL. Above is a picture of the first time, with the original configuration of the silk-wrapped purl flourishes. Up close they looked good, but from across the room, they looked like a sideways crab or spider clutching onto the cartouche! It kept me up at night, literally. HUGE design flaw for me. I wanted the ovals to be within the center of a block of stitching....not hovering between two crabs in a rectangular negative space. So while I was sleeping I thought of all sorts of things I could do to remedy the situation. Just leaving it was not an option for me. What I decided to do was to make the one-sided flourishes into leaves. I drew them in with a pencil first, as can be seen in the bottom half. Then couched yellow silk over the lines to match the rest, as seen in the top portion. I just needed to get the rectangular angles out of this white/negative space of the ground.
A few silk-wrapped purls later, and bam! YES! Finished for the second (and LAST) time! I am very happy with them now.
I have now cleaned off my counter and started my tax papers like a good girl. This slate frame is ready to get cut up and glued to the casket, but I am saving that for when I get back from a trip to Colonial Williamsburg. Cant wait to see them on the casket!
Did you stitch some today???! DO IT!!!!!


2 comments:
Honey, those came out absolutely GORGEOUS!!! I can't wait to see them on your casket, too!! Have fun in Williamsburg! LY, Mom
Really really nice!
Post a Comment