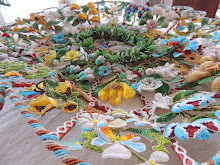
My class at the Get Together..

Randle Holme described it in the pamphlet 'The Acedemy of Armory, or a Storeouse of Armory & Blazon' , Chester, 1688....
"Gum work, is by gumming of several colours of sleeven silk together, which being dry, they cut into shapes of leaves and flowers, and so tie them up upon wyres"
I believe the method I came up with to make it using ingredients available in the 17th c closely resembles the period pieces. I had been asked about several finishing techniques I could demonstrate at the Get Together, so I came up with the above Christmas ornament that crammed as many techniques I could think of into one project. Making this little ornament offers practice in making gummed silk, painting silk satin with watercolours (the background fabric), gluing paper to silk, making paper finishing templates, papering a wood form, mounting silk to a form and applying trim. As you will see in the next pictures, much fun and frustration was had by all!!
The girls learned how to prepare silk roving and make small sheets of gummed silk.
While the silk is drying, we experimented with painting silk satin with watercolours. If you study early embroideries closely, you will start to notice, many of the backgrounds have painted, or lightly tinted elements, all done with watercolours. Janice's turned out really awesome, it looked like confetti and I didnt get a picture of it!
Mendy did a great job with hers~ LOVE it!
Stacey is working on a mermaid embroidery, and brought the mermaid thread palette set that I made her along with it~ its so exciting to get to see my needlework tools being used and loved~ makes me happy!
Once the gummed silk dries, it can be cut into shapes and glued to the background silk~ think really awesome paper dolls! I have an extra trinket box and am going to make it up in gummed silk
The key is to get the roving as thin but as even as possible, with all the fibers traveling in the same direction~ this is what gives the work a very luminous effect. Its really fun to make
This project is a real eye opener to the care that must be taken when finishing a casket. One needs to always think ahead and keep track of where the glue is at all times. Mistakes will be made, and those are great ways to gain experience of how to fix them, so if something similar happens on a finished piece of embroidery, there is no anxiety attack and the students will have the tools and knowledge of what to do in that moment .
The way I look at making an embroidered casket is like baking a cake. One can have a recipe, but unless they put the ingredients together right, their cake could be amazing, or not resemble a cake at all. One can have a wooden cabinet to cover, and years of gorgeous embroidery finished... but all that will not mean a thing if they cant get the pieces mounted in a clean and orderly fashion. Tho finishing wont take near the amount of time it will take to work the embroidery, or make the cabinet, it does take a good amount of time and simply put, cannot be rushed in any step of the way.


