Showing posts with label slate frames. Show all posts

Sunday, July 25, 2021

New Little Helpers....

  Hand Painted Needle Minders

For those who like to keep track of their needles or pins on their embroidery without having to stab them through the ground fabric, I have a cute selection of needle minders in the ETSY shop today!
They are each handmade and painted by me. 
I wouldn't say these are doodles, as I put a lot of time into them, but I had so much fun! I didn't follow any pattern~just cut out what I felt like and painted what came off my fingers at the time.

In case you are not familiar with a needle minder, it has a magnet on the back and comes with a second. You place the minder on the front of the fabric, and the second magnet behind it on the back of the fabric and this holds the minder in place. The magnets are very strong and hold any pins or needles you put on the front of it in place.


Each one is unique, painted in several layers of transparent watercolours so the beautiful wood grain of the sycamore shines through


They are roughly around an inch and half in diameter...some a little larger, some a little smaller


All are signed and dated on the backs


If you are in need of one, they are available today in my ETSY store, link is to the right in the sidebar.

Happy Stitching!

Tuesday, May 11, 2021

Not Quite 'Blush & Bashful'...but close

Pretty In Pink 

  Some of my favorite early 17th c caskets have very light pink interiors~ not that they were super faded...but they always were a very light shade of pink right from their start. I have searched and searched for just the right shade of pink~ makes me think of Steel Magnolias when she says her two wedding colours are "Blush & Bashful".  I super love how this interior came out


The paper I chose for this one is a beautiful faded blue. It goes so well with the pink. Of coarse I have my signature secret compartments all over the place, and hiding under the tufted pad within the mirrored octagon is a beautiful 17th c engraving.

What have you been working on? I hope that whatever it is, makes your heart happy~

if not....just WHAT are you waiting for????

DO IT!

Monday, April 19, 2021

Catching up

A Fun Paint... 
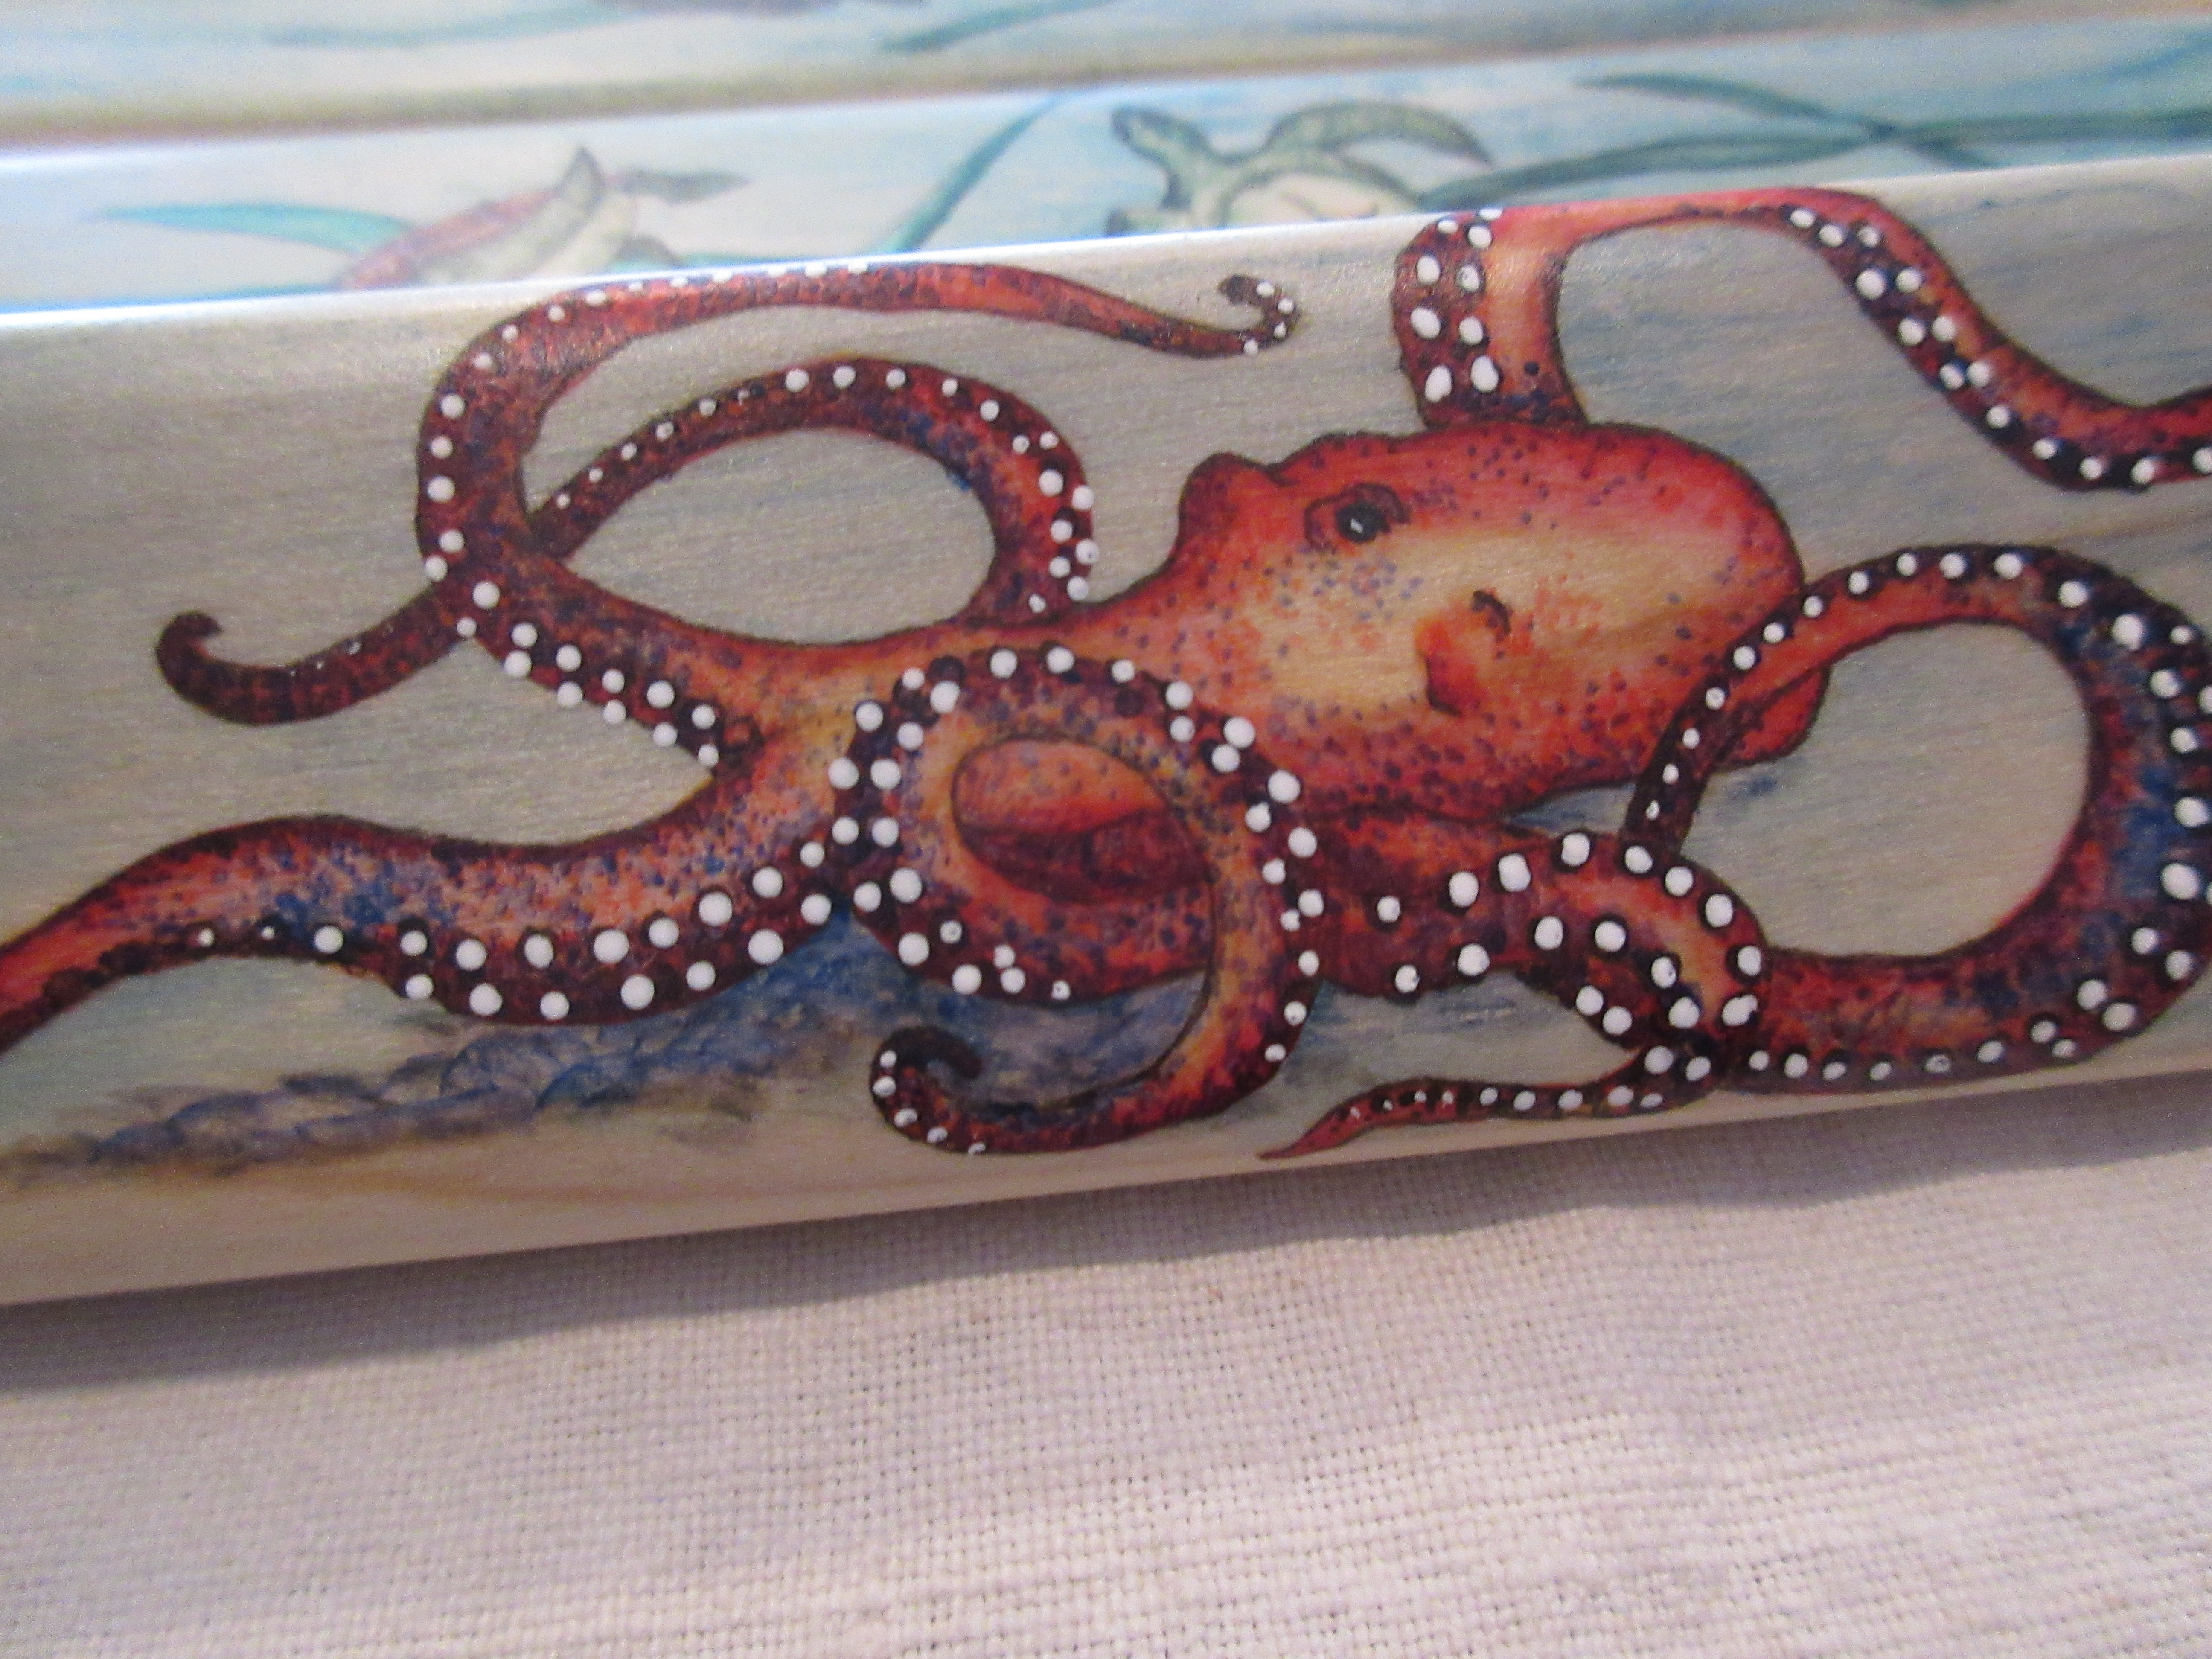
 I am still catching up after being sick, but getting there. Now that this frame has been delivered I can share it ~ it was super fun to paint and I think you will be able to tell why. My customer ordered a frame for his wife for her birthday, and simply said she liked turtles, sea otters and octopuses (is that the plural? I have no idea). I do love the challenge of designing for this tiny narrow area to paint on. Its a really happy frame and has made me anxious for summer!

 The painting technique I practice is from the early 19th century and is done in water colours. I first draw my design or parts of it, on the wood with a steel tip pen, then all is painted with watercolurs. Several coats of watercolours....on this frame some areas have nearly 20 coats of paint. I have to be very careful to have paint to water ratio just perfect so that the new coat of paint does not take off the layers beneath it.


 I very much enjoyed painting the octopuses, these are the first I have ever drawn and painted. There are three, and I wanted to portray how they change to camouflage themselves, 

So the fellow in the center is starting to change to blue. I really love how he came out. I used titanium white for the suckers on the tentacles which really made them PoP!

The otters are cute 'as all get out ' as my Grandmother would say~ so playful

I had to include one with an urchin on their tummy~


With as much time that we spend at our frames, they should be pretty and make us smile~ dont you think? I sure do~

Monday, April 08, 2019

From my Brush.....

Some Past Painted Pretties~
   I have painted so many wonderful things for folks on their slate frames...but this last one,  was so much fun! A customer had purchased one of my mini slate frames, ( I have two currently available in the ETSY shop) at Williamsburg last year, and this year she brought it back and asked me to paint it with 'creepy crawlies'. 

 Oh. My. Golly.  It came out so cute I can't even stand it! I am going to have to paint something on mine now! This frame is tiny~ not even 12" long slats

  There are microscopic little ants traveling in and out of the peg holes....butterflies, may flies, caterpillars...a snail, various little bugs, all inspired by 17th c embroideries. The yellow bug above is my favorite of them all, inspired by a bug on the bottom of a mirror in the Burrell collection.

  In addition to slate frames and various spool/thread palettes and winders, I also paint 'other' things...like this antique Singer sewing machine puzzle box....they originally had the sewing machine implements in them. The owner of this box wanted me to paint it in blackwork, what ever I wanted to paint on it...but she liked a certain 16th c painting of a young man leaning against a tree...so I redrew him lounging instead, so he would fit on the box. She is going to finish the inside and keep her needlework tools in it~

  I love monochromatic painting~ blackwork is my favorite, but was thinking of maybe painting something up in indigo....it is a true challenge to see how much depth and detail I can achieve just using one color of paint. I thought it would be fun to share with ya'll how the top of this box progressed, from being quite flat and lifeless, to looking pretty awesome. The design is first drawn on with India ink and a quill pen. Some parts I dont ink in first, like the building above, because I wanted it to be further off in the background, and not such a focal point. So it got painted first...just a hint of a building, not too many details.

  The difficulty in painting this way with watercolours, is the nature of the paint itself....water colour.  Each consecutive coat of paint, if not mixed right with the correct water to paint ratio....can remove the layer of paint underneath of it, instead of adding to it. It is a very light touch I must have, so these pieces are the most challenging for me. This panel, by the time I got finished, probably had close to 20 coats of black on it, or more.  So the next picture, above, the building and garden is now finished, and gentleman has hit first coat of shading

  I left the pictures large so you can really see the details~ he is coming along. I love how the woodgrain shows thru the watercolours on these pieces. 

  After gentleman was mostly finished, I start on the border.  Watercolours are so fragile before they are varnished, they cannot be touched, or the paint will literally just wipe off. When painting a large piece such as this one, I must start in the center, and work my way out, so that I don't accidentally place the heel of my hand or my pinky finger on the surface, and take the paint off. 

    Once finished with one side, I left it to dry a few days before lacquering that side, so I could move on to the next side.....so it is a slow process

I love how he came out, and can't wait to see it after Sharon finishes the inside.

  This is how it looks unfolded

The ends, when closed, make a complete design. 
I do love to paint.

Saturday, January 13, 2018

Getting Back to Work

Wood, Mache & Glass

    It does feel good to get back to work. I havent been of mind to do much lately, everything seems overwhelming and I havent been able to concentrate like 'normal'. The children have been keeping me busy~ Emma got her first elk a bit after Christmas, and Josh has been building a forge...hes out there now hammering away and I see a nice butter knife with rebar handle in my future.... 
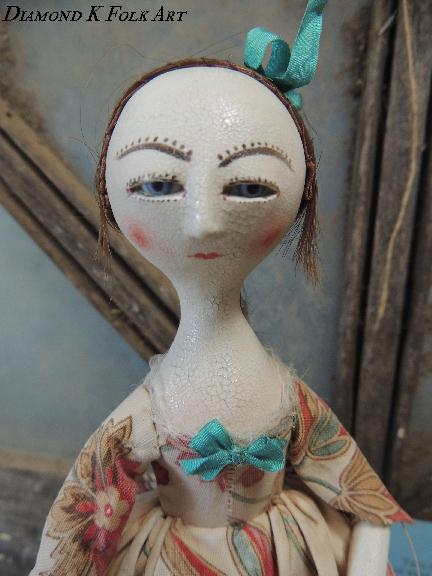
Got a few dollys finished.  I think the expression on Marida's face is a direct reflection of my own...kind of ho hum.....waiting for a nice cup of tea.  I wanted her to look primitive...like something Mamma would have made for her little girl from things found round the house...her clothes are hand stitched from late 18th ~ very early 19th c print from a quilt back portion
  I gave her a wig of real human hair...not my own. I have all sorts of antique hair that was saved probably for hair jewelry, but never got made up. Sometimes I use my own hair, but I liked this color, its dark but has kind of red hue to it if you get it in the light and goes well with her complection. Its stitched on over a cotton skull cap, and yes, I sat and braided it by hand.  I like how it came out, simple, but with lots of character. She will go on eBay later this week.

 My work has stacked up over Christmas,  this past Wed. was my first full day of work back out in the shop, and I have to say, it did much to make  me feel better. I love to work wood, I really do. Drilled out 17 slate frame pairs and have started to saw out the mortoises

  Of coarse I was working on my casket when lil Biskie got hit by a car, so it has been extremely difficult to get back to it since. I was working on a specific portion of the angel's gowns (where was mine & Biskie's when he needed it???) so I have added some little brown beads that are same color as his little nose in that spot.... It's been too hard for me to concentrate to count beads since,  and these are so small, I just can't see them when my eyes well up....
 But I had these pieces done, so I have gone ahead and stitched them on to finish their gowns....minus the sashes

 I don't think I like them very much, honestly, but I'm not taking them off. Perhaps when they get their hair I'll like them better....I'm not diggin little baldies...or maybe it's just angels in general.... I don't know.

But before I can do their hair, I have to make their wings....so for the next while, I'll be making feathers....well over 100 I need, of differing sizes...the small ones take me about 20 minutes to make one, so it will be a while.  I have decided to make the Quiltmania 2018 Mystery Quilt this year, because I have been feeling a need for patchwork...so am very much looking forward to that starting the end of this month.

Monday, November 20, 2017

It's so Dark....

Makes me Want to Hibernate
I don't know what is up with it being so dark lately...but I don't like it. Here in southern Colorado, its midnight dark by 5pm! Depressing. I don't remember it getting so dark, so early last year.... Its hard to get things done when all I want to do is sleep. I have been working very hard tho, tho at the moment it doesnt look like I have anything to show for it. Last weekend I worked the four butterflies on the top panel of my flat top casket...so this weekend I was super excited to get to start my two angels. Their wings are a big focal point~ each feather I am working separately.  I drew in lightly with pencil where each feather would go....eventually.

 So there's not much to show for an entire weekend of work...the two angel busts are attached now...but thats about it.  You can see their poor feet dangling on the panel~ I just have them pinned in....not sure if they will even have feet or not yet....

 The entire weekend, just about, I spent working 2 pieces of needle weaving....for portions of their gowns. I wanted them to be open and kind of lacey...so made up my own stitch. The second piece has more open areas, so they both wont be totally the same. It was fun, but took what seemed like eons...

 I have been working like crazy out in the shop trying to get orders filled for Christmas, and working on orders due in January and Feb(I just can't crank out things in a day)....I think it is hard for people to really understand how much time and effort I put into my work....so I took a few pictures of the shop yesterday to try and maybe show why ya'll have to wait for things.  When you open up one of my kits and see all the cut and portioned threads....they didnt arrive like that! We had to measure, cut, package and label each and every container....me...myself and I. We have a great time doing it...but it takes time.  Oh...and that awesome picture on the cover....of the finished model....we stitched that too, so that we can write you the most complete stitching instructions possible. We make an awesome team, ....me, myself, and I...but we can only do so much in a day.

 The wood for my stitching tools I mill myself...we are planing down stock for padded mirror cases in the picture above.... Each and every hole on a thread palette, gets drilled not once, but twice~ once from the front, half way, and then again from the back, so there is no tear out....same goes for holes in the slats of my slate frames....there are 48 holes on a single large slat, so 96 holes per large slate frame, drilled twice is 196 holes I have to drill for one large slate frame....then they all get sanded.....and yes, each and every hole I drill, gets sanded inside the hole!  When you see a shaped thread winder...I cut out each and every one, myself, on a scroll saw. If it's a circle.....dont even dare think I use some hole saw jig....absolutely not~ I cut that sucker out freehand, absolutely.

 Speaking of slate frames.... I had a visitor to the shop the other day see this stack of frames I have to make the mortise & tenon joints for, and he says...'so you use a mortising bit on a router for those I been thinking about getting one'   To which I replied, "no~ I dont use power tools for my slate frames~ theyre too small. A power bit has too much power and bends in the wood when its this small~ I use rasps and a chisel."  ...He didn't believe me until I showed him, to which I then got the~ you are crazy comment. Its  what I do~ I enjoy the process just as much as I enjoy the finished product.

I wanted to have a slide top spool box ready for eBay this weekend...I got the box done, but not painted, so it will be coming soon! I am also working on some regular spool palettes for those of you who dont want a hole box. Here are three sets of spindles....and yes, I make them too~
  
 It took an entire afternoon, and I mean an entire afternoon to sand and shape the tops of the spindles!

 I have been working on some new designs in between other things. Got in some new wood, this is quarter sawn sycamore, and I love love love the design of the grain~ its only achievable by sawing the wood this way.  I have been wanting to make this shape of a thread winder for a while~ I have to have a steady hand on my saw....it's a replica of a c1840 winder...coming to eBay this week!

 As you can see, we(me, myself and I) have all sorts of things going at once...while some things are getting clamped...I work on something else....everyone is patiently waiting for their turn!

 Ok...I'm so excited about it, here is a peek of the thread winder going on eBay this week! For me, this is the best winder I have made to date~ I have been experimenting with different finishes to try and get a more Early American looking finish to my work, and finally, finally have a lacquer based finish that I am super super happy with. Its strong and super smooth to the touch. The varnish I have been using sometimes can feel tacky to the touch after fully cured~ which was just the nature of the varnish...I have been trying to get my finish to look and feel like a hand rubbed and worn finish....and finally, success! I know ya'll will be as happy with it as I am....not to mention the colors of the design~ these are water colours folks!


And if all that wasnt enough to keep me busy... husband decided to throw a new puppy into my day. We lost our beloved Yetti on the 4th of July, and well...I really wasnt ready for another Pyrenees yet....any puppy for that matter. But what can you do~ that wicked little face is so cute. I personally wanted to name him 'White Devil'....because he tears around the house, eats everything in sight...my shoes, the kids shoes....pots, pans...I caught him chewing up tiles from the floor the other day :::sigh:::  ...but alas, his name is Yukon, so everyone~ say hello to Yukon....he wont be little little for long!

Tuesday, May 30, 2017

Workin My Fingers to the Bone

 My Dayes of Frostbite & Sunburns are over!!!

   I have been working overtime double triple and beyond the past few months, and today, today! I spent my first 'quiet time' painting in my new woodshop! woo hooo!!!!!!  For our 25th wedding anniversary, husband bought me a 10x20 Weather King Lofted Barn...well...I should rephrase that...he wanted to get a 30' long and skinny tube of a building....but I have been pining for a lofted barn for at least the last 5 years, and no Sir...I would not give in! As excited as I was to see it being delivered....I also got kind of overwhelmed~ I had a lot of work to do to get it ready for me. 
 As I work now, my embroidery and wood are all in the same areas~ if I have to do any cutting, sanding, planing ect....I have to dig out my equipment, drag it outside, set it up....then work out in the weather...so in the winter I literally freeze my tuccass and fingers off, and in the summer I get the most horrible sunburns!  If its raining, I cant do anything~ so alot of my work sched is dependent on the weather. 
Well....not any more!


  See the dirt to the left of me here under the building....as I am signing for my shop....thats 12 ton of road base that I spread out~ and then my son & I got up close and personal with a 'jumping jack' tamper to get it all level. This stuff is harder than cement once its compacted. 

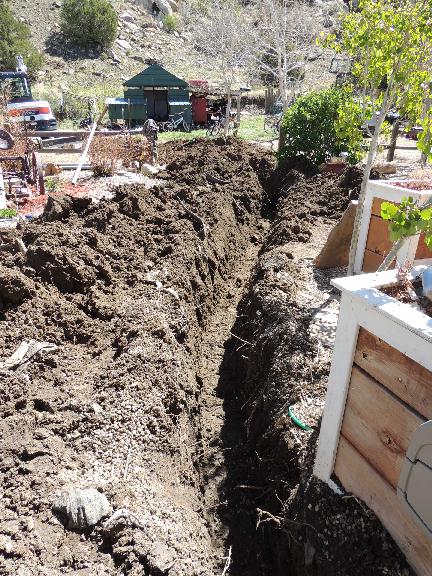
  The ditch for the new electric ...120 feet long and 4 and half feet deep....and yes, I got to fill it all back in by hand...plus another 18 ton of road base I got to spread out over the driveway afterwards...took me over a week...never want to see another pile of dirt for at least a couple of years.  

 Weather King makes awesome buildings~ you can even design your own on their website. I chose the lofted barn with the two big doors, so I can wheel  my tablesaw outside onto the deck when I need to cut something big...and  the two lofts above give me plenty of storage~ one side for wood, the other for all my packing/shipping materials. After the electric was finished, next came insulation.

Peg board wonderful pegboards! I have always loved them~ I can hang all my tools and wood so I can seeeeeeee everything~ oh it will be glorious for sure!

In the midst of working on the shop, I have been finishing up prep for class in August~ 54 pages of step by step instructions back from the printer, ready to go! I really am looking forward to getting all my woodworking things into their own space, so I can get back to having my embroidery out full time, instead of piles of wood everywhere...and I mean EVERYWHERE! 

Things getting messy.....but progressing

Nearly done~ got my work bench made in the center, that I can move around, with benches round the walls

Done and varnished! I have soooo much bench space now~ I can work on cabinets and cases and slate frames and boxes all at the same time~ going to be fantabulous. Shelves round the entire shop to put up all my tools
So I finished yesterday, and was supposed to be moving all the equipment in today....but I am painting on a slate frame and palette set and the shop was just calling to me to sit and paint...so thats what I did. Its so nice and quiet, I can now sit or stand by my window here and listen to my blackbirds and paint....so look for something pretty awesome coming to eBay....after I get my orders finished so I can work on it....you may be able to sneek a lil peek if you look hard in the corner!