Showing posts with label Embroidery & Stumpwork Tips. Show all posts

Sunday, December 22, 2024

Detroit Institute of Arts Sampler Exhibit

 Painted With Silk

The Art of Early American Embroidery

Dec 13, 2024~ June 15, 2025

If you are in the Detroit Michigan area, I hope you will take a moment to visit the Detroit Institute of Arts' current exhibit of early American samplers. It runs through June 15th 2025. The above photo is a link to their website~

Earlier this year, Megan DiRienzo asked me to make a set of Touchable Embroideries to
accompany the exhibit. The main reason was that they wanted people with sight impairments who may not be able to see the embroideries clearly to be able to have something they could touch instead. Many of you know that I have macular degeneration myself, so this was super special to me. 
If you are a stitcher,  you realize how much the sensation of touch is involved in our own appreciation of stitching, no matter how perfect our vision is.....as well as how soothing and relaxing the repetitive sound of the needle passing through the fabric is~ but those that don't may not, so it is super exciting to have something available for anyone to touch!
I worked two identical sets of embroideries so that they may be switched out halfway through the exhibit. 

The curator specifically asked for a house motif. I chose a low-count linen in a neutral tone as a ground fabric in hopes that the cream colour of the ground would not show dirt as quickly as a white one would, and a lower count so that the larger spaces in the weave would allow dirt to pass through instead of collecting on the surface.
The house is worked in DMC cotton thread. 


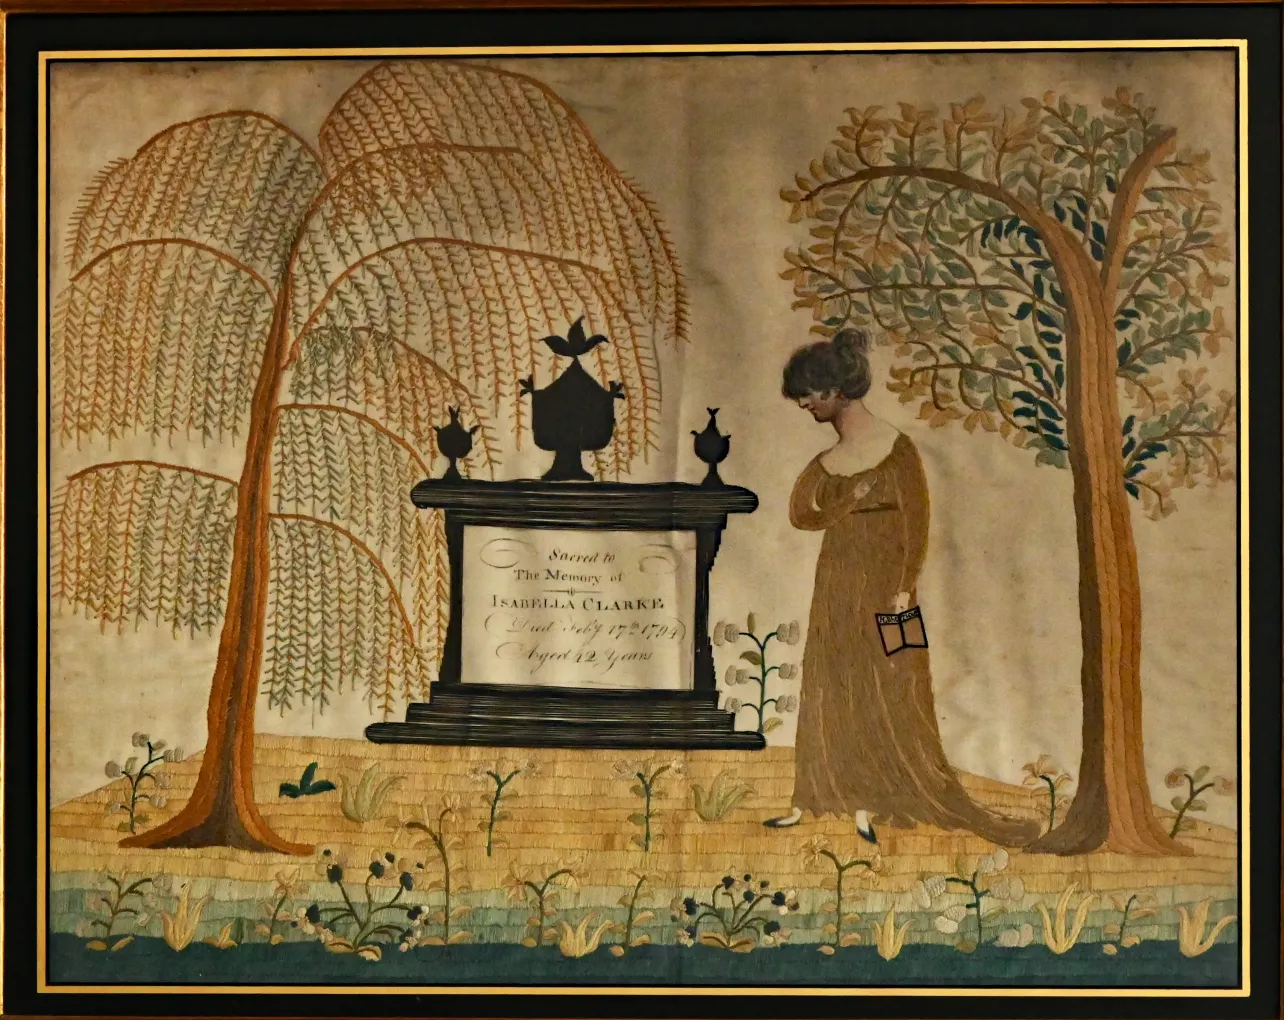
  You may recognize this weeping willow motif~ The Clarke family's 1795 memorial embroidery for Isabella Clarke, shown in the first photo, was my inspiration. It is worked in stem stitch with black perle cotton and really feels wonderful. It was my favorite to pet with my own fingers!

The stitch sampler, seen on the far right in the exhibit grouping above, demonstrates two stitches, satin stitch, and stem stitch. Each stitch is worked (from the top down) in silk, wool, and cotton thread so that the difference in the fibers can be appreciated. 

You can learn more about the exhibit on the Detroit Institute of Arts website~ just click the Isabella Clarke memorial pic to follow the link. 

So after how many years of being told...NO TOUCHING.....and myself telling other folks to NOT TOUCH...
Finally! WE GET TO TOUCH! 

**I hope they keep the samples afterward as a good example and illustration of the importance of not touching embroideries, as I fully expect them to get quite grubby!


Monday, August 21, 2023

What Are YOU Waiting For?

 Time Waits for NO ONE

I finished the front frieze and front panel for my Scenes of Country Life, or Rural Pursuits casket this morning. SUPER chuffed!
I try and post something every day on Instagram...however much or little stitching I get done~ I think there is a link in the sidebar to it. I always get the same messages though....

'Oh, I love your embroidery I need to work on my casket, as soon as I get XXXXXXX finished and some little smalls done'

Is that YOU? Do you keep putting your casket on the back burner until you Retire...or until you finish a sea of endless tiny projects?

Well...let me tell you dearest readers....if you really want to stitch a casket...ya'll got to get on it! 

TIME WAITS FOR NO MAN...OR WOMAN

I will be turning 52 here in a couple of weeks. I used to be fit as a fiddle! No worries...hardly ever sick. Things change. We do not get better with age. PERIOD. Last year could have been my last. year. I am now deaf in one ear. Its hard for me to get up and walk around...I now have macular degeneration making it severely hard for me to see. I see shit that's not even there...and cant see what is. 
I have chosen to prioritize stitching my caskets because they are important to me. You may be one of those folks who love to dream about things and pet their threads and that is enough~ and it is enough if that is your want~ there's absolutely nothing wrong with that. But if you really DO want to stitch a casket....
GET OFF YOUR TUCCAS AND DO IT!
All those tiny little projects you did these past couple of years, could have been tiny bits of your casket. Heck all a casket IS...is a smathering of tiny little projects. Break that sucker down into its components, and just do it! BABY STEPS. Before you know it, your casket will be finished!
I will be starting the final panel of my casket~ the top, here shortly~ hope you stop on by my Instagram to check it out and let me know what you're working on!
HAPPY STITCHING!!!


Sunday, August 13, 2023

Scenes of Country LIfe Casket Progress...And

 Some Notes on the Importance of Stitch Direction

 The time is flying by~ I spent most of July in Washington State visiting my family there, so not much time for stitching. I am back at it now, working the front frieze, as seen at the bottom of my frame above. Because of the number of panels I have drawn on this piece of silk, the size is too large to comfortably reach the top of the frame, so I have to stitch it upside down...I don't recommend it. Shadows change, and stitching that looks one way upside down, may not look the same right side up, so if you are in the same situation, be sure to check your progress right side up frequently!

 As always, I work all the flat silk stitching first, then will go back and add gimps, then other things like silk-wrapped purls, etc. If I have silk-wrapped purls on a piece, those always get put on last as they are terrific thread snaggers. Especially when using flat filament silk that is so beautifully shiny, thread direction can have a huge impact on the look of the finished piece. Most 17th c satin stitch elements were stitched with the stitches running vertically. Colour choices and shading would add the details.

 If one looks at the finer long & short stitch pieces, you will find the stitch direction flows with the elements themselves~ for example, hair. An entire head of hair can be stitched with just one colour of thread, but by changing the stitch direction within curls etc, the stitches themselves create shadows and movement.  Look closely at the stitch direction of my birds here. Stitches that echo the curving design lines will help to portray a rounder more dimensional object. See how flat and boring looking the cherries are next to the songbird? I have chosen to work the flowers on the frieze in straight satin stitch while using long & short stitch on the creatures for more details and contrast.

 Don't be afraid to mix stitches within an element. I have used both satin and long & short stitches on the turkey


Rarely are 17th c pieces ever just one type of stitch~ whether it be a single panel, or an entire mirror or casket. I like to think of them as samplers of all different kinds of stitches and techniques~ so if you want to use a pile of different techniques, GO FOR IT! It will look amazing!!

Happy Stitching!!

Friday, April 28, 2023

Scenes of Country Life Casket Progress

 AKA the What Was I Thinking Casket....

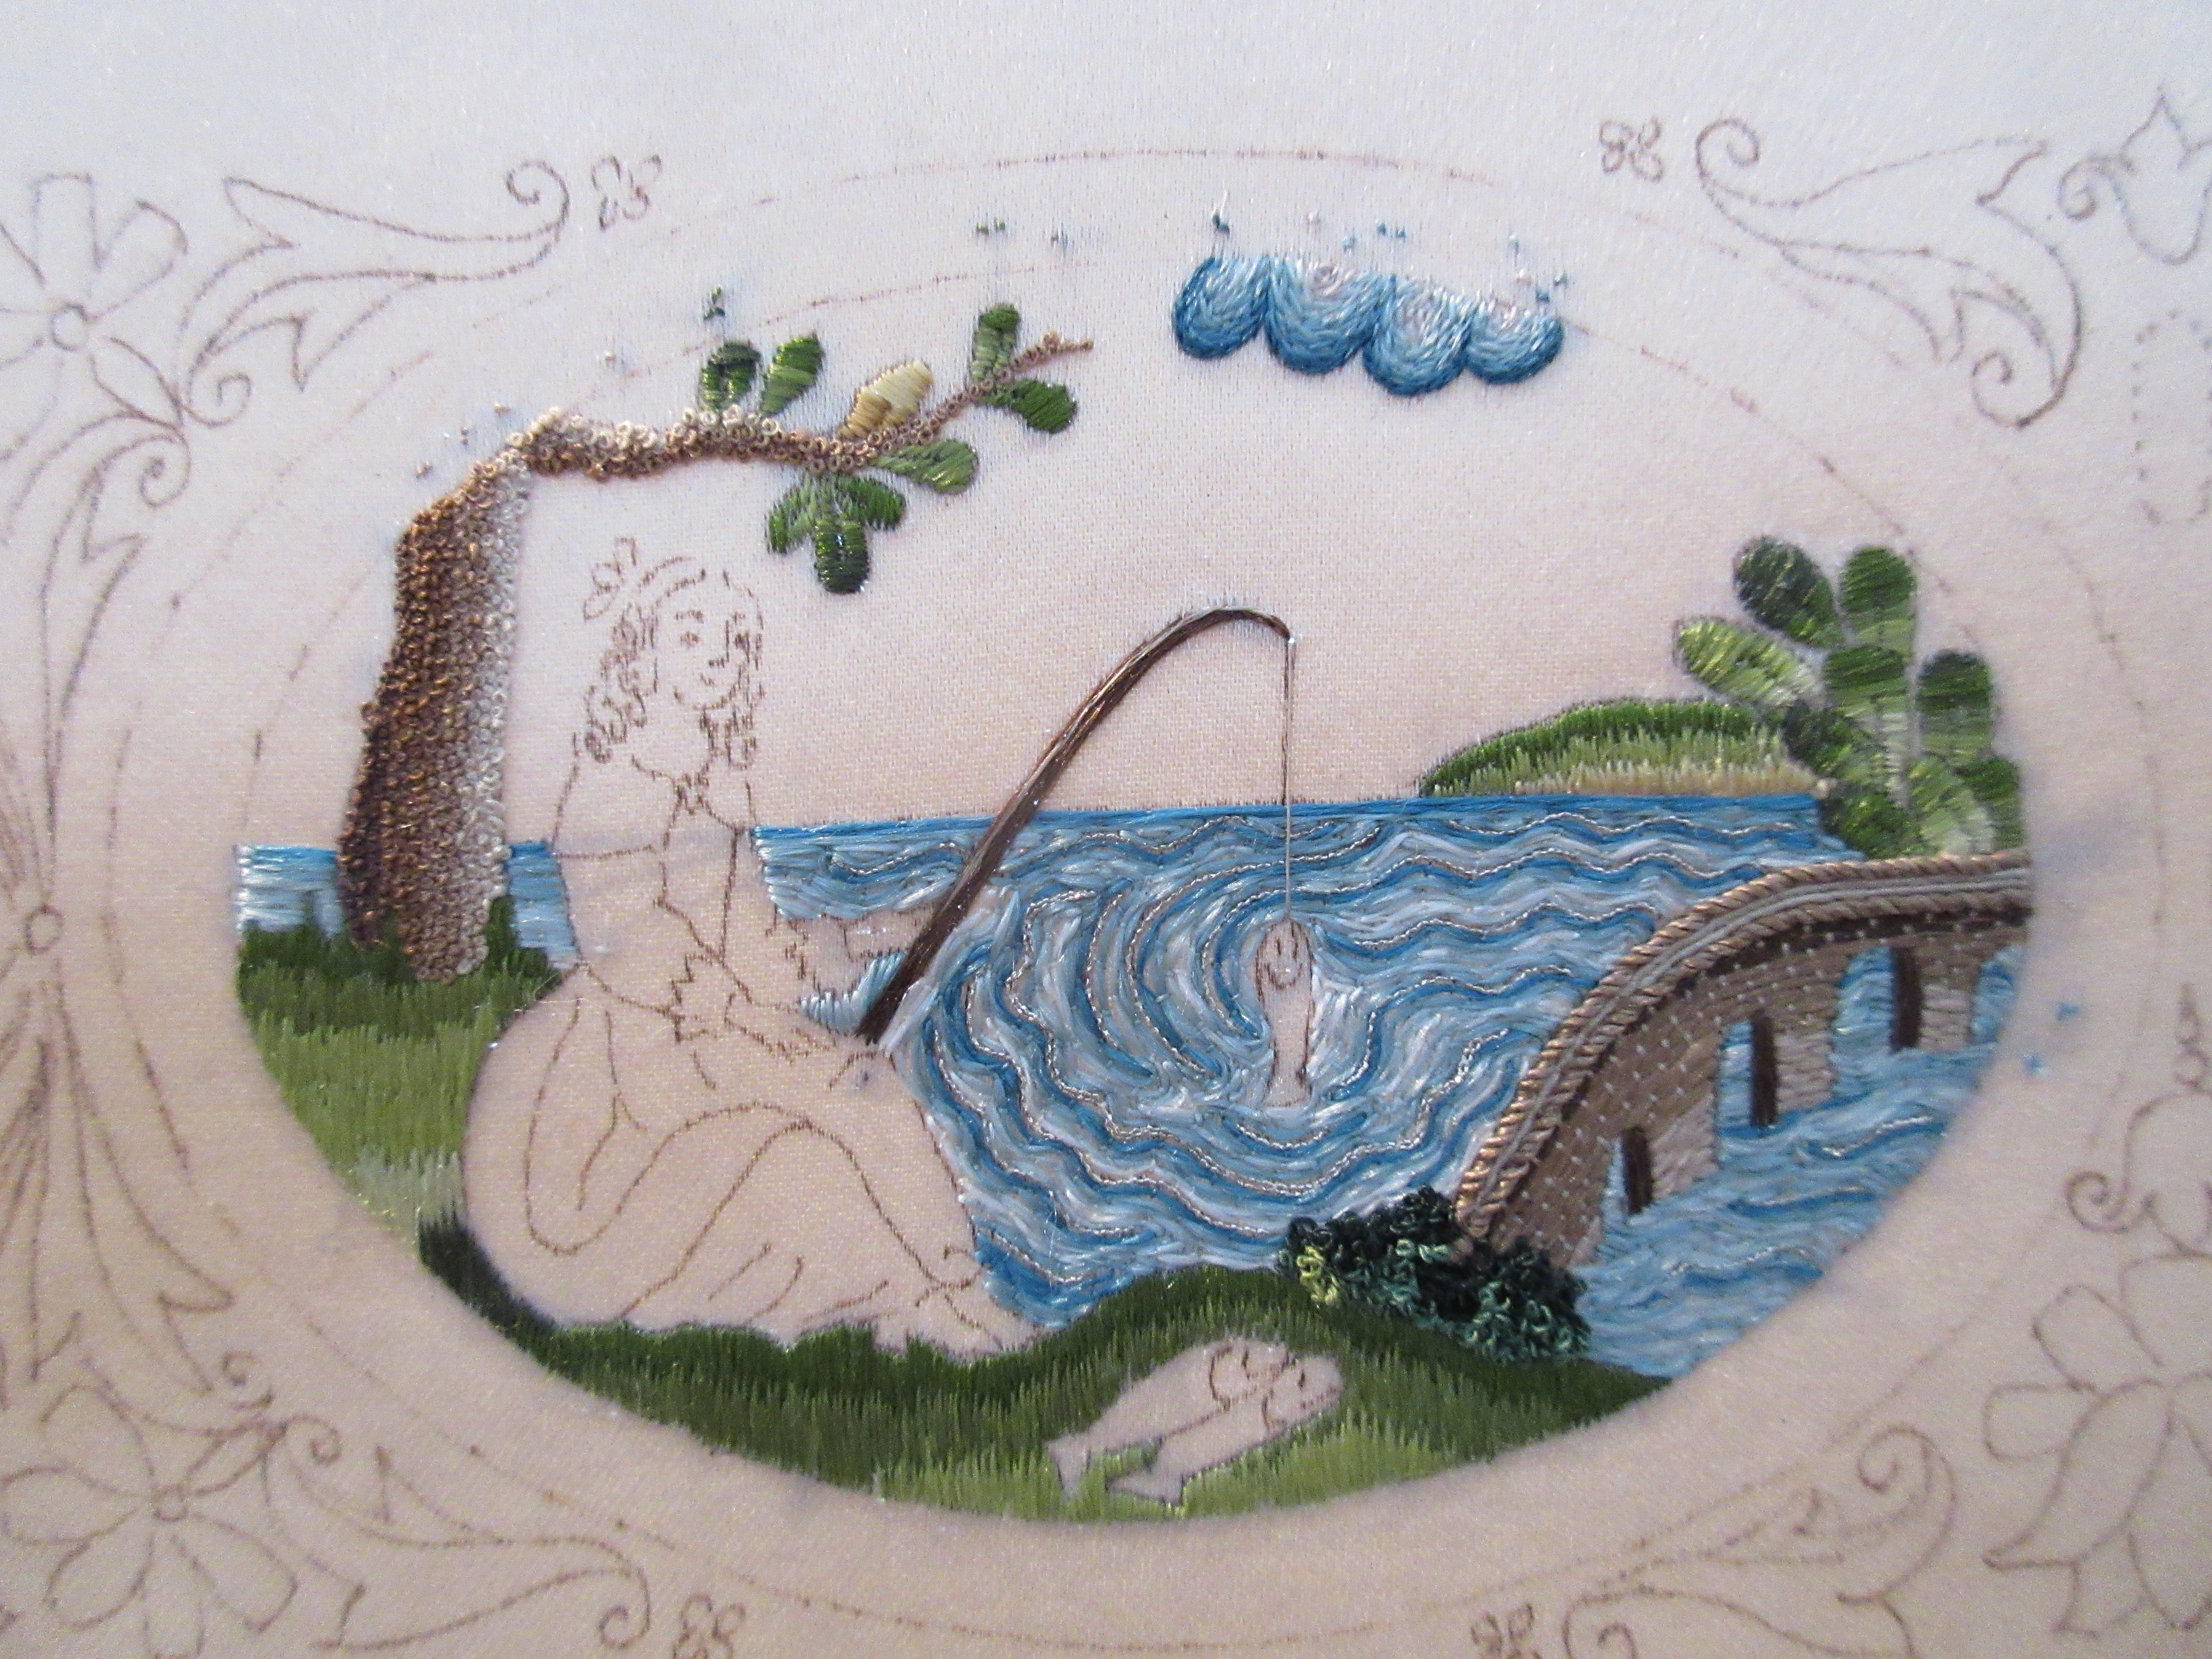
I have had such a large workload in the shop I haven't had much stitching time. Well, I probably have had a good amount of stitching time, but struggles with my health have prevented me from being in the happy zone that allows me to stitch. I am soldiering through hoping I will bump into my former self sometime soon. I have just three panels left on this casket, the front, front frieze, and top. I am working the front panel next, which has a smaller cartouch scene on either side of the front keyhole. I try to post on Instagram at least once a day, and if you have been following along, you will already know why I am now referring to this casket as the What was I thinking? casket. If you have no idea what I'm talking about, let me offer you this advice. Just because you can draw it that small, doesn't mean you can stitch it that small! This panel is an ode to my many days spent fishing for supper as a child...didn't like it then, don't like stitching it now. I started with the background~ the tree trunk is several hundred French knots in 4 or 5 shades of brown, I can't remember off the top of my head (probably blocked it out)


After the trees, I stitched the bridge, the water, the fishing pole, and the fish. The fish were a nightmare in themselves. I had always planned on using some microscopic metal spangles for the fish scales~ TINY, less than 2mm in diameter... I stitched them on the fish and they were way too huge and hideous, so the fish got worked in satin stitch, which I actually really like. But I wasted at least 3 days stitching dinner plate sized spangles onto microscopic fish and then unpicking it all off again because my brain would NOT let go of wanting to use them. 
Then came the ladye & my descent into HELL

I can fit this entire scene into the palm of my hand...and I have pretty small hands. I am not holding a giant pencil...nope, this is a standard size pencil eraser. It looks HUGE compared to her tiny face. 

I ended up stitching her face and unpicking it THREE TIMES before my final fourth try(which is just ok). This is her second face. I call this one the burn victim. Poor girl. HORRIBLE.  So I will remind you that I have macular degeneration....on top of having to wear regular glasses cause my ass can no longer SEEEEEEEEEEEE.  It is beyond frustrating. My first try was satin stitch...didn't like it so I thought I would stitch directionally. My eyes were tired, sooo tired. I have to have magnifiers on and even then, I am trying to focus and what I am focusing on will literally just disappear from my vision. Its gone. nothing, and I have to start all over....then maybe the lines of stitching will literally move, right as Im looking at them, and Im not moving. Enlarge this poor thing and say a prayer for my eyes, please. She didn't look that bad really, until I took a picture and looked at it on the computer. OH MY Golly. What the heck happened!? These stitches couldn't come out quick enough~they took forever to unpick cause they are so small. 

I put this picture on because I took it to show the fourth try at her eyes...not bad~ again though, it went all down hill from there. The only reason I did not unpick it and try again was that the ground fabric just could not handle another unpicking (neither could I)

I chose some really great taupes for her gown, purple but not too purple. I really wanted to give her a yellow dress, but who in their right mind goes fishing in a yellow dress??? At this point, I am hoping that the gimps will relieve some of her massive homliness. Enter Hell 2.0

What a person wants to use and what is available are not even close to the same thing when working at this scale. I used Jenny Adin Christie's Very Fine size gimp for her gown, which actually came out really nice. Thanks to my guardian angel for having mercy on my soul and letting her have just the colour. Now traditionally the hands and hair and face would have also had couched gimps for the defining details....but not here. Everything I had was too big. For her hands, I used  HALF of a single PLY of soie ovale. (first, separate a strand down into six plies, then separate a single ply in half~this will grant you entry to Hell 3.0) 

 No gimp currently on the planet is small enough for her hair...nor silk-wrapped wire. All too huge. I finally ended up digging through my silk-wrapped purls, finding the tiniest one and straightening it out. I like her hair a lot actually, as long as I don't look directly at her face shes great. 


 So here is the finished fishing panel, and now I am on to the milkmaid panel...Lord help me her face is HALF the size of this one.

Tuesday, February 21, 2023

Casket Side Panels Finished!

 No Glamorous Spaces Here


I often get asked what my stitching space looks like. I am usually a pretty organized person, I'm a Virgo so I do like everything to be in its place. When I am 'creating' though, things tend to get pretty hectic. We are always bombarded with pictures of Women's creative spaces looking so clean and glamorous...I personally don't know a single person whose space looks like those in the magazines. In case yours doesn't either and it bothers you, don't let it! This is a picture of my stitching counter, you can just see the corner of my slate frame in the bottom left there.  

See, I usually set aside January for doing my business tax papers....but doing so takes up my entire counter. I used the excuse that I would work on my stitching in January, and start my tax papers on 1 Feb. Well.....I was so close to finishing this current slate frame worth of casket panels, that I convinced myself that it would be a total waste of time to clean off my counter for tax papers, and then have to set everything else back out again. I mean. LOOK at it. I got EVERYTHING I need, right where I need it. It looks like a huge mess to the untrained eye, but it's what I call my 'working mess'. I stand to stitch, and everything I need is right where I can grab it.  You don't even want to see my doll room when I'm working on a doll. Just, no.

Anyways, I am also a numbers person and keep track of everything. I know how much time is WASTED getting stitching things out, and then packing them up again. Just think how much stitching you could get done in the time it takes you to set up and break down your stitching area every time. So this is my tip of the day for getting some serious gains on stitching progress~

Make yourself a dedicated stitching area. It doesn't have to be an entire room. Or an entire counter. A side table, the top of a dresser....just someplace you can have your stitching at the READY and not have to haul everything to and fro all the time. Portable rolling carts are great~ keep all your stuff for your current project in there, and then when you want to stitch all you have to do is roll it aside you. You may be surprised how much progress can be made with just 20 or so minutes of stitching a day!

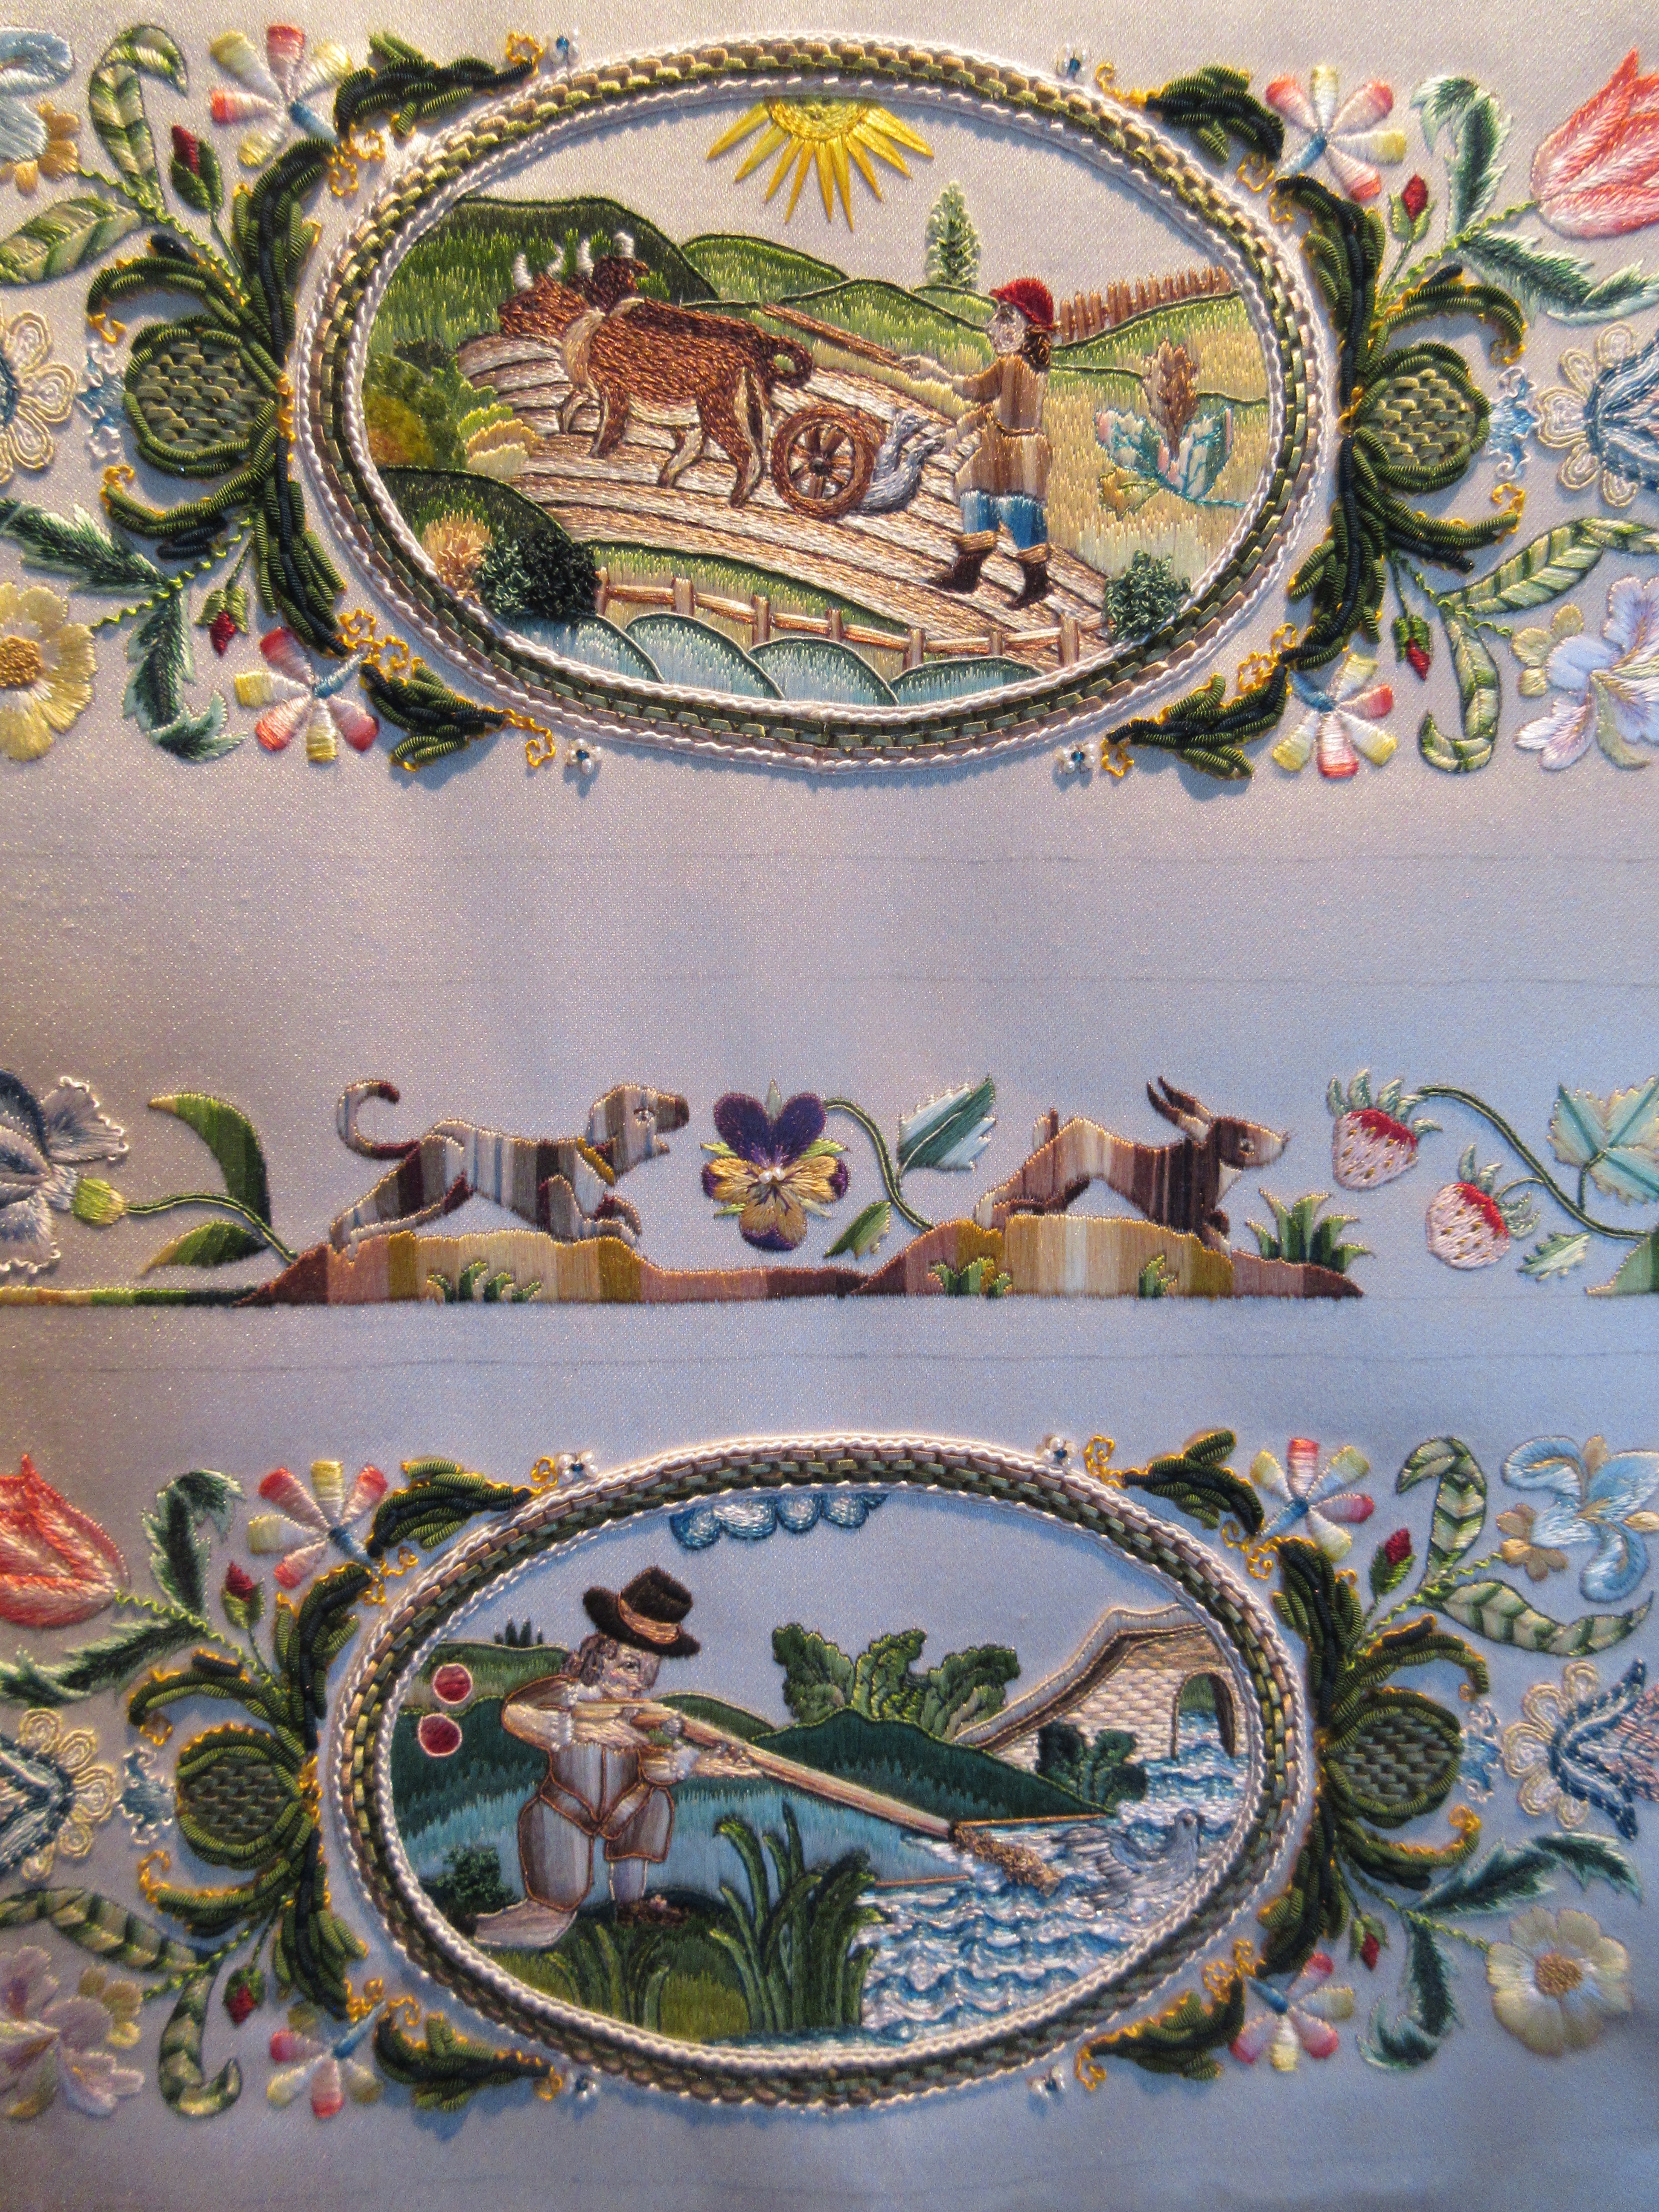
Speaking of progress, yes! I have progress to share on my Scenes of Country Life or Rural Pursuits casket~ WOO!


I actually 'finished' them twice LOL. Above is a picture of the first time, with the original configuration of the silk-wrapped purl flourishes. Up close they looked good, but from across the room, they looked like a sideways crab or spider clutching onto the cartouche! It kept me up at night, literally. HUGE design flaw for me. I wanted the ovals to be within the center of a block of stitching....not hovering between two crabs in a rectangular negative space. So while I was sleeping I thought of all sorts of things I could do to remedy the situation. Just leaving it was not an option for me. What I decided to do was to make the one-sided flourishes into leaves. I drew them in with a pencil first, as can be seen in the bottom half. Then couched yellow silk over the lines to match the rest, as seen in the top portion. I just needed to get the rectangular angles out of this white/negative space of the ground.

A few silk-wrapped purls later, and bam! YES! Finished for the second (and LAST) time!  I am very happy with them now. 

I have now cleaned off my counter and started my tax papers like a good girl. This slate frame is ready to get cut up and glued to the casket, but I am saving that for when I get back from a trip to Colonial Williamsburg. Cant wait to see them on the casket!

Did you stitch some today???! DO IT!!!!!


Saturday, January 21, 2023

Spring Flowers in a blizzard

 Progress on my Scenes of Country Life, or Rural Pursuits Casket

If a person was to have a look at my ort box, they would think there was massive progress on this tiny little casket... but not really! Everything is just so tiny...I really have to make grand efforts to scale down my threads in order for things to still look delicate like I want, and not huge and clunky


 It is somewhat disappointing how long it takes to stitch such a little thing. Maybe I'm just a super slow stitcher? I am working the flowers around the scenes now. Most are long and short stitch with either just one or two plies of Soie Ovale...or a micro fraction of a strand of Soie Perlee.  One must get inventive with the tools available...see Soie Perlee is made from flat filament silk like Ovale...it is a twist of three 'plies'...but if you look further once you get those apart, you will note that each of those three plies, is each made up of three plies...it can be maddening really.

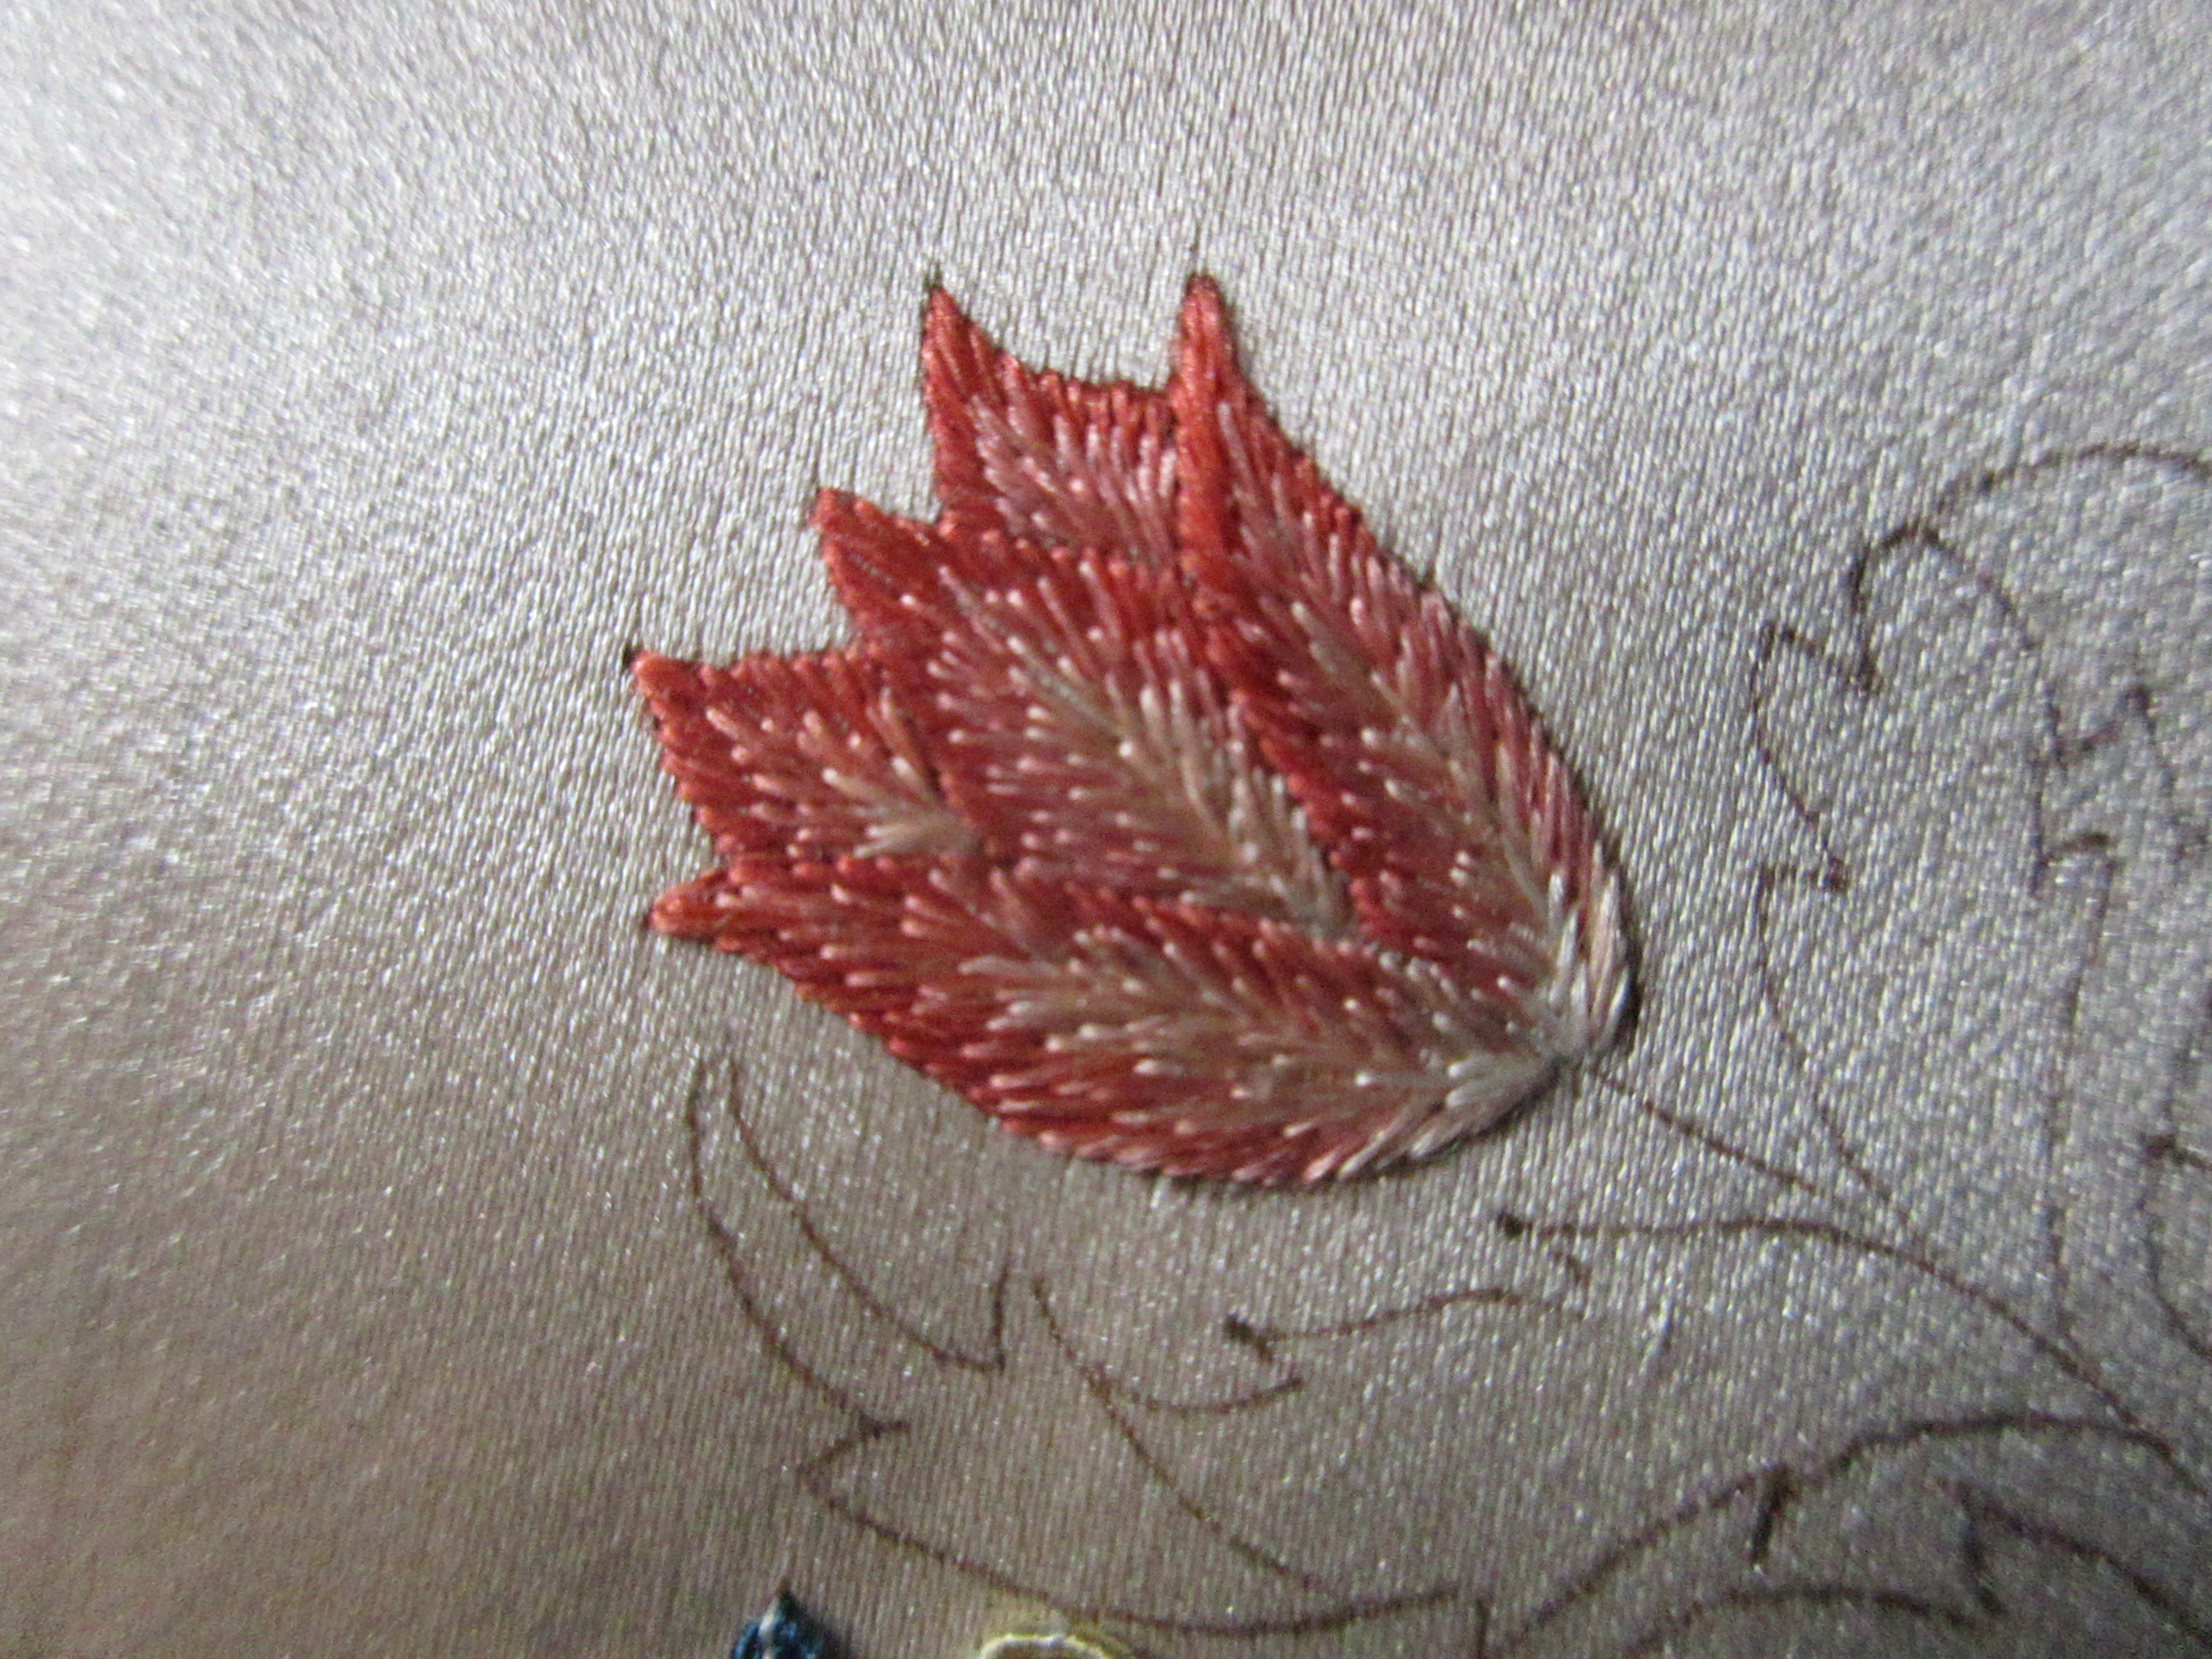
 Here is a peek at what I have named the Devil's Tulip. I had to work four of them on the two panels I'm stitching now, and have another three I am very much not looking forward to doing on the front panel when I get that far... I have several sizes of gimp on my table to pick from, but sadly the smallest size that would have been perfect was not made in the colours I wanted to use...so I had to use a larger size, much too big for the scale of the flower but I used it anyways. There was a million starts and stops, they are really just an absolute nightmare to stitch.

After the Devil's work, I had to redeem my spirit with a couple of regular pretty little happy pink tulips


Last night I worked this little iris. I like it. It's tiny, fits under my thumb, and no, I don't think I have very large thumbs. I am saving all the foliage for last. I have one more iris to work today, I can't decide if it should be peaches or purples...I keep going back and forth. I have the corresponding friezes drawn on above each panel, so I am able to make sure the colours below will complement the colours that will sit above it. It's currently blizzarding in southern Colorado, for us, really the first measurable impactful snow other than a dusting, of this whole fall/winter season. I don't really care for snow anymore, it gives me great anxiety, so its the perfect day to concentrate on spring flowers and NOT look out the window
Happy Stitching!


Friday, December 30, 2022

Happy New Year!

 Details ....Matter!

I hope you had a wonderful Holiday season! My surgery went well and I am ready to bid adieu! to 2022 tomorrow. Life has been a rollercoaster for me this year, but it did not fling me off entirely, and I hope that I can now get on to happier times in 2023. I wish EVERYONE happier times in 2023. I think often of my friends in Ukraine~ Oleksii & his family in Kiev, and Marina in Kharkiv. Oleksii is a marvelous shoemaker, he can make you anything that will fit like a GLOVE~ he made my 17th c shoes for me. Marina is a dollmaker and sells on eBay, in this horrible wartime post from there can take about a month to reach the US, but the wait is well worth it, and they really need our support. It is horrific what they have to live thru each day, and I hope you will visit the links I have provided. 
One of my goals for 2022 was to finish my Scenes of Country Life casket. That did not happen by a longshot, but I am more than thrilled to be able to say it is a goal for this next year. I have managed a little work on it though, if you want to follow more closely, do check my Instagram, as it is easy to post daily pictures there of when I get something done!
Anyways, on to what I want to talk about today, and that is details. If you wish your work to come out neat and tidy in the end, it must start with neat and tidy lines in the beginning. I chose to work this casket all in flat work for a few reasons. While I really love the look of it, I absolutely hate satin stitch. This casket is smaller, so I figured it would be perfect...less stitching. Well truth be told, the simpler something is, the harder it is to hide mistakes. The smaller something is, the more challenging it is to execute well. I gave myself a double whammie and didn't even realize it. Everything about this casket is challenging, very challenging.
So, back to details....check out the grouping of leaves in the first photo. I have finished the satin stitching. 
 
Now check out the same with the addition of tiny veins being added. It makes so much of a difference!

These little scenes are tiny....2x3" roughly...for the entire scene. I am using near microscopic threads to work near microscopic motifs. Behind the head of this pencil, is a dove!

In the original 17th inspiration piece, the foul was a duck. When I was drawing out this panel, I really wanted a grouse here, as we hunted grouse a lot when I was growing up. But, the space was just too tiny. I certainly could have drawn in a grouse, but I wouldn't have been able to stitch it so that it resembled a grouse afterwards, so a dove it became. 

Flat silk work is usually the base layer of stitching on a stumpwork composition. All the fun bits then get stitched on over it. (Some folks skip this step altogether and do not work the shadow stitching depicted on 17th pieces.) The detached needlelace pieces and other fun bits can be used to cover up any areas that got out of hand, or we as a stitcher, just plain dont like. NOT SO if one is working a flat silk piece. It is not entirely satin stitch as I had first planned. I did want some interest and have given myself permission to use a select few stitches that are not satin stitch, but they still must all remain flat to the surface. If you study 17th c pieces, you will actually notice that background, even in a satin stitch piece, is many times long & short stitch. Above is my hunting panel after all the ground work has been finished. It still does not look finished though...


For a proper finish, there must be gimps applied! It is easy to go hog wild and want to put them everywhere, so one must pick and choose carefully. What do you want to accentuate or draw the eye to? That is where the gimp does its job best. I didn't want my strawberries to get lost in the hillock, so I chose a light pink gimp to line them with. They bring back memories of finding a sunny spot on the top of a mountain to eat lunch at after a morning of hunting...and picking the wild strawberries at my feet

Happy Stitching, & I wish Everyone a Happy & Blessed New Year


Saturday, December 11, 2021

Floss Tube Finer Finishing Tips #14

 Gluing A Finished Panel Onto The Box

So.....you have laboured for perhaps years on your embroidery and it's finally finished. All that is left is to glue it onto your box or casket. Easy right? You may be surprised to learn that the majority of folks I know when they get to this point, they panic. Some don't even get as far as opening the glue pot, just the thought of glue on their embroidery is overwhelming enough for them to stop and make the thing live unappreciated in a drawer for the rest of its life. 

I am here as a calming voice to assure you, it's really NO. BIG. DEAL. 

Take a deep breath, gather your tools, and watch this week's YouTube video on how to do it below!


Each panel is glued on in the same way, one at a time, no matter what you have worked onto the panel itself. It could be cross-stitch, crewelwork, stumpwork, or beadwork...no matter, they all go on the same way. Come on back next week for a fun video on choosing trim!


Friday, September 03, 2021

Boxes....

 Think Outside the Box....


Pomme & I made a video to give you some box tips if you are looking to mount your embroidery. You may need look no further than your refrigerator!  I have already got asked who the dollies were in the end, that I was too far away for yaĺl so peek at them, so here they are. My daughter wanted to make dollies last fall so she came over and I made these two. Watch the video to see what I used for their boxes!
This is Agnes with her Ravens

And Full Moon Party.. she is named after my favorite tea!