Showing posts with label Finishing Tips. Show all posts

Friday, May 02, 2025

Do you have one of These in your stash?

Have you Always wanted To embroider a 17th c Style Fancy Mirror but dont know WHERE oh WHERE to Start???
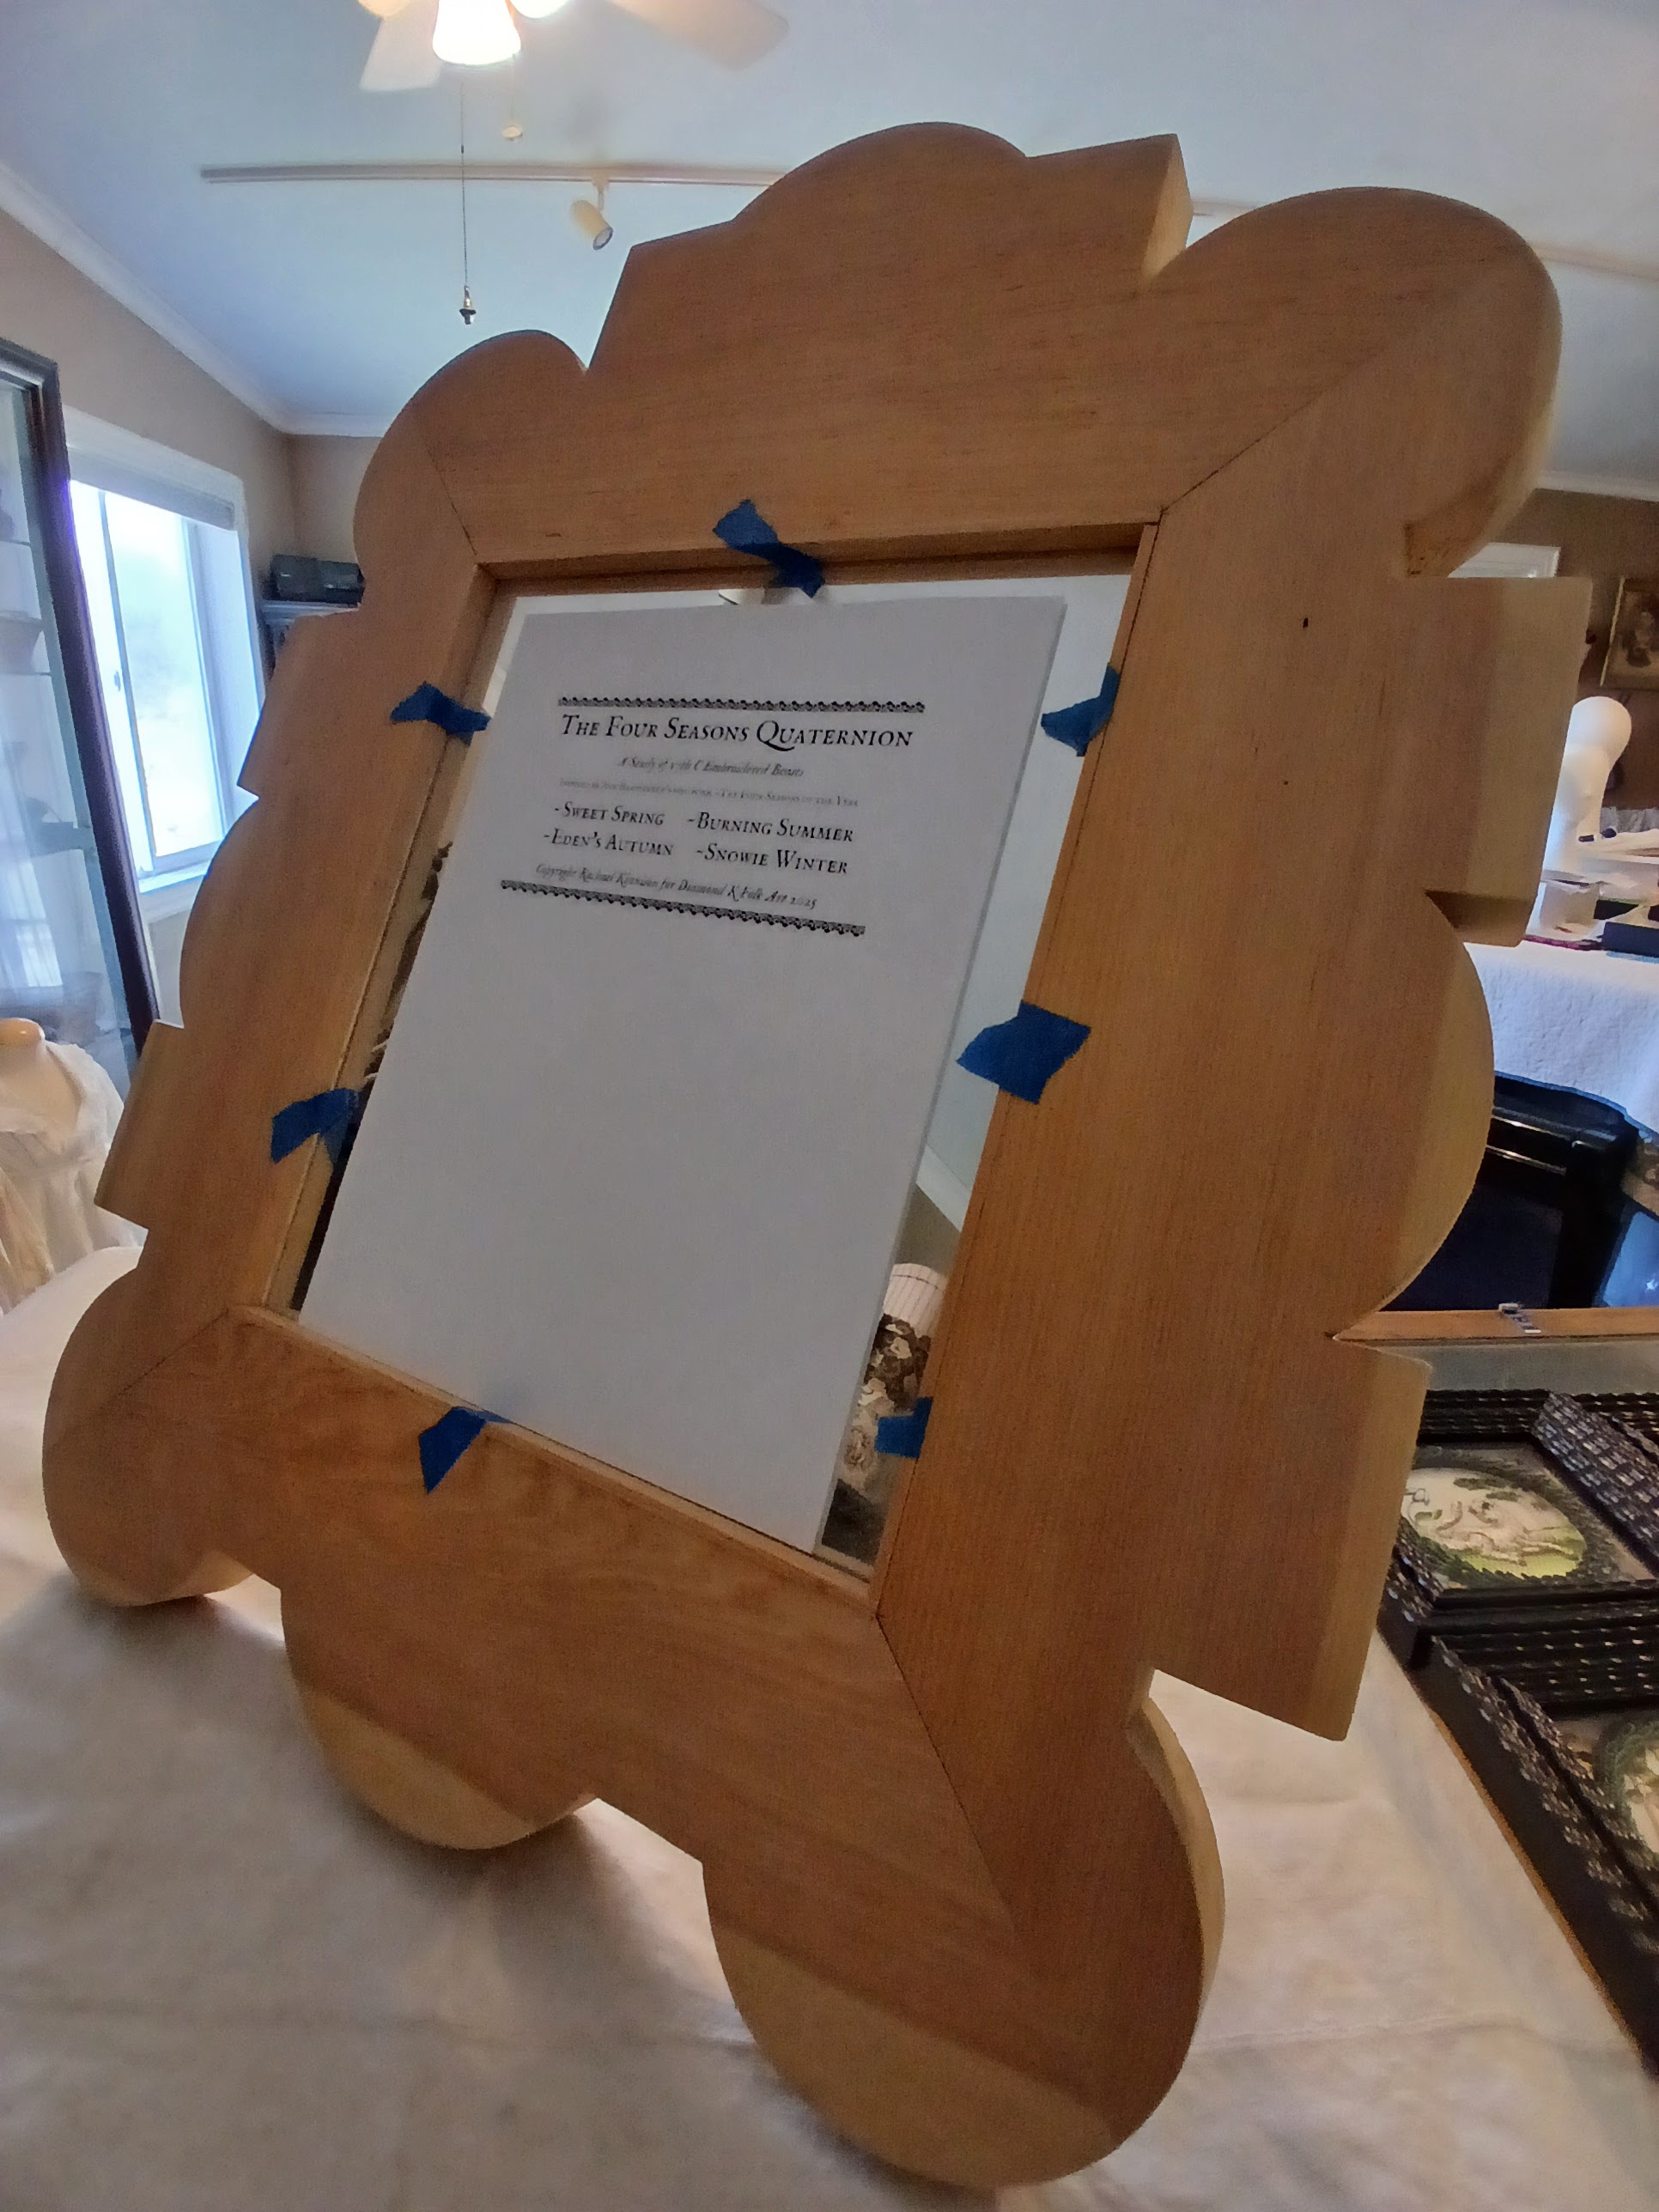

 Are you one of the many with a Thistle Threads Fancy Mirror Frame base sitting in your stash collecting dust??? You had every intent and dream of a beautiful embroidered mirror gracing your favorite space, but got stuck for whatever reason? Maybe the thought of coming up with a design was too overwhelming.... or you don't have a slate frame big enough??? 

Well my friend~ my Four Seasons Quaternion Class may be just what you need to make your dream a reality!

 Several students in class are currently working on their Quaternion pieces to mount onto a Fancy Mirror Frame. When I was designing the pieces for class, I specifically sized them to fit the Thistle Threads Fancy Mirror, just in case anyone wanted to do just that. They are super versatile~ they can be stitched and mounted separately, in pairs, or as a group...they can be incorporated into a box or casket design, and they are a super GREAT way to kick start your Fancy Mirror journey!

 No~ the frame does not come with class. If you don't already have one, you can buy them on the Thistle Threads webstore. But if you do have one, I will show you in class how the cartouches can be incorporated into a mirror design~ as you can see above, they really do fit perfectly! There is enough space left around them to accommodate the traditional tape trim that usually edges the mirror.  

Will I design the rest for you? No, I wont. BUT...I WILL help you with your design, and guide you through the finishing. ....

Which brings me to another point~ I will also share with you my ideas on finishing a mirror in steps~ like a casket. You don't have to have that huge slate frame to work the entire design at once. I'll teach you how to break it down into small, easily digestible pieces so that you can mount and finish your mirror in steps!  

If this interests you, you can learn more about my Four Seasons Quaternion Class here

There are 11 Spots in the fully kitted class remaining.
Class just started on the 15th of April, and its work at your own pace anyway, so you won't be behind. If you want to join us, we would love to have you!


Friday, December 17, 2021

Floss Tube Finer Finishing Tips 15

 Things to Think about when Looking for Trims for a Box or Casket


Happy Friday! I hope you are having a great stitching week...or perhaps getting ready for a great stitching weekend. I will be at a craft show with Pip all day tomorrow, so my usual Saturday video is a day early this week. The only thing left to share of the making of my little Dome Top Casket is how I apply the trim, but before I get to that, I first wanted to have just a little chat about the trim itself, and what you should take into consideration when searching out the perfect trim for your own project. 

Check back next Friday to see how I apply the trim to the box, and then on Christmas Day I'll post a video of the finished casket. I cannot convey enough how much fun this little project was and that I hope it has inspired you to continue on your own project, or maybe even start up a new one!

I do believe this is the first peek you will get to see at the completed Gum Worke~ if you like it and want to learn how to do it for yourself, I will be having a class starting in January~ just drop me a line to rlkinnison@yahoo.com to get on the mailing list. 

Saturday, December 11, 2021

Floss Tube Finer Finishing Tips #14

 Gluing A Finished Panel Onto The Box

So.....you have laboured for perhaps years on your embroidery and it's finally finished. All that is left is to glue it onto your box or casket. Easy right? You may be surprised to learn that the majority of folks I know when they get to this point, they panic. Some don't even get as far as opening the glue pot, just the thought of glue on their embroidery is overwhelming enough for them to stop and make the thing live unappreciated in a drawer for the rest of its life. 

I am here as a calming voice to assure you, it's really NO. BIG. DEAL. 

Take a deep breath, gather your tools, and watch this week's YouTube video on how to do it below!


Each panel is glued on in the same way, one at a time, no matter what you have worked onto the panel itself. It could be cross-stitch, crewelwork, stumpwork, or beadwork...no matter, they all go on the same way. Come on back next week for a fun video on choosing trim!


Saturday, November 20, 2021

Roll with It

 Dome Top Casket Progress...

Do you ever feel like you are on a roller coaster that won't stop? Lately, I have been desperately trying to get off the one I am on but it never slows down enough for me to leap out. Every time I turn around it seems like it's time to go to bed and my to-do list is not even half-finished for the day. Maybe the sun is on the same schedule? It goes to bed around here by 5pm.  IF anyone has any hints on how to s-l-o-w  t-h-i-n-g-s d-o-w-n a bit, I would very much appreciate it. 
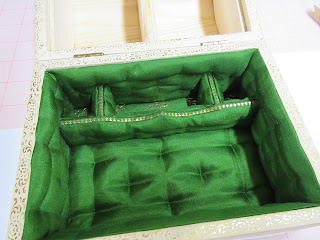
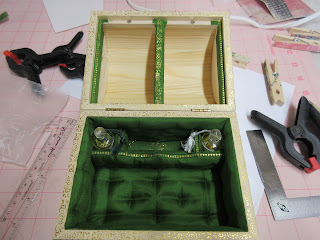
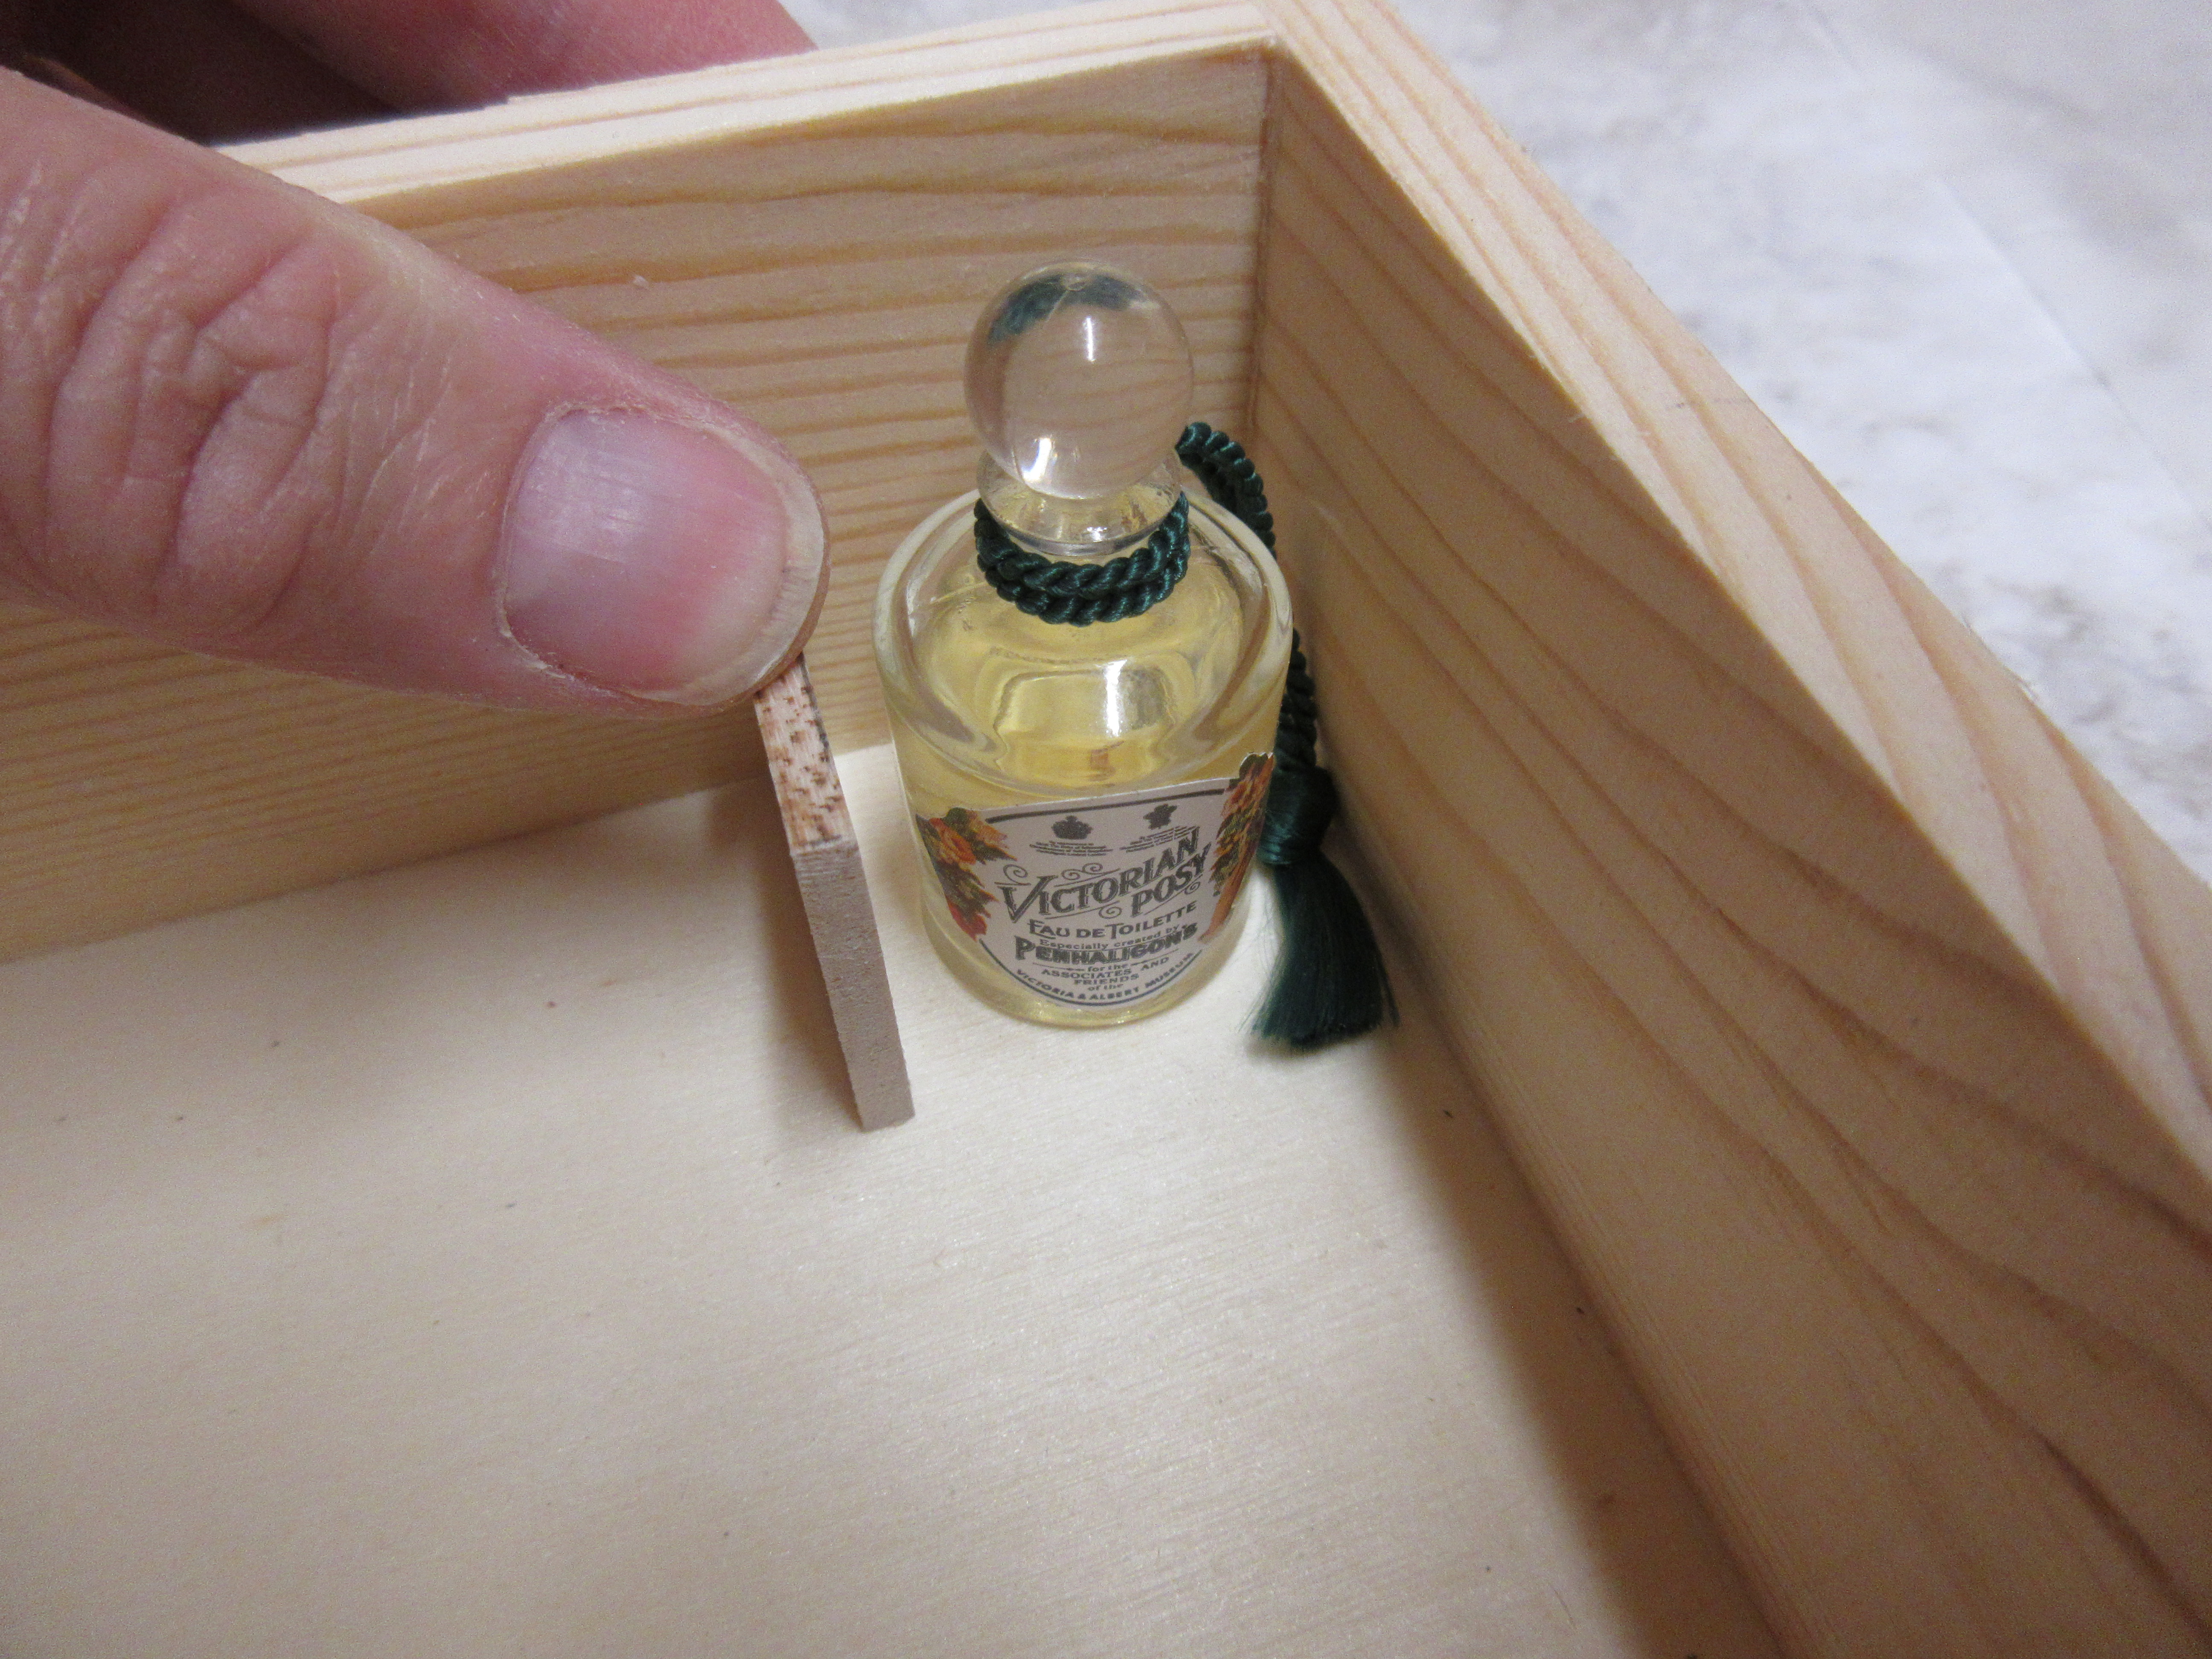
The Dome Casket flew together and I am so happy with how it came out! In the line of progression for today's Floss Tube Finer Finishing Tips YouTube series, I am continuing to prep for the embroidery of the interior doors. What you don't see in the video is the finished padded interior, shown above. Isn't it the most gorgeous shade of green?

 I have a list in my head going of interior colour schemes I want to do, and this green was high up on the list. 


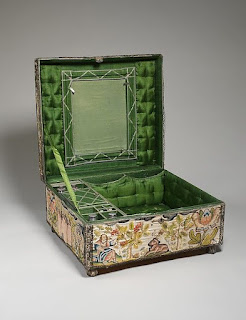
I have always admired the interior of this one at the Met Museum, shown above. Click that link to go to the Museum's page to really check it out! It was the inspiration for my padded interior, except with gold trim. I love my tiny little Penhaligons bottles nestled so snugly into their cubbies. Who am I kidding, I just love padded interiors....and if YOU love them, well I may just have the class you have been looking for coming up soon! It's not a project class in particular. It will teach you the skills to make a padded interior to fit any shape or size box you can dream of! If you think that's something you would be interested in, just shoot me an email (rlkinnison@yahoo.com)to get on the mailing list, I am hoping for a January 2022 start!

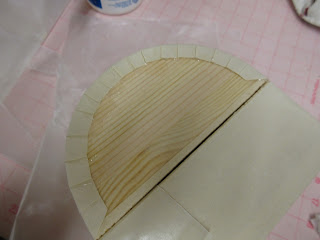
Just a quick tip today showing you how I roll the glued paper onto the surface of the silk to glue it on. I use this rolling method for gluing finished embroidery panels as well. Along with the Yes! Paste, one will get no bubbles!

Wednesday, November 10, 2021

Things You NEED to Think About....

  Before You Know You Need to Think About Them....


I was editing videos for my Dome Top Casket series on YouTube today and think that this next tip is just too important to wait until Saturday's usual post. Today's tip is about when to transfer your embroidery design onto your ground fabric. If you plan on mounting the embroidery onto a particular size of something...or the finished size of your embroidery needs to be exact for whatever reason...today's tip is for you! The easiest way for you to not have to cut into that glorious embroidery you just finished because its now magically too big for its intended spot is to watch today's video tip!!


Saturday, October 30, 2021

Dome Top Casket

 Time to Paper the Outside!

Ahhh a pretty clean slate ready to cover with the embroidery or decoration of one's own desire. Are  you following this little casket's progress on You Tube? I hope so. I have come to realize that I think I love the finishing just as much...perhaps maybe a little bit more, than the embroidery itself. Well...maybe not, but they are a close tie. There are so many possibilities..if you have a lot of ideas and find it hard to pick one, well ask somebody else to choose for you and you can do the rest on other boxes! Above is a picture of the finished exterior papering, which is the focus of today's two videos. 


Yep, another two video day today. My camera angles are weird. Yes, I know. Sometimes Im out of the frame of view...Yes. I know. I am just me. It would be great if I had someone to hold the camera and follow me around and zoom in and out...but I don't. Just me.....and YOU, there in the camera coming along for the journey~ I do hope you enjoy and can take away a few little tips here and there to help in your own making ups.

I will be launching my own Thinkific Online Academy soon and will be offering some really great online classes that will include downloadable detailed finishing courses. So until then, I hope you enjoy today's two part video on exterior papering

Part 1~


Part2~


Saturday, October 23, 2021

Finer Finishing Tips #7

 Wrangling That Paper!


Happy Saturday All! I hope you had a great week. If you are following along with the progress of my little dome top casket, this week's video is a birds-eye view of cutting the exterior paper before gluing. Everyone says matter of factly to glue paper on the outside of the box...but they don't really go over how to wrangle and cut that huge expensive sheet of paper. If you only have one or two sheets, it can be intimidating...especially if you are afraid of making a mistake and wasting it! 

Have no fear, Rachael is here to help guide you through it! As always, I do apologize for the angle of the camera in today's video. I changed it to an above view so you wouldn't see the back of my elbow like last week, but along the way, I think I knocked it out of alignment. If you ever had aspirations of being a bird and seeing what they see, well just imagine you are an inquisitive woodpecker hanging upside down on a tree branch while I'm wrangling this paper!

I wanted to share the photo above to show the finished fold-over of the paper on the lid. This is what can form the halo I talk about in the video. 


Saturday, October 16, 2021

a TWO video day today!

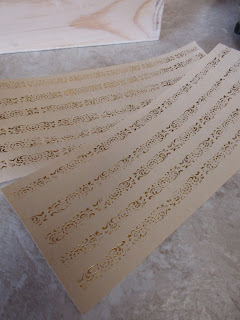
 Gilt Stamped Edgings


It's time to finally start to paper my little dome-top casket.  I wanted to bring you all along with me so turned the camera on real-time as I applied my edgings. Before you write and ask me if I make and sell stamped paper edgings, the answer is no. Not at this time anyway. I have a list a mile long of things I need to get done~ I do link on one of the videos today to Talas where you can find a plethora of beautiful brass finishing tools, papers, and foils to make your own though. A pretty edge treatment doesn't have to be just a stamped paper though, it could be gilt with gold or silver leaf, or a pretty marbled or otherwise fancy paper!

 
Today is a two video day because the battery in my camera died partway through, and  I am still trying to figure out all this YouTube stuff. I have no idea how to put two videos together, and honestly, it is not in my brain capacity currently to try and figure it out. There is a hideous closeup of my elbow that I am both warning you about and apologizing for at the same time. I would have cut that out, which I know how to do, but I was talking at the time so all I can offer is, to just close your eyes for a few seconds!
I am planning on some very in detail interior finishing classes in the near future, so if you like what you see and want to dive into greater detail, just comment here or drop me a line at rlkinnison@yahoo.com and I will put you on the mailing list for future classes.


and Part 2....


Saturday, October 09, 2021

Time for another Video!

 Finer Finishing Tips #5


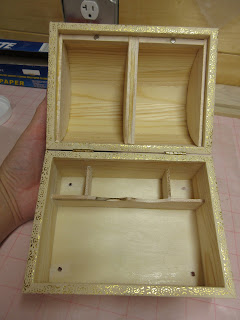
This week flew by in a minute. I have been somewhat ´in the zone´ working on my dome top casket and can't believe it's time for another video already. In this week's episode, I will show you how to deal with the challenge of a deep set hinge, as shown above, when prepping for papering. I will also go over the reasoning behind why we cover a wooden box with paper before mounting embroidery to it. I think there's a little glue talk in this one too. 


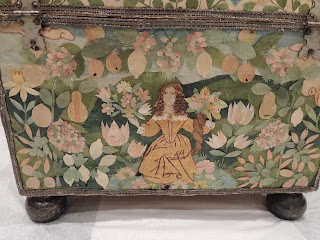
The casket I mention in the video is one of my favorites and can be seen here. This is one of the caskets that I studied the door construction of and used to design my original configuration of the hidden compartments that are in my flat top casket lid so many years ago. One of the things I love about it, aside from the hidden pullouts that are in the slope, are the covers or doors on the top of many of the inner tray compartments. I think you will really love my interpretation of some of them on the dome top box...coming up in a later video, so check on back!

Saturday, October 02, 2021

Finer Finishing Tips #4

What's Happening with that Dome Top Casket??

When I open a box my mind is filled with visions of what could be. To me, an empty box is like a huge playground, and I get to decide what rides I want in it! 

Do you have a special something...or somethings that need a place to live? By place of course I mean, a box! The something could be a bottle of perfume..but it doesn't have to be. Your something could be a piece of jewelry, it could be a rock, a special pair of scissors...some antique needlework tools...

When you are blessed with an empty box in front of you, just sit and have a cup of tea with it...ponder all the things it could be. Let it speak to you. If it tells you it wants to hold that special something you have, well then, you can make a dedicated special space just for it!

I am not good at keeping secrets for very long, so by now a lot of you know that this casket is a showcase for my beloved 17th c Gummed Silk technique I have been working on.  I thought that I had linked in my last post to the beautiful Gummed Silk Casket at the Dallas Museum of Art, but I didn't! So sorry! Click on the photo below to go check it out, it really is amazing. Flat photographs just do not do the silk justice. As one moves around it, the light catches the fibers differently and the whole just takes on a glow like no other.


You can check out my latest tips for making partitions in your 'box' below~


Happy Stitching!


Thursday, September 23, 2021

Finer Finishing Tips #3

  Dome Top Casket Progress...


So as you can tell, I have changed from referring to my little inexpensive Amazon dome top box as a 'box'... it is now a casket. I am really having a lot of fun just tricking this thing out! Above is a little peek at something going on the INSIDE~ do you know what it is? It is a 17th c technique called Gummed Silk. You may remember that I taught this quite a few years ago at the SouthWest Get Together. I have always loved this technique and have studied several different caskets that were either entirely covered in it or had bits and pieces. I have been refining and changing my technique over the past few years and finally am getting consistent results that I am happy with. I will be offering an online class teaching this technique soon~ if you are interested and would like to get on my email list for info, just drop me a line at rlkinnison@yahoo.com. 

The next little video for the Dome Top Casket project is up on my YouTube ~ or you can view it here. Hope you enjoy and come back to follow the growth of this super cute casket!

Happy Stitching!


Tuesday, September 14, 2021

New Finer Points of Finishing Tip Series

 Come Along....

I get so many questions on Embroidery Finishing that I have decided to run a small You Tube video series on the subject, FlossTube Finer Finishing Tips.  We spend so much time on our embroidery, years and years even, and then expect to mount said embroidery on a box in a weekend. NOT SO.  Just as much care should be spent on finishing as the embroidery itself. A great finishing job has the ability to elevate a mediocre embroidery...just as bad finishing can make the most elaborate and expertly worked embroidery look horrible. 

I will be having some finishing classes in the future, but hope that until then, you will join me to follow the transformation of a cheap wooden pine box (under 10.00 USD) purchased on Amazon. I will try and post a new video every 10 days or so. The second in the series is below:

I am not a scripted person, and I don´t make notes. What you see is what you get. When I get my arm stuck in glue...you will probably too. My camera angles need work. I am not a skilled cinematographer...but I think you will enjoy the videos and maybe pick up a few tricks to use in your own finishing~be it a stumpwork casket or mounting a cross stitch or needlepoint piece to a cigar box. 

As you will realize through this series, a box need not be expensive to offer a spectacular, unique finish for your precious embroidery.