Friday, March 30, 2018

Good Friday &

The Cristal Baschet

How many of you have heard of a Cristal Baschet? It's a fabulous water and glass instrument~ for me, in the same family as the Glass Armonica, or Hydrocrystalophone invented by Benjamin Franklin in the 1760s. The cristal Baschet is not that old tho, it was invented in the 1950s by the Baschet brothers in France. Glass rods are stroked with wet fingers to produce deep rich vibrating tones. I hope you all have a Blessed Easter, and enjoy this beautiful video~ one of my favorite French composers, Erik Satie, on an amazing French Cristal Baschet.

Wednesday, March 21, 2018

For Ye Visual Types......

Making Linen by Hand~
Some years ago I posted here about the long process of making linen. The other day I ran across the following video from the Monreagh Heritage & Education Centre at Carrigans Village, County Donegal in Ireland and thought all you folks would enjoy a visual to go along with my description~ because there are some things, that words just cannot express. There are a couple of differing terms in the video~ ie, what they refer to as  'Crimping', I refer to as 'Braking',  and their 'Brushing',  I refer to as ''Combing'~ but other than that, its all the same description of a long, skilled, magical  process.
Enjoy~

Friday, March 09, 2018

Back Home!

Spring in Williamsburg, Va
   I just got back Tuesday morning from a wonderful trip to Colonial Williamsburg in Virginia. The weather, even with the bomb cyclone, was just wonderful~ the cherry trees and Japanese Magnolias were blooming~ makes me pine for Spring.....here in southern Colorado, everything is still in a winter's coma.  I went to attend Chris Berry's 17th c raised work embroidery class 'Curious NeedleWorks'~ if you have a chance to take it, do it~ it is fabulous.  I stayed with my bff Sharon and arrived a few days early to take in Agecroft Hall and all that is 'Colonial Williamsburg'. Visiting the Historic Trades was my favorite~ I could watch them work all day long, every day...  above is a view of the back of the Governor's Palace, from the gardens.

  Of the zillions of pictures I took, this one, I think, is my favorite. There is nothing like the view thru wavy glass~ small glass panes like this were made by blowing glass into a cylinder, then cutting the ends off, cutting one side and then rolling it out flat.

 The Shoemaker was fabulous and a favorite of mine

  Another reason for getting your butt in a quick jiffy to the Dewitt Museum in Williamsburg is the 'Printed Textiles' exhibit. To say it was ultra mega extraordinarily fantabulous is an understatement. 

 Both clothing, and home furnishing printed textiles are on display~ there is no publication accompanying the exhibit, so if you want to study these pieces, you have to go in person~ and yes, take all the non flash personal use photographs you want!

 Several dolly houses are out on display as well~ the little tuck combs always a favorite of mine

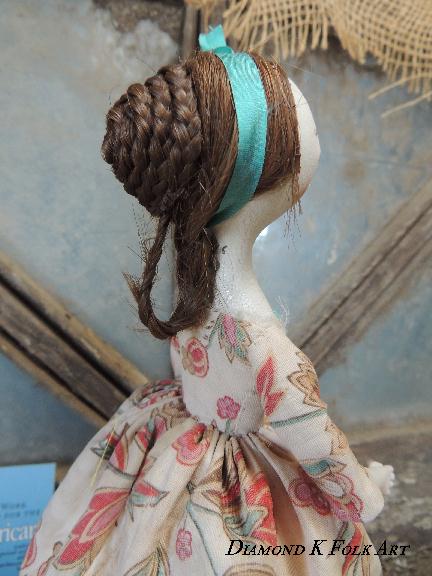
 So of all the trades, if I had to pick a favorite...it wouldn't be the shoe maker's, which is strange, as many shoes as I make, and as much as I am absolutely infatuated with early shoes....nor would it be Sarah Hunter Millinery Shop....as much as I like to sew & study antique clothing.....the Tailor's was really fabulous, and came in a close second to the Wig Maker's....oh my golly. I died and went to Heaven in there! Many new techniques were learned and I have a zillion ideas sprouted in my head for dollys who simply must must must have hair!

 Chris's class was just fabulous~ it starts simply enough with detached buttonhole and before you know it, you are working up & down buttonhole, trellis, ceylon, and all sorts of knotted buttonholes~ I had worked regular detached buttonhole before, and was worried that I would get behind in my stitch samples as I have never worked any of the others before(tho I have studied them for years), but she explains them so completely, and in such a way that I think a newborn baby could work them if they could hold a needle. Because you work your own samples, you know how the stitches work, how they interact with others around them, how they look from the back and from the front, loose tension, tight tension...how they look different being worked with different threads....it was just a fabulous course and I highly recommend it to both novice as well as advanced stitchers.
  Before heading out to the airport, I stopped by the Bakery and they had just pulled out two pans of ginger cakes~ I had room enough in my purse for one piping hot bit of deliciousness.... so note for next trip...get a bigger purse.

 I wasn't even home a full day and zoomed down to Albuquerque to pick the bead palette for next year's classes at Bath Textile Summer School....yes...you read right~ class~'es'....I will be teaching a short 3 day workshop on working a little bunny in a cartouche on a ground fabric, and then another 4 day workshop on a large bust, similar to the one on my casket lid~ but this year, we will be using modern beads, so students will have the option to purchase my bead palette, or bring their own colors!

Sunday, February 18, 2018

Top Panel Finished At LAST!

 5 Months of Work....
 It's official! At 12.35 pm this day, I cut the last thread on this panel and called it finished! I seems like it has taken forever to work~ I looked back in my notebook and I started it on the 18th September, so 5 months to the day it took me to start it from start to finish.  After the angels I worked both the large Tudor roses at the bottom...I used gilt milliary for the edge of the petals to give them nice sparkle, and to match the pink and gold colors on the inside of my casket.

  The cartouche came after the roses~ I finally decided to work the entire thing in loupes~ I was thinking perhaps four bow like areas of them, with flat rows of beads in between, but wanted it to look 'lush' so went all out making little beaded wire loupes for eons and eons..... 

  I am getting ready for a needlework seminar at Colonial Williamsburg this next week, so practically no time to stitch for me.... so when the power went out I threw such a fit my husband went and brought me one of his Coleman lanterns~ there was NO WAY I was going to sit in the dark and do nothing.....

 Aside from the great amount of heat it put off....it was enough light for me to work the cartouche....I spent the night hoping it would look as good in the daylight as it did in the dark.

 Once I got the cartouche finished, there was just two things left~ first to attach all the bits and bobs collected in my little box...wings, and angel sashes.... and then to make and attach the garland that goes around it

  I added steel cuts to the wings and like how they sparkle, but no too gaudy....

  Butterflies got their wings~ I like this picture because it shows how dimensional the stumpwork stitching is

This past week I worked on the twilled leaves for the garland, and today got the garland made and attached~ I left this picture big so you can click on it and enjoy all the little details!

Monday, February 05, 2018

My Flat Top Casket Progress

Working Thru....

  I havent posted any progress on my flat top casket for a while because well, there hasn't been much progress to share. I was working on the angels when my Biskie got hit by a car, and I have felt so much guilt that he should not even have been outside  ect ect...that it has been very difficult for me to even look at the angels, let alone work on them. A few minutes was all I could muster before I would get overwhelmed and need to go do something else. I have dreaded working on them....not to mention, the what seemed like zillions of feathers were terrifically boring and they just kept going on forever and ever. 

 I would make a couple of feathers, put them on...make a few more~ they are all different sizes to fit the drawing I made. Once they were on, angel finally got her hair....because I had to work the hair before I could put the head of the wings on

  Once hair was sufficiently full and flowing, I added the head of the wings to cover the bottoms of the feathers. At this point I was still dreading every bead, knowing that I had a whole second angel to work

 This was the angel I was working on at the time, so I have left a gap in her feathers, a missing one, for my precious lil guy. When I finished her feathers, I was anxious to work her hair and finish her wigs so I could just be done with them, finally.
I have a ton of work to do getting ready for next years Bath Textile Summer School, (I will be teaching two classes), so my thought train was as soon as I finished the angels, the cover was going over this panel for a while. I knew if I didnt make myself finish the angels, 10 years from now they would still be unfinished...but something unexpected happened when I got second angel done. It was like a huge weight was lifted off my shoulders, and looking at my lid panel...I was excited again. There's not that much left on it actually...

 Suddenly I found myself madly pawing thru my beads looking for colors for the two large roses at the bottom of the panel, and before I knew it, I had chose two sets of colors and was enjoying trying to figure out which ones to use. My son suggested this red, which I liked, but didnt have enough beads of that color, so this petal got unpicked and I went with shades of pink to match the roses in the friezes.

Yesterday I finished one of the roses and yes, I am excited for this panel again! One more rose like this, a garland and the cartouche border and thats it~ I already have all the detached elements for the bugs finished, just have to put them on when I get the cartouche border done.

Tuesday, January 30, 2018

Girl or Boy?

 Paletot or Tunic?


Would you know one when you saw it? I thought I would share this piece with you all, in hopes that perhaps you will think twice the next time you quickly assume that A~line post Civil War era 'dress' you are looking at is a girl's paletot (generous fitting overcoat). There are several clues straight away, when I saw the photo above, that immediately told me this was a tunic or boy's jacket, rather than anything for a girl.  Do you see the belt? Obvious clue number one....girls 'usually' did not wear a belt over a paletot, not this early anyway...(to the mid 1870s they did wear belts over their elaborate overskirts).
Do you see anything else? Obvious clue #2 is the asymmetrical front~ if you see a bodice with asymmetrical front, you should hear a little voice on your shoulder screaming boy boy boy boy! 

   Of coarse obvious clue #3 is the trousers.....but what if your piece is not still matched with its original trouser bottoms? The above silhouette I have seen time and time again in period displays misidentified as a girl's dress or coat.

  Adding the belt, one can immediately see the change in character of the entire ensemble

 Even boy's clothing of the 1860's used an enormous amount of fabric to obtain the fullness of a period correct silhouette.

 This is a excerpt from the Butterick & Co engraving ~Spring & Summer Fashions of 1868. I love group engravings as they show the difference in dress for different  age groups at the same time....(and for same reason I love early 1840-60 class photos)
Young boys would first wear dresses, then as they aged, would go from knee length trousers to pants ect ect..
One can see a slight resemblance to our fellows suit in the yellow one in the center above

 The boy in blue, in the center above, shares elements and details with our suit~ the pointed waistband on the knee length trousers, and the asymmetrical design on his shirt.  One rarely comes across an exact match in an engraving, but there are enough detail matches to firmly date our little suit to the 1868 period.


The little fellow who once wore this suit was from a prosperous family~ one need only count it's 36 matching  gilt brass buttons.....18 on the top, 2 on the belt and another 16 on the trousers~ the cost alone at the time for just the buttons would have been more than what some folks made in wages for a month.

The front of the trousers have 2 cute functional pockets that match those on the jacket. There are no fastenings at all on the waistband~ it would have originally buttoned onto a shirt.

The seat of the trousers cut full for nice range of motion (you had to squat to play marbles after all....)...and all those buttons, save for the last one at the knee, all are decorative.


Folks say boy's clothing is so rare, when actually, there is just as much out there as girl's clothing....it's just misinterpreted. 

Wednesday, January 17, 2018

on eBay this week~

Marida, a One of a Kind Queen Anne Dolllye

  If you would like to say hello, or perhaps place a bid, she is on eBay this week here