Monday, May 30, 2016

Museum Monday!

c1855-60 Child or Dolly's Chemise 146.2002.14
 Today's Museum Monday lucky number is 146!  A quaint little girls white cotton chemise, entirely hand stitched in minute little stitches. There are 5 Clambroth glass buttons around the waist, for a petticoat to be buttoned on to.
 It has several really neat features, the hand stitched ruffle around the neckline and sleeves is marvelous....there are underarm gussets with reinforced bands under the arms..... ( pictures I left large so you can see the tiny stitches).  One cannot say for certain if this is a small girl's piece, or if it was made by a girl for her dollye~ which was quite common, to give the girls practical use of all the stitches they had been taught at girl's school.  The stitching on these pieces is always immaculate, tiny, fully hand worked. There are usually embroidered initials to go along with~ a young ladye would perfect her stitching in miniature for dollye, before she was on to larger things for herself or others.
 What I would like to focus on, for this post, is the one aspect of this chemise that is not hand stitched. The simple strip of whitework embroidery down the center front. Its attached with perfect tiny stitches....above is a picture of the back of the embroidery. If you are ever in question if an embroidery is hand or machine made, one need only examine the back. You can click on the picture to enlarge it, and note the carriage of the threads is in the exact same place on each reoccurring motif. Of coarse it also helps to know when the first embroidery machine was made~ 1829 by Joshua Heilmann to be exact.  He sold his machine to the Swiss, and by the 1850s, machine made embroidery was all the rage, having put hundreds if not thousands of cottage industry workers out of work.  And when I say machine made embroidery, don't automatically think it was crude....not in the slightest. It can sometimes take an expert eye to discern a machine made embroidered piece from a handmade one.
The process was not exactly simple either...above is a postcard c1905 of workers at an embroidery machine. The man sitting on the left is tracing the embroidery pattern with the long arm, which in turn transfers the design to several sets of needles that embroider the motifs at 1/6th the size of his pattern template. I dug around and found a video of the last Schiffli machine in use, by the Manchester Metropolitan University ~ its hard to tell, but the fabric is what moves, the needles are stationery.  By the 1860s there were literally thousands of these machines in use~ one can only imagine the noise!!!


Saturday, May 28, 2016

Happy Memorial Day


Proud to have served my country, and  proud that such kindred spirits watch over the graves of those who have given the ultimate sacrifice. I encourage you to cut an extra vase of flowers, and put on an undercoated veterans grave at your local cemetery this Holiday

Thursday, May 26, 2016

My Flat Top Casket

Slithering along at a snails pace.....
  There are snails everywhere on my casket, I love them! Each frieze, and in just about every panel they can be found....it was really hard for me to not design an entire frieze of sword wielding snails, battling the iconic evil knight and winning.....but alas, my casket is a violence free zone.....there will be no severed heads dripping with blood....no dismembered bodies floating in the sea!  It is amazing how s.l.o.w. it can go tho....even for me, who enjoys not rushing! Its ridiculous to even think about how long the two snails took me on the front frieze...forget 'a snail's pace' ...I was traveling at a negative snail's pace for quite some time....I worked several partial shells for color study....it was terrifically hard to pick colors that I liked....or I liked the colors, but then they didn't look good worked up. I had a vision in my mind of how I wanted the shells to look....and Oh. My. Golly! they just would not cooperate. They thought they could get away with being cheeky and I wouldn't unpick them....but alas, I spent 3 and half hours one afternoon unpicking a hideous shell. Added padding.....worked a shell....nope, still not right! To say I was absolutely aggravated was an immense understatement. These little blasted shells were not going to defeat me....( and yes, sailor in me came out on more than one occasion! ...^#^$@)*#&$^*&$(@*&#!!!!!)
 Perhaps its a sign from above....or maybe a warning...that the entire casket will resume at a snails pace...or maybe even slower...but that's O.K. I suppose...they were really a challenge for my mind to comprehend how each little spiral and swirl was formed, and now that I have them finished....my dapper fellows.....I don't think the other ones will be as cheeky....at least I hope not....and since I used up all my pretty blue beads on these shells, I wont have to try and figure out what color goes with this blue! Victory!!

Monday, May 23, 2016

Museum Monday!

c1805 Girl's Crimson Gown & Spencer Jacket 213.2003.46

 Today's Museum Monday lucky number is 213!  I never tire of revisiting this gown and it matching Spencer jacket.  If you have been a regular blog reader you may remember it, but if not~ here is a more detailed post, gosh, almost 8 years ago!  Enjoy!

Thursday, May 19, 2016

Take a Step Back....Take Time....

Take Joy

  While working on my casket this week, I have spent hours in quiet reflection....literally, hours. But this is me, this is how I enjoy my sewing~ its not so much the end product to get finished all of the sudden and stack up on a shelf....but more of the doing that I enjoy. It's not that I think I am old fashioned...I know I am old fashioned....and thats not a bad thing. I see it happening all around me...every day...everyone is in such a hurry. Why? What ever happened to enjoying life?  Life as in....every second of every day? Weather doing the dishes or digging a hole or stitching? What is the point of zooming around like a chicken with your head cut off....being a nasty person, pushing... shoving...to get where?  I have come to the conclusion these people have no happy place.
 Life has gotten quick! One can mail a letter to the other side of the world and back again in 24 hours...need to talk to someone ...just call them~ nearly everyone(but not me!) these days has a cellular phone and has obviously no problem talking wherever they are at...news happens one second and the next everyone knows about it. Quick hurry~ we need to go here or there~ zoom here or zoom there....come on~ hurry hurry!
It makes me sad. The children hate it when I have no TV days....when I make them sit at the table to eat supper....ahhh what happens??? No shows? No mindless dribble streaming from the electronic babysitter in the living room? What happens...we all sit and talk and end up having a nice time.

  Stitching to me is no different. Why do it if you don't enjoy the process? Stitching can pass the time when you are bored.... or when you are nervous or even upset about something....but its more than just passing time. Stitching can teach you things...about the fabric and thread of coarse...if you listen...but it can also teach you things about yourself. Unknowingly, we put all of our emotions into our stitching~ and weather we like it to or not, they show up again in the finished piece. Did Michelangelo hurry to paint the Last Supper in a weekend??? When you see a piece that speaks to you~ do you hear a voice in your head that says...'wow', that must have taken alot of time....I could never have the patience for that'....My answer to you is...sure you do! When I stitch, I am truly in my happy place, and spend my time remembering my early days learning to sew with my Great Grandma, my Mother, my Aunty Becky.....I also look at embroidery like a huge puzzle, full of tiny little pieces that each have their own way of going together. I enjoy the process. 
 I think, if more people took the time to slow down, and enjoy their process, whatever it may be, the world would be a much happier place.

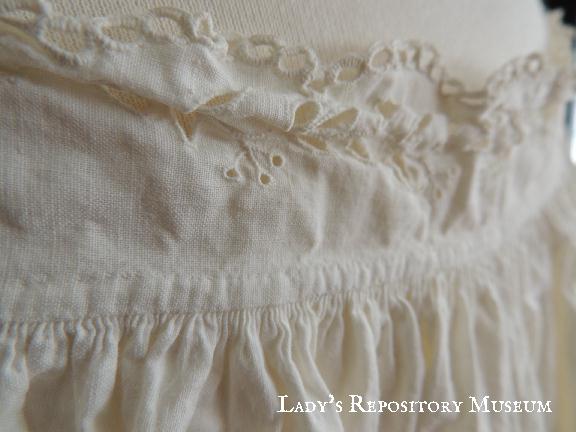
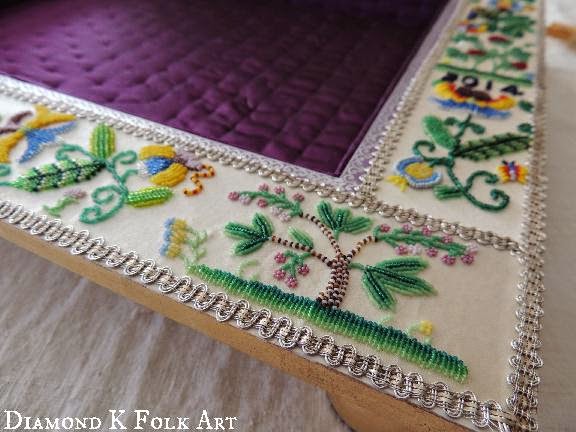
So been working on my casket and spent a bit of time trying to decide what pearls to use for my initials...I have some pretty small, about 1.5mm seed pearls....and then I have some ridiculously tiny ones that are supposed to be 1mm...but I think they're more like half a mm....anyway, the top picture is my doodle of how the larger ones looked...which wasn't too bad, but up the the smaller ones (bottom foot of the R), they looked huge and clunky!
 Of coarse,  I decided I liked the little ones...really? I have to like the little ones? I cant even see the damn hole in these things!
 Need I even mention, the holes are so small, not even my smallest needle would pass thru them? 'Bring it on'  I say to myself...Ill just have to thread each one on by hand, no needle. So me being me, challenged myself to whip these little buggers into submission. I know how I would like my casket to look when I get it finished~ and the big clunky pearls just werent there in that picture in my mind. Would you go with the big pearls just because they were quicker and easier?? If so....why? Stitching is not a race. Its not a competition...well, unless you are specifically stitching a piece for a competition....but otherwise....why take the easy quick road? Why stitch the same thing over and over again??? Try something new!  Challenge yourself the next time you find you are at a fork in your stitching road....the path less traveled may have more challenges for you, but in those challenges are more rewards
It took me over 4 hours to get these little whatnots on here, but here they are to stay. I have marked my territory. I haven't done 90% of the techniques I'm planing for my casket before...but thats not bothering me any...it should be fun and interesting and frustrating too....but as most of ya'll know my favorite thing to say is..... Just do it!  When you are at that fork in the road...don't stand there puzzling....Just do it!
Take your time! Take Joy in your process!

Monday, May 16, 2016

Museum Monday!

1830-50 Lady's Chemise, 111.2000.42
 Today's Museum Monday lucky number is 111!  I love this piece....which I will probably say on all my Museum Monday posts...because, hello, every piece I have is special for some reason or another...but this one, while from afar it looks just like another plain boring white chemise...up close, its marvelous.  This chemise came with a hand written note attached that reads "S. A.  Dockums, her work". From outward appearance, it looks to date c1850 to 1860s, actually very similar in cut to this one at the Met Museum..tho theirs is of coarse presented on a better form than mine. Family provenance dates this piece to the 1830's, and we all know how horribly mixed up family provenances can be....but upon inspecting the details, I really do think it is that early....so lets look at all those great details!
 First let me report that their is not a single raw edge on this piece, anywhere.  It has been entirely hand stitched with extremely even, tiny stitches,~ very skillfully executed.   The entire chemise is constructed of just 5 pieces of cotton.  The top yoke that has been embroidered by hand, 2  embroidered single piece sleeves, and two body panels, (which I refer to as skirting).   The yoke is embroidered with cutwork the entire way around, with center front 3 button closure. (Center button is missing)
 Here you can see that the design of the embroidery incorporated the center button to be the center of the cutwork flower when closed. The tiny gathers of the skirting panels up into the yoke can also be appreciated here
 The front placket has a particularly long opening, which may indicate that this was used for nursing.
 The yoke is shaped into wonderful points over the shoulders
 Very tight fitting short cap sleeves~ see how they are shaped full at the bottom, but gathered up at the top? This is a very common practice to tie up childrens dress sleeves(both boys and girls)  in the 1850s to get this shape~ they just threaded a ribbon thru the shoulder and top of the sleeve and tied them up.  Looking at the top of the sleeve, one would definitely think 1850 decade for a date.
 Its the shape of the bottom of the sleeves that is what is exciting, and dare I say innovating for this seamstress at that time. The sleeve has been cut as one piece, but has the added width and shape of a stitched gusset at the bottom. The shape, but no extra seams! High fashion in the 1830s for huge gigot sleeves made wearing sleeve puffs or ruffles mandatory~ you just couldn't get the pouff without them. These were tied on over the sleeve of the chemise, so there was literally no room for added bulk in the sleeve area~ combined with the high set of the sleeve on the bodice, I would expect the underarm gusset seams to be quite uncomfortable after a few hours of wear. Cutting the sleeves as one like this, with the gusset, would still allow the extra room for moving ones arm, but eliminate some chaffing and bulk

  The pretty shaped yoke & sleeves would have been embroidered first, before cutting the pieces out for construction.
 The two body or skirting panels are seamed with french seams up each side. All are gathered up evenly into the yoke, all the way around.
I left this picture large, so you can appreciate the expertly placed stitches~ this is a view of the inside of one of the side seams, at the hem.

I hope you enjoyed this Museum Monday. Feel free to pick a number and leave in the comments below for a chance to be chosen for next weeks Museum Monday!

Thursday, May 12, 2016

Pick A Number!

Snoopy Sundays....Picky Peeks......Number Nibbles????
 I feel so bad that I get busy and dont get the time to post regularly about pieces in my collection~ so I came up with a little something new~ I think ya'll will enjoy it and it could really be fun! The point is to share something new from the collection each weekend~ may be just a little nibble, like the picture above....or it could be a big post....dont know! The fun part is that I wont have any say in what gets picked~ you do!  So pick a number between 1 and 922....why 922??? This is how many pieces that I have catalogued so far...so pick a number and post it in the comments, and I will put those in a hat, and have Pip draw one out, and that will be the post for that weekend. I am really looking forward to this actually, it will force me to photograph things I havent yet...and give me a really great excuse to make time for sharing the textiles with  everyone!
 
  Since I just pulled this guy from the freezer, Ill start with him~ no. 918~(918.2016.41). This is a closeup of the top of a boy's brown wool hat, c1865-70. Patent leather edging, with silk covered buttons, cord and chenille trim.  If you are wondering why it was hanging out in the freezer, it was to kill any stray wee beasties!  I am very careful to not introduce any bugs into my storage, so when I get something new, its get s a thorough check for insects, eggs, seeds....bug carcasses.....anything living that would want to feast on the fibers.  Hats are particularly hard to check, because there are so many nooks and crannies, and in this instance, so much area on the inside one cannot get into to see...so they go into the freezer for at least 2 weeks. Wools in particular are so very fragile and susceptible to moth damage, one can never be too careful!

 So please leave me a comment for a number~ you can post up to three numbers!!

Saturday, May 07, 2016

My Happy Mother's Day

Happy Mother's Day!
 Firstly, I want to wish my own Mom a Happy Mother's Day! Thank you for being my Mom! XOXOXOX
 And as for me....What better Mother's Day present is there than your son being inducted into the National Honor Society? Am so proud of my lil Joshie....but I suppose, since hes over 6' tall now, I should probably start calling him Josh....It was fun looking thru the membership book after his ceremony to find his big sisters name there.....no pressure for his two other sisters or anything......
  I have been tidying up a few loos ends here and there....I have kept this piece of maple for years now, waiting for just the right something....I only had the one piece, so resawed it to stretch it out a bit further...and look at this, a travel case made and still bits left over! Awesome!!
  Bath Arbor Ladye must travel across the pond in style with a case made just for her!
 We had a blizzard last day of April and the power went out so I spent the day working on my Rug, I got all his planks finished and now just have the border left.
 Am also full steam ahead on my flat top casket panels~ I had debated on weather or not to do them one at a time, but because of what Ill be using for the embroidery I wanted to work them all at once....so made me some scrap frames and stands and here they all are, standing tall like soldiers awaiting their orders!
 Since I won the flat top casket in the Thistle Threads Beaded Basket contest, I thought it only fitting that it needs to be embroidered in beads....I have been hoarding and saving and have over 200 different colors of antique micro beads....of coarse, the first thing I went to work on, couldn't find the right color! LOL  I really do want to see how close I can stick to my "beads only" rule....but I am sure there will be other materials interspersed. I am using tiny micro beads, so any technique you can think of in stumpwork with silks....I am going to try in beads~ should be pretty interesting!
 It was kind of  hard to choose my designs...well, I have a million designs in my head, what was hard was choosing what designs would go on the flat top, and what ones would go on my double casket.... I decided the flat top will have all of my favorite things on it....unicorns, mermaid, angels, snails, animals and roses roses roses everywhere! I should be able to get quite a  bit of detail with the beads Im using, all are 30 or more beads per inch....the weensie teensie ones!

 I hope ya'll have a wonderful weekend & make some time to do something that makes you happy!