Unpicking a c1760 Brocaded Silk & Pekin......
Anyone how has studied or admired antique clothing knows that very few survive to this current day in their 'original' form. Prior to the early 19th c, textiles were highly prized. A single loom width of Indian muslin could take 4 men weaving 12 hours a day up to 9 MONTHS to weave....and silk brocades even longer. Precious metals were woven into the fabric, so literally, a fabric
could be, and often
was, worth its weight in gold. Garments were made up and then unpicked when fashions changed and updated to the latest styles. Many many wonderful 18th Century gowns were 'remade' during the Centennial years and for late 19th c dress up parties, and others, well they were just cut up for whatever reason.
A few years ago now, I purchased a 'spread' from a dealer on eBay, sight unseen. It was a 'silk spread pieced of lengths of 18th silks and metal laces'~ she had unpicked one side of lace and sold it before I found it and noticed the spread in the background of her auction. It was made up of the large central area in the photo above, bordered on all 4 sides by a different stripe silk in similar but unmatching colors, and edged with lace.
Each spring I repack the textiles, and this being such a huge thing, it is really a pain to fold and pad. I have not had the time to really study it until now, and am happy to share with you its marvelous details. Textiles can talk, if you know how to speak their language.
This silk is a wonderful shade of pink, between watermelon and cantaloupe, with woven pekin stripe and brocaded with silk and metal threads. Some folks think these are hand embroidered, but they are not~ the flowers & center stripes are brocaded with real silver metal flat plate, while the small climbing vine is brocaded with a twisted filament silk, and the large floral bouquets are worked with flat filament silk
The overall effect is bright and feminine, not too busy and with a pretty hint of sparkle from the silver threads. This absolutely just twinkles when its moved in the light.
Taking a look at the back of the silk quickly answers the question of weather or not it was hand embroidered~ and if it is a true brocade and not a later jacquard. The silks are not carried along the width of the backing with a brocade as they would be on a jacquard. The silks run horizontally, and are not carried over from one motif to the next, saving aLOT of precious thread.
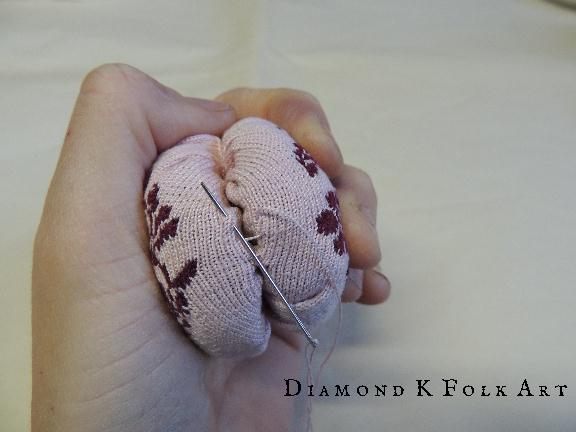
Please do click on the picture and enlarge it. Look carefully at the right hand side, which is a salvage edge~ do you see the tiny pinpricks???? These are what I first noticed, being up the center of the spread, they caught my eye...This was no simple spread made from some furnishing fabric...this was once a beautiful gown, the pin pricks evidence of where trim was once attached.
Close inspection of the back showed original backstitch in matching silk thread where lengths were joined salvage to salvage
Pretty stitches.....
NASTY stitches. And yet I also found hideous machine stitching in.....gasp....polyester thread~BLEK. Personally, I find it insulting to all the hours and hours of hand work that went in to weaving this fabric to have machine stitching marring its surface. I spent a few hours carefully unpicking the tight poly machine seams....and when finished, had 4 pieces~ 2 of which are shaped as shown below
These are long lengths, nearly 6 feet.
To any of you who sew, do they look familiar???
This photo is of a 1765 Robe a la Francais at the Musee de la Mode et du Costume in Paris. Some of you may also be familiar with this type pf dress being called a 'sack or saque back' This too is made of Brocaded silk & pekin. Stripes were very en vogue at this time
This photo is a sketch of the fabric used in a c1770 Robe a la Francais in the Snowshill collection~ on page 34 of Janet Arnolds Patterns of Fashion Vol 1 if you have it.
Do enlarge this page so you may admire the kind of dress that this fabric most likely once made up~ note the shape of the back of the gown to the right in the cutting diagram~ the back of these gowns, from neck to hem is cut in one piece~ same shape as my two pieces. Thrilling to discover!
No longer must I pad and fold, and pad and fold for storage. The lengths can now easily be rolled, which is how I prefer to store all of my flat textiles, quilts included. I have layered each piece on acid free tissue, and covered an old wrapping paper tube with buffered acid free tissue as well.
I cut the tube to the width of my largest piece, cover it, then carefully, and loosely roll it. Once rolled, I tie it closed with cotton string. Having the tissue between each piece protects them from the metal threads scratching and catching/cutting the filament silks
All comfy and cozy on their new roll, ready for quick retrieval for study & inspection.